For my Sony SA I created a simple yet very useful vertical stand. The idea is that when the laptop is at a desk with an external monitor/keyboard/mouse that it can run quiet and cool while not taking up a large amount of desk space. There are a few commercial manufacturers but they are very pricey and made only for macbook pros.
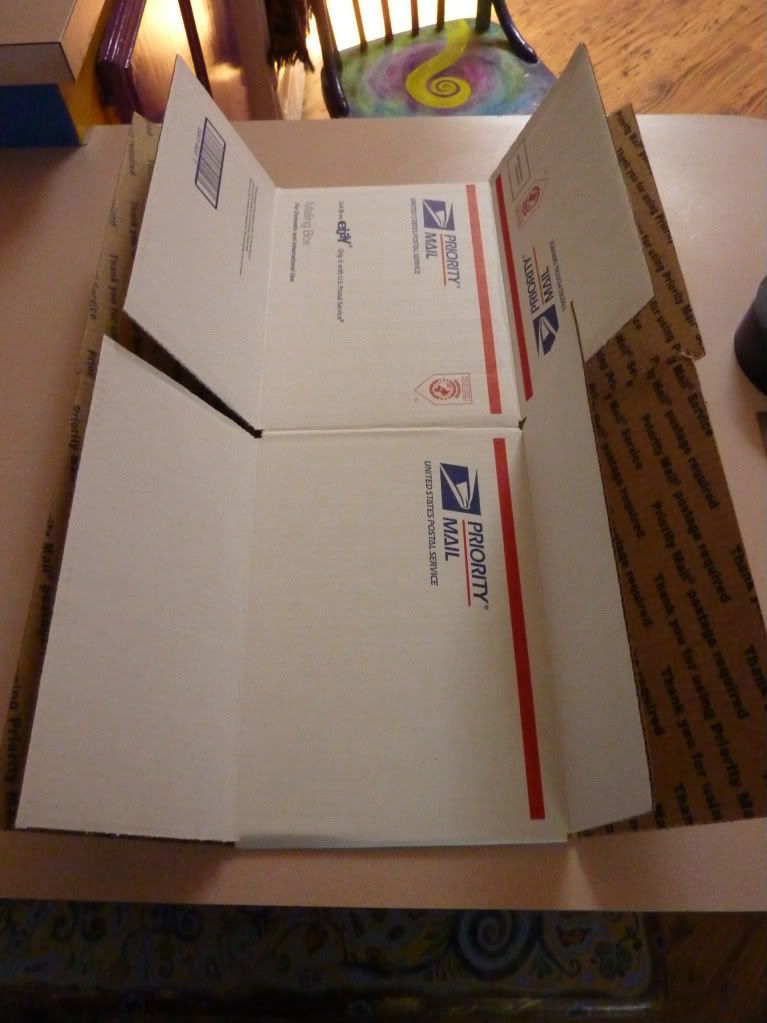
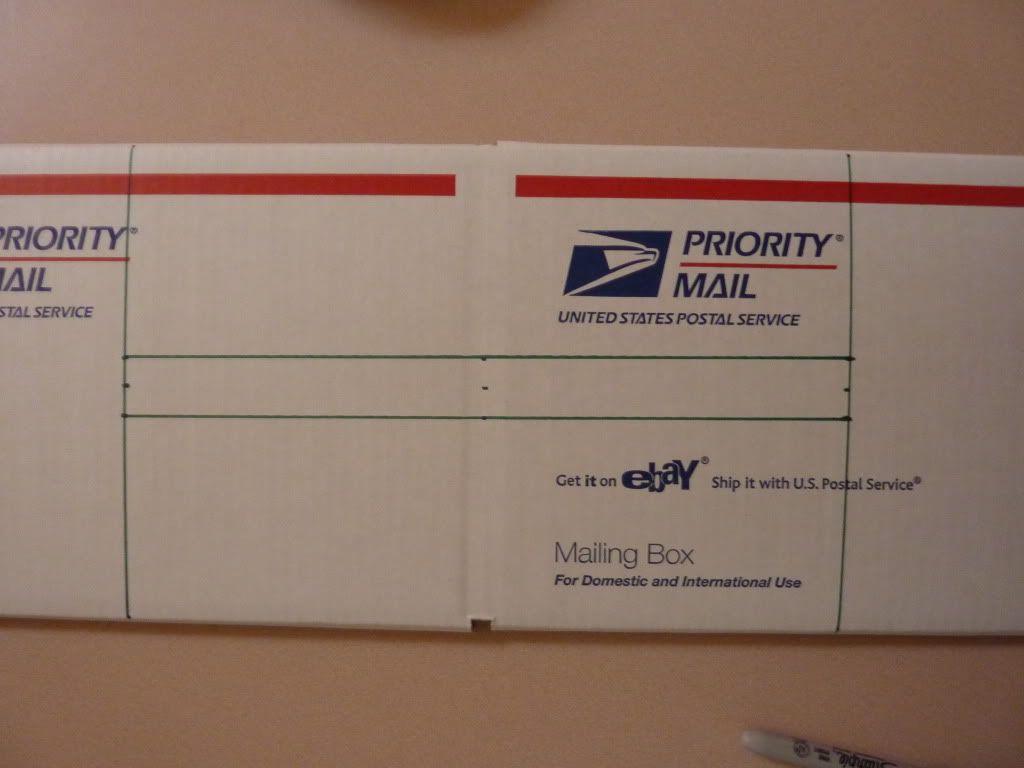
This can be done with any flat pack square corrugated cardboard box. I am using a large flat rate box.
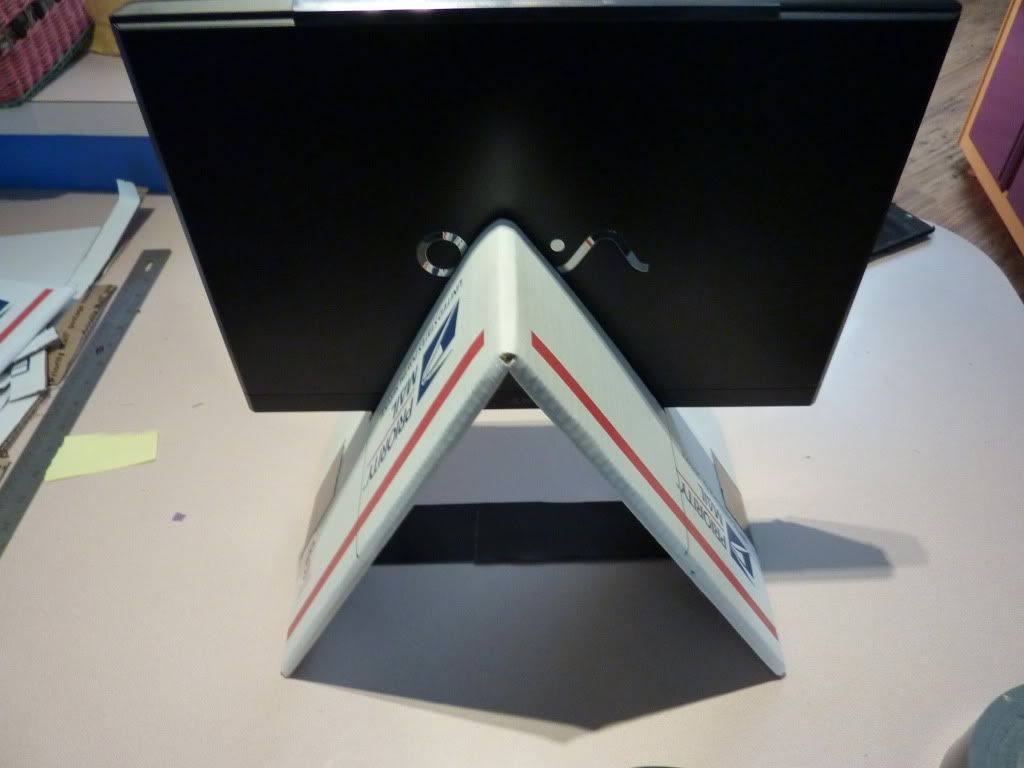
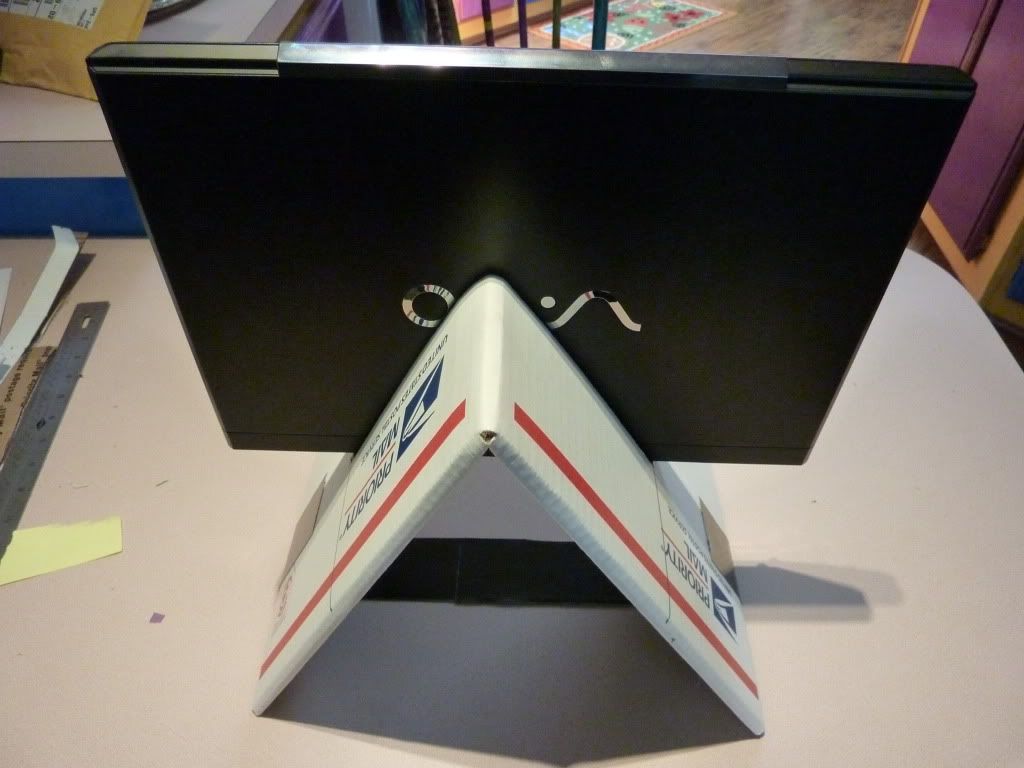
This is the final result. It is very sturdy and does not push over easily. All the vents are exposed and the laptop is well protected. All ports and switches around the edge are accessible as well.

So to start, you need a square flat pack box preferably new for added rigidity -- a box knife or equivalent -- a ruler -- and tape ( I use gorilla tape here, but duct tape should work just as well.
Before you start you need to know the thickness of your laptop. For mine it is ~1. Add an 1/8th more so the laptop slips in to the stand easily.
First you need to fold the box down -- as shown below. It might take a bit of strength to get the edges looking good.

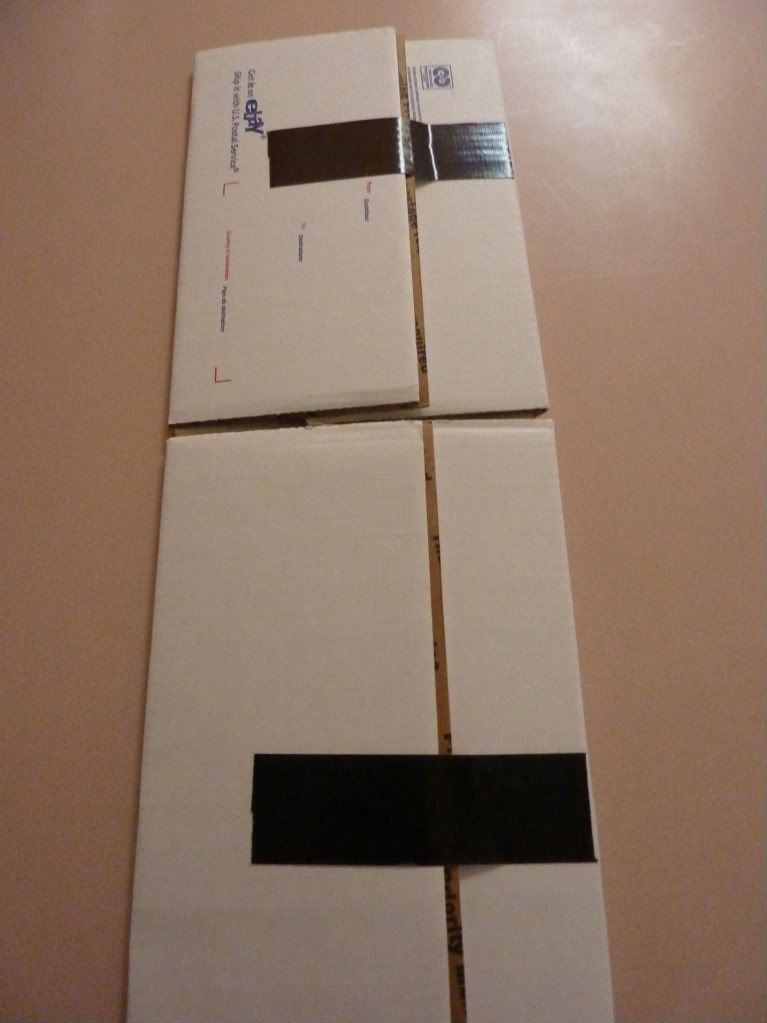
Use two pieces of tape (Or more depending on how you want it )

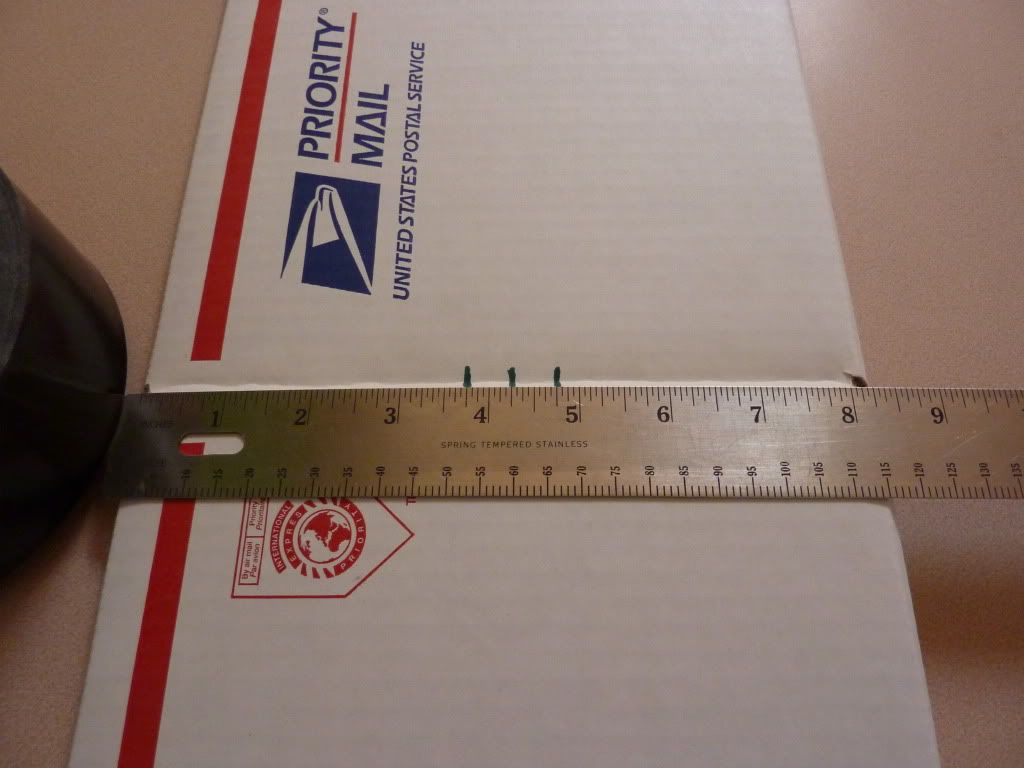
Now you need to mark out where you will be cutting the slot. Measure out and find the center of the width. ( For a large flat rate box it is 4 ¼ ) You then need to mark out the two sides of the slot you need for you laptop ( make a mark half the thickness of your laptop on either side )

Move 6 down the box on either end and do the same. ( Take a look at the photo )

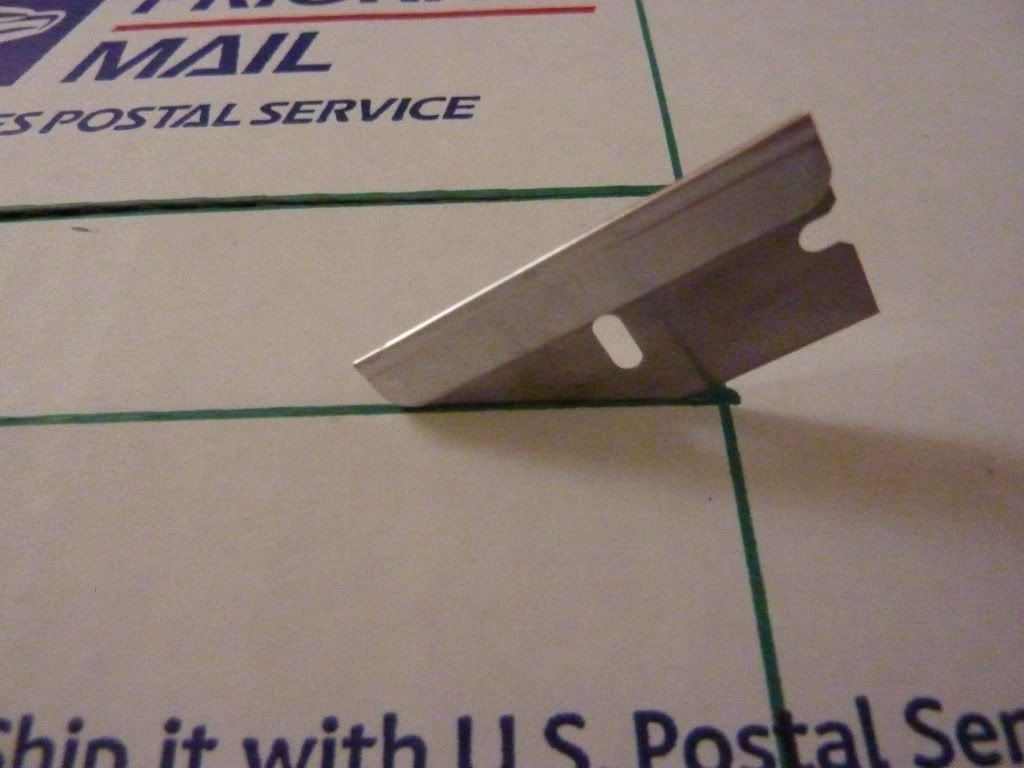
Once you have the slot measured out you need to cut through the cardboard. I used a straight edge razor but any sharp knife should do the trick. You have to be patient as you have to cut through 6 or more layers of cardboard here.

Try to keep your cuts accurate and in line with your markings as it helps keep everything looking good. Go layer by layer, and cut off each layer at the end when you are done.

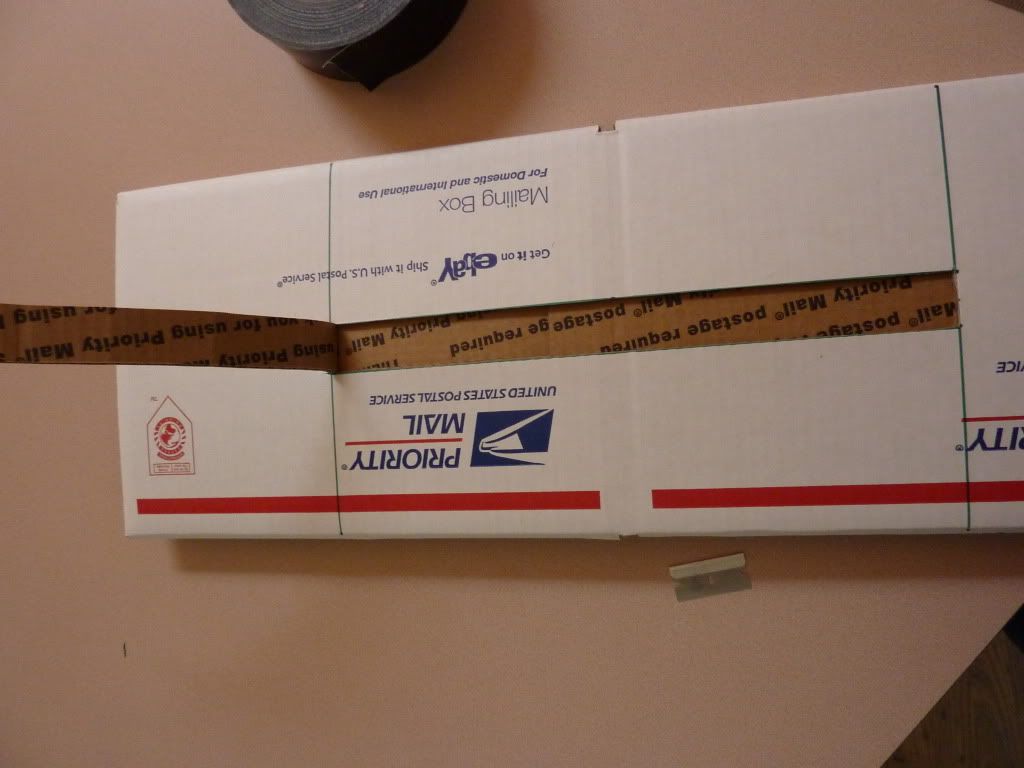
When you are done cleaning up your cuts you need to tape down the back flaps and the hinge area where the stand will bend. ( This step can be done before you start cutting also, I had forgotten the order when I made this stand. )

You then need to fold the stand to an angle that you choose and run one strip of tape along the bottom from side to side to hold it in shape. The side facing up will be the sticky side. To remedy this I run another piece of tape on the inside of the stand to cover the upwards facing tape.
Once you are done with that, you are ready to attach the laptop!

This design could be manipulated to work with other materials but I dont have the time to test them out.
Even though it is a DIY project it is very functional and is an excellent stand. I would love to hear back from anyone that does build this.
I hope this is helpful!
-
nice. very nice diy stand!
lol. my laptop is currently resting on a usps medium flat rate box this very minute. -
Nice job OP..
") Very well constructed & good write up/pic's
Very well constructed & good write up/pic's
-
hmm this is nice..
i'm cooking up another DIY stand following this.. i want the lid to be open to increase air contact area and i'm thinking of using Polystyrene as a base and a plate of cardboard/plastic/metal to hold the laptop up since i don't want to force the lid... so i seeing an " L " kind of shape, like an open laptop which is ironic... -
Very good job + rep.
How heavy laptop can it handle? -
in my opinion anything <5kg is rather fine as long as you do it right xD
that V shape works as a perfect anchor... -
This laptop stand could be useful to have on the go instead of lugging a big cooler, but I guess my computer is too heavy for it.
-
I'll do a few tests with weight, but I doubt I could break it if I tried. It is extremely strong because of the many layers of cardboard...
-
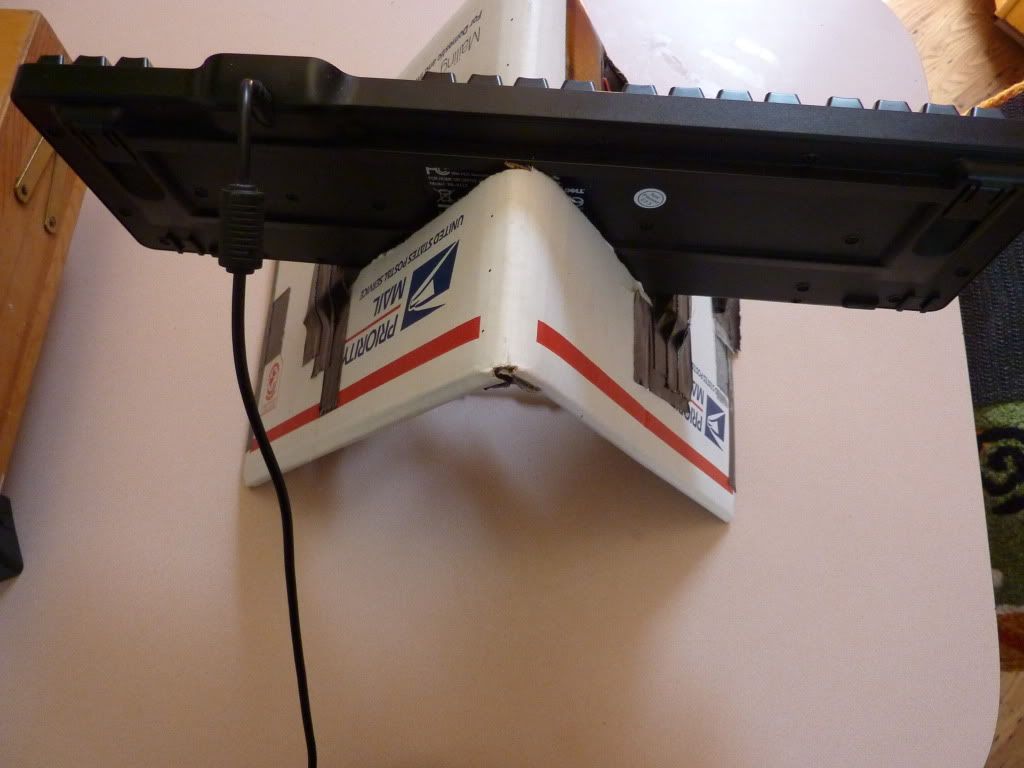
So...in my unconventional test I took an identical stand I made earlier...put an old keyboard in it, and pushed down with about 15kg of weight....it didn't break or buckle!

To measure I had the stand on an accurate postal scale, so I'm in no doubt of the results.
As long as you build it steady and strong in the first place I think it should hold pretty much any laptop you can throw at it.
The only downside to an oversize laptop would be the stand becomes somewhat top heavy. To combat this I would suggest to cut the large strip not six inches from center on either end, but 8 or so. That should lower the center of gravity and produce a more stable stand for a large form laptop. -
Tried to picture this..but I don't quite understand. Any chance of a quick sketch?
Vertical Laptop Stand! -- Easy and Cheap!
Discussion in 'Accessories' started by lazybee, Jul 22, 2011.