
Thanks i think i will save this as a document because right now i dont have the courage to take it apart , it has less than a year and im going very slow with my changes so i dont damage it and i just dont wanna take apart now , i thought it was just a configuration, thanks for the help when i have more money ( because im afraid to destroy it ) i will do it.
-
-
If you want to I could fix it up for u in a day and ship it back like say u ship it and in the box include a return label and I won't charge you a dime to dial in the cooling to the max brother lol then again you would have to trust me per say. Say it takes a couple days or something to ship to me it will take me like an hour or two to fix it up perfect for you so it will never fail on you ever and will run cool as hell. It's up to you I'm a very trust worthy honest person only looking to help others and make others happy I would never ever do anyone wrong.
@capitankasar
I modded the vga bios for the 7150m in nibitor and here's the .rom file =) I'm going to attempt myself to re-integrate...
Stock 2d voltage is 1.1v, throttle and 3d are 1.2v
Modded 2d voltage is 0.95v, throttle voltage is 1.1v, and 3d voltage is 1.25v
Do you think from 1.1v to 0.95v at idle and only 100Mhz would cause an issue? Idle temps is 55C and under load in 3d it's 65C. I'd like to reduce the 2d idle temps to 35-40C if possible it's only a 150mv reduction. As for the 3d a 50mv increase for 3d is alot considering a 20mv increase on the gt540m resulted in a 100Mhz stable overclock over 0.980v but it's different architecture so i doubt they will relate.
http://www.mediafire.com/?803a7p5tuv3cacc -
Again thanks a lot for your help , theres a small problem , the laptop is a gift from my father and well if i say to him that im shiping my laptop to someone that he doesnt know , to mod it ( even if it was just to see how pretty and shiny this laptop is ) he would be pretty pissed and im only 16 so hes the one in charge , im gonna talk to him but if he doesnt like the idea he might take back the gift :cry:
Thanks for all your help but i imagine his response will be no . -
@DSKEAARSR 2013
That's cool no worries =)
@capitankasar
Okay so i used phoenix tool to dump the bios did a search for nvidia found the vga bios in OPROM1.ROM which is the same as the gpu-z dump file. I edited it and it's exactly the same size as the original.
I am now trying to get a .rw file so working on creating one. Since the chipset driver corrupts the registry on windows 7 since it's a vista driver, gotta re-install or backup from my windows backup image and then I can open rweverything app to save the .rw file and then hopefully recompile or reintegrate which is a learning process for me lol but it's not very difficult at all after all. I just don't know how to edit the hex for voltage like on the gt540m, this 7150m is way easier. -
@chris89
yeah, the voltage settings were easier at the 7150m, however you stil need to hex mod it for other values than the ones nbitor let you to mod.
the question is allways the same, even if you put over 9000 volts, the real voltage will probably not that, so it would be nice to know what is the real hardware limit, the range of voltages I mean.
also throtle and 3d were the same value before while editing the bios, so I would also keep it at the same, for example 1.25v
well about the OPROM1.ROM, yeah, that is the gpu bios file, and I also sucesfully modded it, the problem is that I am unable to reintegrate it using the tools I use.
it give size error, even the size is exactly the same as the previous one, so idk what is happening with that bios.
that seems interesting, it seems I am not the only one doing some hardware mods to the laptop after all
do you have pictures of the process/final mod?
I'm curius
-
I'm back with some mixed results.
First of all both bios files requested by me work and can be flashed without any issue. Thank you!
Instead of going straight into OC and how well/bad they performed I decided to load test first on different bios and monitor temp and voltage with the exact same OC 750/960.
This are my results:
v4 @ 0.83 = 84°C
v4 @ 0.85 = 80°C
v5 @ 0.80 = 84°C (monitor shows 0.83 fed to gpu)
v5 @ 0.83 = 84°C
v5 @ 0.87 = 93°C (monitor shows 0.95 fed to gpu)
v5 @ 0.90 = 93°C (monitor shows 0.95 fed to gpu)
(ambient temperature steady at 17 all the way, and the fan seemed to be running at the same speed on all scenarios)
As you can see, the second is a very weird result, and was the one I've been using so far. I double checked each result a couple of times minimum.
I can't draw much conclusions except the obvious: .87 and .90 are been override to .95 and .80 is been override to .83.
However, what is going on with v4 0.85? I have no clue. Maybe the sensor is lying and the actual temp is higher. The problem is that I don't have thermometer to properly check nor want to run all this with the laptop in pieces.
So, a couple of things would be nice:
1) i would like to test the following bios:
Bios version: A12-latest (v5?)
GPU: gt525m
desired 2d voltage: 0.83v
desired 3d voltage: 0.85v
2) It would be great to see if someone can reproduce some of these results or is just my machine been weird.
The tool used to load test were MSI kombustor and gpuz to keep track of sensors.
If i find out something else, I will let you know. -
@crapula
thanks for the feedback
added you to the first post and also uploaded your last request ^^
well, your v4 / 0.85v results looks nice
anyway its curius you get lower temps than while using the 0.83v, are you completly sure about those readings?
in my case after several testings, my favorite one is the A12 525m v5 0.85v/0.85v, it is the most stable in my case, temps are also cool
I preffer it over the 0.83v/0.85v cause that one caused some crashes while alttabing (fast switching betwen 2d/3d profiles, thats why I am happy with the 0.85/0.85), the voltage is allways the same, 0.85v
it is also the one I am using at the moment ^^ -
I just tore down my L502X to clean the fan dust out, and repasted with artic ceramic 2. Overclocked 525m fell to 65 degrees c from 95 degrees c. i7 2630qm saw similar results!
-
That's awesome man! Did u do everything I described?
-
They said the voltage table editor doesn't have anything beyond 1.2v in it so couldn't we just add the hex code bits to allow for it in the hex code? I don't think it's necessary to mod the hardware. Someone said I could mod the dac chip but I need a 7150m schematic...
-
I ended up doing everything besides pulling the blue pin from the fan
(I couldn't find it, there was only black/yellow/red IIRC)
So far my fan noise is MUCH quieter and doesn't start and stop like it used to (quite annoying actually) It is much more consistent and now gradually increases/decreases in speed.
Minimum CPU temp: 50 degrees C
Maximum CPU temp: 88 degrees C
(525 on 83/90v overclocked to 700/1400, stock is 600/1200)
Minimum GPU temp: 44 degrees C
Maximum GPU temp: 77 degrees C
Sadly during the process I stripped one of the 3 screws from the DVD bay area, so I broke the thin plastic bridge to get around it. I only did this because I have no warranty, and this really thin bridge didn't have any structural significance. It gets completely hidden by the DVD drive anyway.
Next on my list is to install the caddy for a second HDD. My SSD is quite small so that'd be nice. The caddy installation is REALLY simple right? -
@capitankasar
I'm totally positive about the readings, what I don't know is if the sensor is reporting an accurate temperature or not.
Tested the v5 0.83/0.85 and I'm getting the same temps (80°C) as in v4.
I couldn't find v5 0.85/0.85 in the first post though, is it there? -
@crapula
well, then it seems 0.85v is definitly nice for the 525m
oh, my bad about that, I totally forgot to upload it since no one asked for it, I just made it and was using to myself since that is my favorite version.
sorry about that ^^
I just uploaded it now
you should find it now at the first post
like I said, this version works really good for me, give it a try
-
@capitankasar
Can you try more than 1v on my gt540m? Maybe 1.05v or something?
I used the phoenixdell tool to extract the original bios to the dump folder, then I modified the oprom1.rom with my 0.95v 2d voltage from 1.1v 2d and changed the 3d to 1.25v and put the new modded .rom file in the dump then I clicked go and created the new bios file. I then opened the new bios file with pheonixmod after deleting the old dump folder. It created a new dump folder, checked the oprom1.rom and it had no changes.
I guess I just don't know exactly how to re-integrate. I was also curious if the certificate is required. Because I don't want to brick my system. Do you think the 0.95v is too low from 1.1v? it idles at just 100Mhz so 0.95v should be sufficient at least in my mind.
Here's all my files and my dump and phoenixdell tool and my original vga bios and my modded vga bios and I put the modded vga bios in the dump. When I use SSV2 method I get an error BIOSCOD4.rom is 2 bytes too big and I never even touched that file... It's happy with the vga bios.rom file since it's exactly the same size as the original.
http://www.mediafire.com/?9lrysx2lea4rqq7
Thanks
@overvu
If you don't have a blue then that's weird first of all but it's old school for some reason. Just pull the yellow pin then and it should roll at full speed, but some systems freak out when there's no fan detection so if it says warning when booting up just press enter and boot to windows this is normal just gotta press enter every time u boot or it will shut down. While you have it apart just do the below mods and you should be sitting in the 60-65C range in game and on the cpu core #1 on my 2720QM hits 79C max on intelburntest at 3Ghz then it throttles back to 2.6Ghz and core #1 is like 70C or so. I wish it wouldn't throttle back at only 79C... I'd let it rip it up to 85C if it could maintain 3Ghz lol because performance is huge at 3Ghz lol but in-game it maintains 3Ghz since load isn't as high as intelburntest.
Yeah that's funny my gpu hits only 60-65C at 800Mhz with zero artifacts and insane stability at 1v. First buy a tube of arctic silver ceramique 2 25g tube for $7.48 shipped on ebay, then pick up a soldering iron. We are going to use the soldering iron to remove the plastic by the fan so it can suck in fresh free restriction free air. Remove the motherboard from the laptop case and look at where the fan sucks in from. Then carefully make a circle in the plastic with the soldering iron and keep doing that until u cut the whole plastic piece out. Then remove the heatsink from the cpu/gpu be very careful since the heatpipes are hella sensitive to adjustments and this will screw up ur temps so be careful not to bend it at all! Clean the heatsink on the cpu and gpu with 90% alcohol and a cloth, then do the same to the cpu and gpu cores. Then apply a tiny dot of ceramique 2 on the cpu and gpu and spread it evenly across the whole chip and make sure it's very thin layer. Now let's mod your fan, there is I think 4 pins on the fan connector use a safetly pin or something tiny and sharp to pry the "blue" pin out of the connector and wrap with tape. Take a look at the heatsink when installing and make sure it's 100% flat on the cpu and gpu any none-flatness will cause ur temps to skyrocket. If you need to bend it until it sits flat so you can't teeter totter the heatsink back and fourth on the cpu/gpu. Make sure its flat and stable. Then re-install the heatsink on the cpu/gpu and use your pointer finger to press slowly wiping across the heatpipe directly on top of the cpu/gpu core to make sure the paste spreads best and plug the fan in, then put the laptop back together. Now enjoy temps in the 60-65C range under full load lol and I'm running 1V at 800Mhz and I get 65C in game for hours. -
@chris89
well, I can mod the 540m gpu voltage values to get 1.05v or even 1.1v, the question if is the voltage would be truly that, or the monitoring software will lie.
are we talking about the 540m from the L502X? or the one from the other bios machine I modded for you? (I dont remember what was the machine ^^)
well, if you phoenix modded the file and it didnt asked to replace it, then it doesnt reoplaced it at all.
to use properly the phoenix tool.
1 - open phoenix tool, and open the bios file
2 - then select the machine manufacturer
3 - then go to the advanced options, a warning message will popup, click on yes
4 - under preserve module size, you will have to tick all the first six options, tock from "ask, prior to each modification" to "no SLIC", then click on done
5 - copy the files you want to mod to another folder, and mod then.
6 - when you are ready, click on "GO"
7 - a new message will pop up asking you can make manual alterations to modules at the dump folder (dont click OK yet!)
8 - now copy the modules you modded to the DUMP folder, and overwrite the original ones.
9 - when you are done, click at the OK button of the phoenix tool popup
10 - if you did it properly, phoenix tool will ask you to reintegrate the modules you replaced, click on yes.
11 - if everything went fine, you will get your modded bios with the following name %biosname%_SLIC
however, like I said, for some reason , it doesnt let me mod your second machine, even the modded vbios is exactly the same size, it ask it is bigger for some reason (phoenix slic tool bug maybe?)
about the hardware mods, what machine did you modded?
do you have pictures of the process?
or at least pictures of the final looking of the mod? -
Hi, following up on my post from a few days ago, I still experienced 2 crashes but only in one game. I underclocked by about 10mhz for that game only and no crashes since. All other games are fine.
Thanks for your continued effort on this project.
-
Hi everyone , im back and pretty happy with the overclocking results , currently running 812/1010/1624 on 0.95V , i only need to mod my fan and i think i will be able to get even better OC before overvolting , temperatures are doing not bad but its not what i would call cold , even for a laptop ( under load the temperature is 87C , after some tim it starts to climb all the way to 92C , still runs very well on this temperature but the cpu clocks down ( framerate loss ) , i will see what i can do about that.
@chris89
Thanks for the help , and just like i told you the awnser was no ( about shipping it ) but he may think about doing the fan mod himself ( he is very experienced with hardware , so either way i still get a ice xps ) , but hes only gonna do it after the warranty expires ( march ) , well im happy with what i have now , but imagine if we all get like imense power out of our machines , its going to be as good as some gaming laptops that you cant OC and its gonna be cheaper ( not if we fry it
, but thats probably not gonna happen with all the great people around always giving support ).
-
This is a bit late but,
Well, I'm using a 2720QM, however there technically shouldn't be any differences between the two chips (just different clocks). They even have the same amount of cache. Are you actually using an L502X, because the motherboard may not sufficiently support the OC'ing. If you do, you can try to manually set the memory speed in the custom BIOS from this thread, and see if that works.
Also, I used CPU-Z to check my memory clocks, however Speccy also reports the correct clocks. Try one of those programs to see if they're still giving you 800 MHz.
Ahhh dammit, the EXACT same thing happened to me. Heck I think I even posted about this before somewhere else.
![[IMG]](images/storyImages/m75XA.jpg)
It was THAT ONE.
However, unlike you, I'm waaaay too protective over the things I value, so I put the whole thing back together and didn't solve the problem for over half a year (I did get it out recently, and managed to repaste my laptop). It wasn't a complete waste though, I was also changing my hard drive at the time, so yeah. Silly screws. I realized that I was using bad screw drivers; even though the screws are small, try not to use "precision screwdrivers", instead, get a big one with adjustable screwdriver heads, and use a small screwdriver head. It works a lot better, and I could screw everything together a lot tighter the second time around. -
what kind of screwdrivers do you use guys?
I use those
![[IMG]](images/storyImages/dsc0109et.jpg)
never had screws issues with my L502X, and I took it appart several times to mod it. -
@overvu
The i7 2630qm memory controller supports only ddr-1066 and ddr3-1333 and won't handle anything beyond ddr3-1333. If you pick up a i7 2720qm it can support ddr3-1066, ddr3-1333, and ddr3-1600. Not even the i7 2920XM support DDR3-1600 so your out of luck. Anyway DDR3-1600 on a 2720QM will would perform like no other.
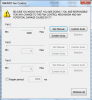
@ capitankasar
I wish I knew how to fix this error...
![[IMG]](images/storyImages/reintegratefailed_zps8dbda693.jpg)
Yeah if you can mod my ASUS k53sv bios again with 1.05V for 3d that would be awesome! Maybe you could make a 1.075v, and 1.088v version too. Since it's fermi architecture it can handle a maximum of 1.088v. Maybe I could get 900Mhz out of it lol
Here are the pics of some mods I did to the laptop...
![[IMG]](images/storyImages/1-12_zps2780bbc6.jpg)
![[IMG]](images/storyImages/k3fanheatsinkinstalled.jpg)
![[IMG]](images/storyImages/k53small2.jpg)
![[IMG]](images/storyImages/k53small1.jpg)
-
Hahaha I can't believe I'm not the only one ^^ The middle screw was already stripped slightly, it is refurbished after all.
But on the topic of RAM, I can't get mine to run @ 1866. However @chris89, it does run at 1600 MHz (CPU-Z) -
@chris89
I'm not sure I want to put a hole in the bottom of my laptop's chassis xD, but thanks for all the advice -
The difference is nothing short of getting throttled back hardcore without the hole OR Running wide open fast as a mother trucker continuously. You will find that the core i7 continously backs the clocks down until temps are within reason and it'll throttle you back down to even lower than your base clock just to run stable... Do we want that? Hell no. Without the hole your only getting a fraction of the potential HUGE power of the core i7 processor you realize. The Core i7 is a mother trucking powerhouse monster powerful cpu that puts out HUGE amounts of performance. It can ONLY do this if temps will allow it to do so. Without the hole and no fan mod your Really Only getting 50-55% of the maximum potential of the Processor. With the hole and no fan mod your getting 75% of the potential and with the hole and the fan mod you can rest assured you will be getting 100% of the cpu's power potential and you will notice your laptop will RUN WAY WAY FASTER.
-
@chris
well, that was the same error I was stuck at, the one I told you ^^ so I cant help you there so much.
nice pictures.
however, your cpu looks on another level, and making a hole at the case may not looks cute for the L502X
I removed several dustfilters from inside the machine and repasted, with the GPU undervolt, it also decreased the temps greatly
however I may am interested on modding the fan, I dont care about internal modding, but I just love the L502X case
I also made some tweaks to the system, since my system does not have turboboost, I disabled intelsteep, dinamic FSB, and C-states at the bios. that make the cpu to be allways on max power, I also unparked the cpu cores on windows, and I tweaked the max performance power setting for windows, and now it isnt doing that bad, even for being a crappy i3
well, here is your asus modded bios
K53SVAS_(1.08v).rar
It is 1.08v -
@capitankasar
Your error was for the OPROM1.Rom and not the BIOSCOD4.ROM so maybe you use my OPROM.ROM I modded since it's happy with it's filesize and maybe you can reintegrate.
http://www.mediafire.com/?d26d93j611w541l
About the voltage on the GT540m it didn't work and is still at 1v i think it's because it's not a valid voltage. Fermi voltage is as follows 0.825v, 0.838v, 0.850v, 0.863v, 0.875v, 0.888v, 0.900v, 0.913v, 0.925v, 0.938v, 0.950v, 0.963v, 0.975v, 0.988v, 1.000v, 1.013v, 1.025v, 1.038v, 1.050v, 1.063v, 1.088v.
I think it rounds up my idle voltage from it's actual value of 0.825v to 0.830v. Since I got 100Mhz out of just 20mv, I wonder what I could get out of 1.025v or 1.050v and so on. I wonder if 850Mhz is possible at 1.025 or 1.038 or 1.050 since temps will be getting very high at 1.050v not sure whatever you think. It just has to be a valid value for it to work.
Thanks -
Happened here too!
Except I damaged the thread of one of the screws, so it rotates and doesn't come out unless I use some sort of leverage. -
@ capitankasar
Holy Crap I got it working! Okay So what I did was I checked the "Ask prior to each modification". One of the modifications for slic was the BIOSCOD4.ROM and for some reason the SLIC modification adds an extra 2 bytes and causes the error. So I clicked no for the SLIC Integration on that file and it worked! How can I just reintegrate with no SLIC at all? Is there any benefit to having slic or just stock? I just don't wanna brick my rig because SLIC tore it a New A-Hole lol
It reintegrated Successfully but I may have spoke too soon gotta check to see if the OPROM1.ROM is modded...
Okay so it worked via SSV2 and I put in there no SLIC and it worked without an issue only thing is it didn't use my modded OPROM1.ROM so how do I get it to integrate? I heard I have to paste it somewhere during integration or something like that... -
i use your A12 advanced 80/83 and it works like charm. mine is 540m
i have a request for me. please help me
Model: DELL L502X
Bios Type: PHOENIX
Bios version: A12 (MODDED)
Bios Link: Download L502X_A12_generic_Unlocked_Menus_v4.rar from Sendspace.com - send big files the easy way
Old Card: NONE. MY LAPTOP DONT HAVE WWAN BASICALLY. NOW PURCHASED ERICSSION F5521GW TO BE ADDED
New card: ericsson F5521gw purchased externally and not from dell. dell oem driver installation says no compatible device found. cant get any other working driver after googling for hours together
if possible please remove the white-list check from my bios, thanks -
So with this step in mind I don't know how you reintegrated them into the bios replacing the files while PhoenixTool asked for it at the reassembly processor?
So I took the OPROM1.ROM modded it in Nibitor and it was exactly the same size as the original then I replaced it with the original in the dump folder. Since I get that error because SLIC21 modifies BIOSCOD4.ROM and adds the two extra bytes so that's why it fails it's SLIC21 which causes the error. Since I went to advanced and clicked ask prior to modification and said no on BIOSCOD4.ROM and it completed no problem. I then opened the newly created bios file after first deleting the old dump folder. I opened the OPROM1.ROM in Nibitor and it was the same as the original with no modification. So I don't know how I can force PheonixDell Tool to use my new modded file and not the original file....?
You didn't quite explain that step enough because there must further steps in that process because it doesn't replace anything or ask any questions it just completes successfully when I check "No SLIC" in advanced since SLIC21 is causing issues.
What's the actual real need and requirement for SLIC21? Just to show in my bios that the original OS is windows 7 and not windows vista? Does SLIC21 auto activate windows 7 or something?
Thanks buddy for all your help this is a learning process and sufficient amounts of information by you explaining steps in detail and your learning experiences when you first started the hex modding would be highly appreciated by myself. Since the guides are lacking in sufficient details and contain tons of gaps.
THANKS :hi2:
:thumbsup:

 :wink:
UPDATE - I actually got it! so I guess according to the hex bits when I changed the voltage too high it switch to 5A from a numbered value so I set the values I wanted to as high I as I could go before going with a 5A like value so the value was like say 69 or 73 rather 5A or whatever in Nibitor voltage table. Then this time I unchecked NO SLIC and only checked ask prior to modification and allow user to modify other modules. It asked a few things about SLIC modifying files then it told me to put the modded file in the dump. So I did and It completed successfully with SLIC21 and the modified vga bios file. So I suppose I'll test it now... Only got 1.21v out of 3d from 1.2v and got a reduction in 2d volts to 0.96v from 1.1v. I hope it works lol...
I did a little testing after successfully flashing the rom to my hp pavilion dv2615nr with the successful vga bios and successful SLIC21. My idle temps went from 55C at 1.1V at 100Mhz to 37C at 0.96V but I haven't tested my new 1.21v 3d from 1.2v so we will have to see once I get Windows 7 installed since I had xp on there to get the RW Everything file. I'm so damn happy I finally got it! Thanks capitankasar your help means a lot!
Did some more testing have windows 7 installed and it's working at 0.960v in 2d and 1.210v in 3d. Idle temps are actually at about 48C from 55C and load temps are the same and I can't get anymore overclock well maybe 10Mhz so I got 560Mhz out of it for Insane 2 on the laptop. I bet other games could handle 575Mhz because I could do 575Mhz at 1.2v on certain games.
Now I just need to figure out what minimum and maximum capable voltages are for the GeForce 7000 series well at least a list of what exact voltage it supports. Since I get bytes too big when the voltage isn't supported. I've only been able to get a minimum of 0.960v and a maximum of 1.21v so far but maybe I need to test every since voltage from about 10 steps down and 10 steps up. I'd like to reduce the 2d more and increase the 3d more... -
@chris89
are you using HWMONITOR to read voltages?
well, in your HP bios, it doesnt seems a specific issue with a file, it seems an especific BIOS Issue, I cant be able to reintegrate anything.
also, by manual hex editing, I only know to set those voltages ,I can do only one byte, so I cant do more decimals, just 1.xx
http://forum.notebookreview.com/del...ed-bioses-download-gpu-voltages-more-108.html
oh, wich checkbox did you removed to make it work?
I was allways clocking at the NO SLIC, but the error still there, maybe you did something different, can you take a screenshot of your phoenix tool settings?
and yeah, you have to replace the files when phoenix tool ask for it, not before. that is how I replaced the A062CF1F-8473-4AA3-8793-600BC4FFE9A8_1_192.rom file
well, the procedure I told you was the one I did
about the byte modding, I just modded the 3D voltage on the 540m card for you
since the 540m is inside the A062CF1F-8473-4AA3-8793-600BC4FFE9A8_1_192.rom file
I made it at the easy way, I made a copy of the original 540m file I sent you, and then I changed the voltage looking for this hex string
00 00 00 00 00 00 0F 00 62
then I replaced the 62 for any other value from the voltage table I posted before.
then I opened the modded file with nbitor and saved it with the same name so it fix the last byte checksum,
and when comparing the original and modded BIOS by hex edit (in HxD free hex editor, I opened both files, and hit ctrl + k, and hit f6 to see next difference)
as expected there must by only tho differences, the voltage byte and the last byte of the file (Checksum byte for nvidia)
when noted the bytes, you will have to open the A062CF1F-8473-4AA3-8793-600BC4FFE9A8_1_192.rom file like I said and look for the original non modded vbios values, so (to make it easier to find, copy a few of hex hex bytes from the non modded bios, and click to search at the bigger file. it will take you to the place, then replicate the two bytes you modded at the modded file to the A062CF1F-8473-4AA3-8793-600BC4FFE9A8_1_192.rom )
then ask everything like I said and replace the modded A062CF1F-8473-4AA3-8793-600BC4FFE9A8_1_192.rom file when phoenix ask for it ^^
oh, 5A relating to the voltage table is 0.9V
well, as for the help, pleased to help ^^
however, I have little time cuz I have to focus on the L502X mods ^^
@senthil61
where you got that message, in windows?
as far I know there are no white/black list at the L502X, I even took a minipcie card from another laptop and plugged it at the L502X with no issues, and it was different by the one provided from thell.
in your case, it seems just a driver limitation, because if there were a black list, the bios would just prevent to boot the machine by poping up a message at the BIOS boot asking for non incompatible device or something else.
where are you getting that message? -
Is there a way to unlock CPU turbo ?
Even when the turbo is enabled it can only go up to 2.5 GHz maxAttached Files:
-
-
@ricohunter
Just gotta dial in ur temps and it'll boost up a lot higher. So dial in ur temps with the mods I said in earlier posts and it'll boost to full turbo boost clock on a continuous basis.
@capitankasar
In regards to my hp pavilion dv2615nr with the 7150m I was able to get 1.280v in 3d but its no more stable so it's limited to 1.2v so kinda sucks. Wish I knew exactly how to hardware mod it to higher volts.
In regards to the gt540m anyway u could make another with a little more voltage than 1v if you have tested it? 1.050v or something? Thanks -
@ricohunter, well, I dont have a turboboost compatible processor installed (just an i3) so I cant test it.
did you tried throttlestop software?
it let me to tweak many CPU settings., maybe you can get a little more jice from the machine using that.
@chris89
hardware modding the card, mmm
I made something similar to a old ati 3850 HD AGP
I added a resistor to some pins, it made the voltage regulator to overide software settings and set a custom voltage over the software limits, dont ask me what pins you need to mod, because I just followed a guide for the specific card and it worked.
but I supose if you investigate the mod, and compare it with your card hardware, you may find answers, the electronics may be similar and you have luck.
well, I dont have a 540m to test the voltage, but I made u a 1.05v for your asus machine.
let me know if this works for u.
K53SVAS_(1.05V).rar -
@ capitankasar
Yeah still showing 1.000v isn't that odd?
Thank you
-
well, that's bad luck I guess ^^
anyway what are you using to monitorize the voltages? -
AIDA64 and it's weird that it would default to 1.000v I mean I flashed it correctly renamed it and went to cmd to cd c:\winflash\winflash /nodate and selected the proper modded file... I'm kind of like what the heck only 1.000v when u clearly changed it maybe ill give it another go...
-
mmm, well, I renamed the file the previus two times, try to raneme it to match the original file.
I am sure the file is modded.
I checked the bios I just uploaded and it is definitly 69 in hex (1.05v) -
lol yeah idk i flashed it twice first renaming it to the original file name and then the second time no re-name and just used the file. Maybe there's the voltage in "extra" i saw that on GT 200 Series gpu's where if u don't put the 3d in Extra too it won't use the right 3d voltage or I have to disable extra and use only 3d but this is in nibitor.
I don't get why even if it knew 1.05v wouldn't work where would it get 1.000v from? I don't get that... I saw the same occurence though on my 7150m when modding on top of a already modded vga bios file.
Maybe you have to start with a fresh untouched vga bios file then add the hex for 1.05v because I noticed that my hex bits would get all out of whack if I tried modding a file I had already modded since even if it was exactly the same the bytes were too big. Had to start fresh with the vga bios .rom straight from the dump and mod it like that. This is for the hp bios though. I finally got 0.86v 2d out of the 7150m from 0.96v and only using 2 profiles no throttle profile so 2d is 0.86v and 3d is 1.2v. Working on the forums with some engineers to hardware volt mod the 7150m.
![[IMG]](images/storyImages/IMG_20130112_195747_zpsb3e87f91.jpg)
![[IMG]](images/storyImages/IMG_20130112_194238_zpsdf7027df.jpg)
-
well, in nbitor and with hex editor I has been doing the same thing this whole topic and it worked for all 540m users ^^
you also have a 540m card, so even the procedure to extract it is different, the vbios modding process is the same.
you also noticed the voltage changed with previous values, didnt you?
I supose you are just trying go over the voltages range.
well,maybe the card if detect a invalid value, ot load some kind of default value, 1v in your case, thats one suposition
ir hn your case, 1v seems also the max for the card, so even you are trying to give 1.05, the max the card can give with default voltage regulators and software is 1v.
I cant affirm,I can just supose ^^ -
Well just in regards to my success with the 7150m after messing around and doing like 50 failed runs of phoenixtool testing every possible value until I got it right. Finally I got it right and PhoenixTool was happy with 1.280v for 3d from 1.2v and 0.96v for 2d and then I spent about another 100 failed runs of PheonixTool to finally find the perfect combinations and I got 0.86v on 2d and 1.2v 3d and a 2d clock of 100mhz and a 3d clock of 555mhz. Nvidia drivers then report exactly the value I used in windows even know the hardware may not support it. So it should show 1.050v on the GT540m but it may or may not support that voltage in hardware and I guess the only real way to tell is if it runs hotter and can handle more core clock.
I don't get why I can't actually edit the bios of the Fermi cards in nibitor? If only it would show clocks and voltages I could probably dial it in... I just don't like not knowing exactly where all the hex values are for each profile and the hex values for the 2d/ 3d clocks and 2d/3d memory clocks.
Anyway to properly view fermi bios like for the instance my gt540m? I get the same result with my Desktop GTX 470 nibitor shows no clocks or voltages. -
oh, didnt saw the update on your last post, so you already modded your HP BIOS right?
glad to know ^^
what did you made exactly appart to get a untouched BIOS?
also I supose those images are from the 540m of your lappy right? (cant see the chip labeling properly)
I think I can see some voltage regulators there, the problem is that I dont know what is the final point before the voltage go to the main gpu chip, so I dont know where to place the multimeter to take measures while the machine is running.
well, to get the voltage bytes to change with the 540m, I modded a file changing fermi voltages with nbitor, and then opened the modded file with hex editor, the ones changed are the ones to fucus, that is how I made the custom (non avalible in nbitor) voltages for this topic and posted the table too.
this can be used for any voltages (2d and 3d voltages)
well, as for the voltages on the 540m, I edited it with nbitor at this way, opened the vbios file with nbitor, then click on the "tools" thing from the toolbar, and then fermi voltage.
maybe you can do that on your GTX 470 one like that way, because the 7150m procedure was different and the clockrate/voltages was visible at the main page. -
The pics are of the 7150m.. yeah the hp bios I got it just had to tweak settings in nibitor and keep saving and reintegrating until it worked, took some time.
Got my 2d volts down to 0.86v from 1.1v and my 3d is at 1.2v since it can't handle anymore than 1.2v which sucks. I really do like the bios clocks though no need to manually do it and its at 555mhz and no throttle clock so it'll run at 555mhz continuously while in game which is nice.
Wish I could could get more than 1.0v out of the gt540m. Maybe ill look into it a little and see what i can do.
Thanks for ur help buddy -
pleased to help
wel, as for the clocks on the 7150m
it is very easy,
you can mod them in nbitor at the main page.
default values appears to be 100 mhz for 2d, 250 for throtle and 425 for 3d.
you should be able to mod it if you already confirmed your desired clocks are stable ^^ -
Hi all, I'm new to the forum, have been reading this thread because my Dell XPS 15 l502x has died after upgrading official A11 to A12 BIOS. The update went fine and rebooted automatically after completing the installation. I have updated the BIOS several times without a problem. But this time it did not boot anymore. The powerbutton lights up and the fan blows at full speed (no heat) and that's it. There are no beeps and there is nothing to be seen on the display. I found this thread and with hope I burned the CD and followed capitankasar's helpful advice in the first post. Booting up with End key works fine but it does not show the Dell screen where I can hit F12 to continue. The powerbutton and XPS logo are flashing. I am stuck at the moment. The laptop has the blueray drive.
Did I have to burn the cd in a special way? I just burned the .iso with the built in Windows 7 burner, I can boot from the cd on my other laptop.
It's weird because I never had any issues with the device. Sadly my warranty has already expired. -
mmm, did you flashed the iso correctly?
if you used the windows 7 burning folder you may flashed the iso as a single file in a data cd, I suggest you to use a more nice software like image burn and try again.
if the cd is burned properly, the power led should stop blinking after some seconds and the dell splash screen should appear
let me know if the problem persist after burn the disk again ^^ -
Thanks for the quick reply! Good to know the power button should stop flashing. I'm out of spare CD-R's though, so I'll try it again tomorrow.
-
pleased to help
yeah, while it is blinking ,it means it is looking for the capsule, when it stop blinking it means it already bound it (the capsule is the BIOS.cap file included at the cdrom image)
well, if you ran out of cd-roms, it may work too with a DVD (even wasting toons of dvd space because the iso file is smaller than 300mb I think) -
well, while getting new cdroms, you can check if your bios can be recovered with this method.
for example, using a usb stick, I never got the OS loading from usb while using the recovery capsule, since it seems only to load properly an os from cdrom, (it load too from hdd, but with some limitations wich cause windows 7 to BSOD)
so as for just booting the bios and checking if this recovery method will work for you, you can do following,
get a fat or fat32 formated usb stick, if the partition is already fat or fat32 you dont need to reformat it.
download the iso file from the first post, use winrar to browse the files inside the iso file, you should be able to see a lot of files, extract the BIOS.cap
and make sure it is exactly renamed as BIOS.cap (yes, it is case sensitive)
then put it at the root of the usb stick and place it at the esata/usb port of your bricked laptop (right port)
after that, follow the recovery guide, it should load the capsule from the usb stick and you should visualize the dell splash screen after the power led stoped blinking.
however you will be unable to boot the tweaked xp with the recovery tools until you use the complete recovery method (burn the iso into a cdrom) -
Custom voltage moded A12 bios mod for gt525m with advanced menus for L502X DOWNLOAD from mediafire /// MIRROR by ximinez
MD5 checksum: DA79B0AA216534D9D4E5E9CBC4F967C7
BIOS version used: A12
this bios mod has been tested by crapula
2D PROFILE: 0.83v
3D PROFILE: 0.87v
notes: Minimal voltage modded A12 BIOS for gt525m with a nice set of extra options,plus native speedstep and updated CPU microcode,intel vbios update to v2137 and sleep FIX for OSX, handle the new options carefully!
FYI: This mod breaks file copy and locks up the computer when you copy a file. Processes won't close, and explorer freezes and is un-cancelable/process wont close even with end process and taskkill. It locks the windows core when copying files, with google chrome "Waiting for cache", which makes me believe it has file R/W problems, with speedstep being the likely cause. -
lol I was hoping we could figure out how to volt mod the gpu and find out which chip would need to be pencil modded to work?
![[IMG]](images/storyImages/IMG_20130112_195747_zpsb3e87f91-1_zpsc436c5a9.jpg)
![[IMG]](images/storyImages/IMG_20130115_051235_zpsa29f7544.jpg)
L502X modded bioses download (GPU voltages and more!)
Discussion in 'Dell XPS and Studio XPS' started by capitankasar, Dec 30, 2011.


