
This is the extracts vbios A062CF1F-8473-4AA3-8793-600BC4FFE9A8_1_189.ROM and it's 477kb.
I don't know how to extract that as well... Winrar or something? Or SLIC tool again to dump it?
you sent me the vbios alone at 64kb a while ago and I just now changed the hex and it got rid of p15 so there's 3 voltage tables rather than 4. P15 isn't available anymore where 3d volts were at. Nothing was changed, Nibitor see's no new voltage.
I used Notepad++ with Hex editor plugin and searched 00 00 00 00 00 00 0F 00 62 which found only 1 string in the standalone vga bios you sent me a while back which is 64kb. I changed the 62, to 69 and saved. Opened it in Nibitor and Integrity went from "GREEN" to "YELLOW". P15 is Now Missing and P12 is at 0v, P3, and P7 are at 0.83v. By stock P3 is 0.83v, P7 is 0.83v, P12 is 0v, and P15 is 0.98v (Or I can Select 1v).
What we want to do is modify it in such a way that Nibitor actually see's 1.02v, 1.06v, 1.08v, or 1.12v. It can't be impossible to manipulate it perfectly so in Nibitor it will show say 1.12v in P15... Then I could run 851Mhz STABLE!
I would appreciate it a lot if you could lend a helping hand since I'm sure we are ALL interested in seeing what the GT540M's Peak Potential is. I know I am...
-
Why did my whole post get flagged? Moderator has to approve it... WHY?!?
:thumbsup:
I have to start over OMG what is up with these forums? I didn't say anything inappropriately...
I don't know how you extracted A062CF1F-8473-4AA3-8793-600BC4FFE9A8_1_189.ROM so you get the resultant 64kb bios.rom that can be opened in Nibitor. Maybe use Phoenix SLIC Tool to extract A062CF1F-8473-4AA3-8793-600BC4FFE9A8_1_189.ROM? Or maybe Winrar to extract the contents of the .rom... I know when I open A062CF1F-8473-4AA3-8793-600BC4FFE9A8_1_189.ROM 477kb in Nibitor it says it's a gt540m, it knows that much otherwise everything else is messed up. I saved it in Nibitor and the resultant file is still 477kb.
You sent me the 64kb vgabios.rom that you pulled off a while back and I searched the 64kb asusk53svvgabios.rom and searched 00 00 00 00 00 00 0F 00 62 with Notepad++ using Hex editor plugin. Changed 62 to 69 and saved it. I then opened it in Nibitor and the Integrity went from "GREEN" to "YELLOW". I then checked Fermi Voltage Table and P15 3D is now missing. By stock without modifications it's P3 0.83v, P7 0.83v, P12 0v, and P15 0.98v (or 1v is selectable). Using Fermibioseditor you can tweak voltages better but it's not supported by the gt540m.
So basically I think we are all interested to see what the GT540M is capable of. I'd highly appreciate it if we could try and figure this out. :wink:
I just need to go into Nibitor Fermi Voltage Table and see 1.02 for 803, 1.06 for 819 , 1.08 for 835, and 1.12 for 851mhz.
-
many of my posts also get marked as pending to be aproved when I post them, a thing I consider annoying.
I think I already spent enough time on those forums and participated enough with constructive information to be considered as a posible spammer... -
@capitankasar
That's what I'm saying bro! :thumbsup:
I posted more on my post above about my findings... If you could help accomplish the goal at hand I'd be thoroughly obliged. To pull more than 1v and have it show up correctly in P15 field of Nibitor.
Thanks -
@chris89
ok, I see you updated your post.
well, I extracted the A062CF1F-8473-4AA3-8793-600BC4FFE9A8_1_189.ROM file using phoenix slic mod tool.
then I opened the file with a hex editor and located the part concerning to the GPU, then I selected it and saved into a single file wich was 64 kb exactly and tested it was properly readable by nbitor.
oh, didnt knew nbitor was able to open the file directly inside other file with aditional contents, that will make things easier for sure
yeah, that was what I meant, if you hex edit the file, the integrity will be marked to yellow because the checksum is based on the previous voltage value, and you will need to save the file with nbitor, so it recalculates the new checksum and fix it.
also dont worry about the modded P15 value, it is missing from the app since you manually added a value not present in default nvitor voltages, but it is already there
if nbitor already let you open directly the file, then do:
1- open the 477kb file with hex editor.
2 - alter the voltage byte for P15 and save the file
3 - open the file with nbitor and just save it again, that will fix the integrity/checksum byte
(well, I never used nbitor on the whole file direcly, but if you said it can open it without cut only the video bios part, try on that way )
now your A062CF1F-8473-4AA3-8793-600BC4FFE9A8_1_189.ROM will be ready to be reintegrated into your main bios.
you need phoenix slic tool to do that.
1 - open your main bios file with phoenix slic tool, it will create a DUMP folder with the bios contents
2 - select your laptop manufacturer (dont touch any other options like method options, it can mess everything, default options are OK)
3 - now click on advanced and tick the settings marked on the red square of following image, leave other options as default.
![[IMG]](images/storyImages/settingsu.png)
4 - click on ok
5 - now click on "GO"
6 - a message box asking to replace files will appear "DO NOT CLICK ON OK YET!!!"
7 - now you can replace the A062CF1F-8473-4AA3-8793-600BC4FFE9A8_1_189.ROM file inside DUMP folder with your modded file, click yes to overwrite
8 - now get back to the phenix slic mod tool and click "OK" to the messagebox
9 - it will ask it detected changed on that module and will ask if you want to reintegrate it, click yes
10 - if everything went fine your modded bios will be ready with "-SLIC" at the end of the file name , all you need will be rename it and flash it
-
Thanks, is there an ASUS.txt for SLIC?
I can mod the hex values but P15 goes missing therefore the Fermi Voltage Table gets messed up. The 3 voltages are written in by default, and no additional values are available. They go 0.83v, 0.98v, 1.00v and that comes stock like that.
What I want is to write in, so Nibitor's Fermi Voltage table shows the updated voltage.
Without Nibitor Fermi Voltage Table Recognizing the new voltage, nothing will change at all.
My or Our (lol ) objective is to get Nibitor's Fermi Voltage Table to see the new voltage above 1.00v... I'd like to figure out how to get it to work correctly so I don't waste my time.
I was wrong on the clocks as there are quite a few different fermi GF100 series cards. The GF104 uses the 16 x .1875 for clock generator but the GT540M is GF108 and uses 13mhz steps so you can only truly get 797mhz, and 810mhz. So basically this is how the GF108 goes....
797Mhz is stable at 1.02v
810Mhz is stable at 1.03v
823Mhz is stable at 1.05v
836Mhz is stable at 1.06v
849Mhz is stable at 1.08v
So basically if we can actively get Nibitor to show the new updated voltages, the GPU will be fed exactly the voltage presented in the Fermi Voltage Table.
Thanks for all that info I really appreciate it!
I hope we can get some true increases because we aren't doing something correctly in the hex because they don't show the new voltage in the "Fermi Voltage Table".
Thanks -
@chris89
as I stated, nbitor dont show values at the fermi voltages other than the ones wich come by default.
if you already hex modded it, dont worry, just use it to save the checksum even the modded voltage doesnt appear in nbitor it will be there. (I checked flash weird voltages and they are detected like software like HWMONITOR, however not sure if it will work in real)
I cant do anything with that, because it is nbitor coding, so you would need to ask the app developers to be able to add more voltages using nbitor gui.
it is a nbitor issue, for example, try to replace the voltage hex byte with some value recognized by nbitor, like 0.83v or 0.98v
they will appear, I suspect it is nbitor coding fault -
I apologize if this question is already answered.
I have the A09 0.83v / 0.85v BIOS. A while back, I was trying to update the NVIDIA drivers, but I found that any version higher than 296.10 was causing voltage fluctuations and crashes. I think capitankasar posted on it here. Is this problem fixed in any of the newer drivers? Does anyone know of a solution or workaround? Thanks in advance. -
what GPU you have?
I have the 525m and using 0.85v/0.85v with out any issues at all.
using 314.22 drivers without issues.
give also a try to the latest custom modded a12 bioses, they offer a lot of unlocked features
my machine started acting slow some days ago, but problems went away after clean the dust from the heatsink, -
A newbie in the thread!
I have GT 540M. Had issues with freezes (which made impossible to play almost any game newer than 2007 without my XPS freezing and requiring a reboot). By trial and error I ended up underclocking my GPU to 570 Mhz (!) to play without crashing (depending on games), although 600 were often OK too.
Flashed this:
BIOS version used: A11
2D PROFILE: 0.83v
3D PROFILE: 0.85v
So far tested only in BF3. Played for 30 minutes. No crashes. I even added 20 Mhz to Core Clock to test. Still working. Can't report accurate temps but approximately load temps have changed by something around ~7 degrees. I think before I wouldn't have lasted 10 minutes in a game with stock clock. Yesterday we had 25 degrees outside (which doesn't help temps), but I was testing in the morning when it was cooler. During my BF3 session max GPU temp was 76 (before it was 80 and a bit more), and CPU was 89 max. It's clear that the gap between CPU and GPU widened. I suppose CPU got slightly cooler too, as everyone knows to expect.
I'm happy if I will not have to underclock anymore, at least for some time, until I will do a repaste or something. Do I understand correctly, that I can take one of the dust filters (the one in the bottom) without unassembling the whole thing? A bit unrelated, but recently my fan began doing on/off on/off a lot. Another thing that is bad about this notebook. But I can live with that, I guess. I want to achieve temps that others have achieved here. -20 would be awesome, and I could continue using this notebook for gaming.
The only weird thing is that at first boot Nvidia inspector still showed 1.0 v at the first screen, but if I pressed "show overclocking", it shows 0.850 there. On a second boot it was the same. But now after playing BF3 I see that it shows 0.830 on the first screen. I guess it's inspectors problem or something. I'm happy if games won't crash anymore with stock clocks. I won't be able to resist adding some more Mhz and testing, just for science.
Update: Ok, got a first freeze at 690 Mhz. Will be testing on 672 Mhz further. By the way, I'm playing with Turbo Boost enabled. Tried disabling it in ThrottleStop and instantly felt some difference. Although it's not that clear in some games.
Update 2: forgot to mention one problem. Skyrim exits by itself once it's loaded and it shows the menu. Wasn't happening before. -
Go to Power Options in Windows 7 and set cpu to 90-95% because no matter what the system can't handle full turbo boost on the cpu and full overclock on the gpu.
I'm running a Core i7 2720qm runs 2.2Ghz stock and 3Ghz in turbo boost which it acchieves in game as long as 4 threads are hitting hard. If it boosts up to all 8 threads it'll back it off to 2.7Ghz. Given my ambient temps are 100F so atm the moment if I run turbo boost and 800mhz it'll git 72C on the gpu and cpu is 89C at 3ghz until it hits 2.7Ghz and dials back to 85C.
You could consider buying the i believe i7 3612QM or 3632QM which are 2.1Ghz and 2.2Ghz turbo boost to 3ghz still. Only difference is the 2720QM for instance as well as the 2630QM are 45W TDP CPU's. The heatsink can really only handle 35W max... So it would be ideal to go with the 3612QM or 3632QM because they perform the same, use 10W less power with a 35W TDP max and will get an hour longer battery life since they use 10-15W less on battery than the 45W chips. 10W at peak usage is a lot! It's like dialing our cpu's back 10% which would be in the 1.6-1.8Ghz range to get 65C. The 3612qm and 3632qm will hit 65C max at full clocked out turbo boost at 3Ghz per core...
Your motherboard may say it isn't compatible but I have done the research and its no different and should work since it's the exact same socket being a Socket G2 BGA-1224.
Usually to keep temps super low and keep the gpu clock high is to run the cpu at 98% which is 2Ghz for me, or if your temps are way too high even at 98% dial back to 97% that's 1.8Ghz for me. The core i7 is way too powerful and you won't see even 1fps drop until your around 1.4Ghz per core... That's like 80% or so in Windows 7 Power CPU options for max percentage, and set to passive to keep temps lower. Passive mode pulls back the cpu's tdp (Max Power Wattage) just because it thinks it's being passively cooled by no direct air flow. Active cooling sets the TDP slightly higher meaning uses more CPU Wattage because it knows it being cooled directly so it can pump up the performance.
At 98% my cpu cores hit 65C, and my GPU at 790Mhz and 1v I hit 65C. The best way to know what ur 3d voltage is while in game is to get the FREE software EVGA Precision or MSI Afterburner and use the Monitoring on OSD for GPU Temp, Utilization, Core Clock, and Frame rate. That way in game on the OSD in the top left u will see all your gpu specs in real-time.
Good Luck!
@capitankasar
I remember you sent me my gt540m bios in a 64kb form a while back, can't find the link... Can you?
Anyway I opened the 477kb file with Phoenix Tool and it said not insyde/phoenix bios... So I couldn't open the 477kb file to find the 64kb file from within and you can't open the 477kb file in Nibitor.
I wish I knew more about what lines do what in the hex for the bios... I wish I knew how to specifically find the p15 related areas... So I can pull the p15 from say the gt550m which I have yet to look at it's vga bios since I still don't know how to extract it from within the main big file... I wanna look at the GT550M vga bios and GT 440 bios So I can add the bios support for more than 1v. They are both exactly the same GPU's in every way and I'm sure this isn't at all impossible.
***ON ANOTHER NOTE***
How to determine 62 as 0.98 or 69 as what 1.05 or whatever? Could I pull the exact P15 string from the GT440 bios and put it in the GT540M bios to get the P15 values of the GT440?
So, how does nvidia make the bios for the card? with only 3 voltages available? 0.83, 0.98, 1.00v?
I absolutely hate the gt540m. I mean it's a fermi gf108 but is it possible to run a bios on it from say an identical gf108 from say the GT550M? they're only identical in every way, ram size, ram type, shader symmetry, ram speed, and power wattage tdp. I think they can go above 1v... Can't this be possible?
For instance I think only 2 gpu's are of possibility. The GT550M, and the GT 440. I like the gt440 specs a lot everythings identical, just different tdp. Couldn't it be possible? To add the device id of the gt540m to the 550m bios or gt 440 to have that bios with the same hardware engineering specifications, just more voltage, and more core clock... Is all I want is more voltage and more core clock.
![[IMG]](images/storyImages/GT44011V_zpsaa86286c.jpg)
![[IMG]](images/storyImages/gt540mcomparedto550mandgt440_zps68cecb36.jpg)
-
@Beyond One
glad to see you finally decided to test the custom bioses
about the dustfilters, well, you can remove also the ones under the ram expansion door.
however the most important one require to disasembly the whole laptop, because it is under the main system Fan.
after that, the fan will get more fresh air inside, keeping the machine cooler.
to archive lower temps do what many people did here:
- use undervolted bioses (I think you already are doing it)
- repaste
- remove dust filters, specially the one under the system fan
- use cooling pads (this is optional, but also helps)
also keep the vent holes clear and away from walls or other stuff
about nvidia inspector, it is a bit unacurate with newer drivers, use hwmonitor instead.
well, the modded bios fix completly the crashes for some people, for others, it just improve the situation but do not completly fix it, you you may still need to underclock a little if you keep having issues with stick clocks
@chris89
all ix-2xxx movile proccesors are sandy bridge while all ix-3xxx movile are ivy bridge.
I tried in the past mod the bios and firmware to support the ivy bridge proccesors at this laptop, because the socket is the same PPGA988, but it will not work due chipset/ firmware limitations.
and I didnt had sucess modding the system to accept the newer ivy proccesors on it.
well, if nbitor doesnt work, I will tell u how to extract the video bios from the 477 file
1 - open it with a hex editor like hxd
do CTRL + E (select block)
starting offset 4741C
end offset 5721b
2 - then copy the selected content.
3 - click on new file at the hxd editor, and then paste the content
4 - then save te file with the name u want, example, videobios.rom
5 - now you have your 64 kb file.
6 - mod it with your custom voltage and fix the checksum byte with the instructions I said on my previous posts
7 - now open your modded video file with hxd and copy all the contents.
8 - open also the 477 file in a new tab and select the block 4741C - 5721b again
9 - paste the video file into that, it should not ask about resize since the slected size is the same.
10 - save changes in 477 kb file and voila, you have modded it, all you need now is to reintegrate it back to your main bios using instructions I said before
about how to mod the voltage, do it like the hex way and table I told you before, It is the only way I know, if the card doesnt accept the voltage later then it is a different voltage, but this is the correct way to set the voltage for p15 ^^ -
@capitankasar
I was wondering where you got the info about the starting and ending offset?
Okay cool thanks for clearing it up. I think modding the bios like this actually messes up the functions from within and probably should be avoided. Instead, just select blocks send out to a 64kb file. Then open in Nibitor, edit the Fermi Voltage Table to whatever voltages are available and only use what's available. The only available possible voltages are 0.83, 0.98, 1.00v.
The reason I say that is because I'm not getting any GPU Memory Utilization what so ever. The game simply isn't using the 1GB of GDDR3 at all. I'm going to revert back to 100% stock bios and see if it fixes the issue.
If I write GT 440 bios to the gpu, it simply won't work and may cause BSOD's but it shouldn't ruin the card. Or cause the laptop to be un-repairable right? It'll still be using the Intel CPU Video for everything...
Thanks for all your help!
-
well, this is the same method I used for the L502X and had no issues with it, ^^
-
There are no issues but frame rates will suffer significantly because no video memory is used for any games. Instead it uses the the Intel VGA "FRAME BUFFER" to utilize the System Memory, rather than Video Memory.
For some reason modding the gpu bios, has actually caused it to turn off on-board video memory all together, and forces the Nvidia GPU to share System Memory.
This is clear when at resolution since most of us are running DDR3-1333 which yields just 444Mhz. So what that means is we aren't running GDDR3-900 (2700Mhz). Instead we're utilizing only DDR3-444 so that's about half our stock speed. The total difference is 1333Mhz vs 2700Mhz and at resolution and detail levels it kills performance entirely.
Another clear explanation is I get 0% memory utilization in all games. Instead I can see 99% System memory bus utilization and Frame Rates Plummet. Try installing MSI Afterburner and enable (OSD) for Core Temp, Core Utilization, Memory Utilization, Core clock, Core voltage, FB Utilization, and Framerate. Make sure all those are set to OSD. While in-game view the OSD info to see where your sitting... Take a Screenshot and post if you can... I'll post one of my laptop shortly. -
well, not sure what is the cause of the issue, but I remember when you asked me to mod your bios.
this is how I made it, and you said it worked fine.
I also get propper memory utilization, I have no memory utilization option in my msi afterburner options (using 2.10)
however I have a desktop gadget wich shows it
![[IMG]](images/storyImages/vjl0.png)
-
chris89, yeah, I was using 80% for quite some time, but then recently, after trying to blow the dust out of the notebook, I've decided to use 100% again. Will most likely reduce the % again, or at least will be disabling "turbo boost" in ThrottleStop. What I still don't understand is why this statement is true "The core i7 is way too powerful and you won't see even 1fps drop until your around 1.4Ghz per core...". Why can't i7 (or i5) utilize it's power and turbo boost to the full in games?
-
Mainly first because the i7 has 8 threads with the power to do more power hungry tasks than measly games. So 1.4ghz x 8 = still 11,200Mhz of processing power. So that's why mainly and the 45w tdp is to high with the gpu being 35w and if your overclocked on your gpu and turbo boost is like an overclock so your pumping close to 100W through a tiny heatsink. So the heatsink can't keep up with the wattage.
I'm going to be re-doing my heatsink again since not enough heat is transferring at 800mhz. I was able to get 800mhz stable with my keyboard removed and a full speed office fan blowing into the fan intake and on the back of the motherboard. I see zero fps increase from going from 900mhz to 1000mhz on memory. Since I'm certain Unreal Engine 3 is using 0% memory utilization. Basically there's an issue where the video memory isn't being routed to the dedicated video memory but instead my system memory.
Use MSI Afterburner 2.3.1 or the latest available on Majorgeeks to check your OSD and see if your using memory utilization or FB Utilization (system memory). -
^^That's so long as the running programs support multithreading. Otherwise a quad i7 is as fast or even slower than some i5.
In most my games, generally I rarely see much benefit of the 8 threads, the only time I notice the performance of the i7 is when I am doing some CAD video rendering (which have taken over night at 100% CPU load) I suspect an i5 at similar clocks would take double the time since they have only 2 cores/2 threads
And I would suggest that you leave the memory clocks as is
From experience memory overclocking just caused unexpected crashes after prolonged use with negligible performance improvements. But if you can hit 1000Mhz, I'm not stopping you (just don't break it lol) -
yeah, sadly many apps take only beneficts from one or two cores.
thats also one of the reasons I oced the whole computer.
the ram is rated at 1333 mhz, but it is running now on 1400 mhz, and the i3 cpu rated at 2.1 ghz is now running at 2.2 with the OC, intel graphics are also OCed now and everything running stable.
it may not sound like an extreme OC, but the performance improvements in apps such as dolphin emulator are very noticiables
I wonder if there are some other user interested in OC the whole L502X, the instructions are already at the first post, but well, hardware modding is needed for this, so this probably will keep away many people from doing this. -
^^ Yeah you have done some amazing stuff, overclocking an essentially "locked down" system.
And the hardware mods, as you said, I'm too afraid I'll break something!
The only "mods" I've done is place some blu-tack under the power button to make it have a softer sound and feel when pressed and resolder my keyboard strip when I accidently broke it in my ambition one day lol
And is dolphin emulator single threaded? Because looking at your screenshot above, it looks as if it's multi threaded, or is that all your open programs I see on the taskbar
-
@NeoMesal
ty
well, if I could find a software way to override the descriptor security lock, it would be posible to overclock the entire machine using just software, if someone with a locked descriptor (all here except me I think ^^) want to give me a hand looking for a software way to unlock or override it, it would be nice
as for dolphin, yes and no
most proccesing power goes for the emulated GPU and CPU threads.
you can only set 1 core for GPU and other one for GPU.
well, you can speed the emulation a little by moving other minor stuff like sound emulation and texture decocing to other cores leaving twose two cores for GPU and CPU free-
I get full speed on many games, but most are on 90% even with the OC I did ^^
If I had only more base clock at the CPU or just a faster one, I am pretty sure I would get full speed in most of them
-
Doesn't the descriptor security lock apply to all non-K Intel CPUs (aka all Mobile CPUs) because I think it is actually hard-coded onto the CPU
And yes, the Dolphin Emulator makes sense. (simulating the Wii CPU and GPU separately on a PC CPU)
I read up about it
Dolphin (emulator) - Wikipedia, the free encyclopedia
And the "recommended" specs are an i2500-K Sandy Bridge, so not much more overclocking on your i3 needed to match it
-
Anybody know if this item StarTech USB to Slimline SATA CD/DVD Optical Drive Enclosure: Amazon.co.uk: Computers & Accessories will be compatible with our BD-Drive? Because HDD caddy is great option but losing BD isn't good. Or maybe I should just buy sata-usb cable?
And can I use HDD Caddy like this: http://www.amazon.co.uk/EiioX-12-7mm-Universal-DVD-ROM-storage/dp/B008V66RDY/ref=pd_sim_computers_9 or only some dedicated?
@Neomesal non-K have only blocked multiplier by defaul I think. -
@agalin
it will probably work
however, your BD drive speed will be probably limited due the usb 2.0 connection
I suggest this instead:
it takes advantage of the esata combo port and it includes a carryng pouch to put the cable and drive after you use it.
eSATA-USB cable (eSATAp), connect SATA optical drive externally [slimSATA-eSATAp-C06] - $24.95 : NewmodeUS, Hard Drive Caddys for Notebooks
I started to use it after I installed an internal hdd caddy, the times I need to burn a dvd or watch a dvd movie, I take the puch and connect the dvd drive and the cable, It works fine for me and since you use esata connection, you dont lose speed ^^ -
I don't need pounch - have some free place in notebook case
Thanks for idea of e-sata. I thought same about speed and only about changing from 2.0 to 3.0, but e-sata is better idea. My biggest trouble was about usability of drive without body, but for you it's working, so I'll probably search for this cable (probably on Amazon or something from Europe).
And text "it will probably work" is about hdd caddy too?
Edit. I think it's same cable type: http://www.amazon.co.uk/DELOCK-Kabel-eSATAp-22pin-6-4cm/dp/B002MV2468/ref=sr_1_1?ie=UTF8
Edit2. Oops! This cable
http://www.amazon.co.uk/DELOCK-Kabel-eSATAp-Slim-13pin/dp/B002HQTR7C/ref=sr_1_15?ie=UTF8 - first is for HDD
-
well, there is also the cable without the puch, it is a little cheaper, butwell, I think there is even better prices on other sites, but yeah, esata port I think is the best to connect the old optical drive to keep functionality and speed.
about the caddy, I think yours will work.
I got mine from new modeus too, this one allows to use the old dvd plastic thing from the optical.
2nd HDD or SSD Caddy for DELL XPS 15 (L501x, L502x) [OBHD-SATA12-SATA-BU] - $44.75 : NewmodeUS, Hard Drive Caddys for Notebooks
it work fine, but there are probably more cheap alternatives with the same functionality
-
I'm searching on Amazon UK because I'll get free shipping to Poland
And from US it's often very expensive (20$+).
It seems that these caddys are same in construction. Thanks
Edit. Oh and last question: Will be 7mm SSD "stable" in notebook? I think won't it detach when notebook moved? Because in my rage is Kingston V300 which is only in that size. -
yeah, it probably will be stable, I also noticed many of those come with a plastic spacer.
you can also use stuff to secure it on your own ,) -
my bios chip has been corrupted since the battery was removed, so just didn't bother to fix it anymore. Built myself a Haswell system instead
-
@Mang0
did the laptop was flashing bios while the battery got removed?
did you tried my bios recovery cdrom. -
Any word on undervolting the CPU in the future? My GPU runs great at around 70c but my CPU is always up so high, around 80-95c
-
@overvu
yeah the cpu becomes too hot at this laptop, thats why I allways keep the heatsink and fan free of dust and also removed the filters and repasted.
I also heard about a third party fan wich operated better for the l502x, not sure if someone at this forum mentionated it.
relating undervolt, not sure if it will be avalible in future, I am checking again the setup modules to see if I can unlock the remaining hidden menus, like overclocking in bios.
maybe I also find a way to unlock the descriptor via software and let users to flash my modded ME firmware letting them to enable BCLK overclocking like me, sadly the only way yet is via hardware (instructions are at the first post)
also other laptop mods gave me some interesting ideas.
I noticed about some laptop bios mod wich create a new hotkey (FN + 9) wich make the fan spin at max speed allowing cooler temperatures while gaming or doing heavy tasks.
I will check if I can replicate that this laptop
-
I've repasted and removed the dust filters as well, also just purchased the coolermaster xslim to keep air circulating.
Still my CPU temps rise pretty high. I'll keep checking back and I'll look forward to whatever you end up releasing
Thanks again -
uh, after that tweaks the temps should dramatically decreased, what temps u got before?
-
Here are my CPU temps.This is with Céramique paste, no dust filters, and even on top of a laptop cooler. -
well, I think they are ok.
I noticed mine start underclocking the cores when it reach 90, and it is like 80º now after cleaning the dust
![[IMG]](images/storyImages/ueiv.jpg)
those proccesors become very hot, even after tweaks on the cooling system.
maybe I will be able to unlock fan control in future to keep the temps cooler ^^ -
I just cleaned out my entire laptop down to the fan and repasted but this time using Artic Silver 5. So far so good. There was a good amount of dust residing in the heat sink grill from the last time I cleaned it, (about 2 months ago)
CPU temps idle at 40c and underload 65c. Guess I have to clean my laptop more often
-
Quick question:
I have an SSD on the left side of my laptop and it creates quite a bit of heat (at least I think it does, I feel it with my left palm when typing)
I also have a HDD in the CD bay which doesnt create much heat at all.
Can I switch the two without any consequence? So that the hot SSD will be farther from the CPU?
*EDIT* In the back of my mind I feel like the HDD should produce more heat because of it's moving parts and higher power consumption... then what's producing all the heat on the left side of my palm rest? -
On the left side temp is generated from heat sink (GPU and CPU), not HDD/SSD. I have only HDD (in normal place) and this side is much hotter than other.
-
@overvu
as far I know, I was never able to boot an hdd from the optical drive caddy, it doesnt even appear in the bios boot settings.
you can try, but it will probably not work.
well, Ihave two hdds, one of 320 gb at the palmrest with the SO, and other one with 750gb at the optical place.
both of them are 7200 rpm, and I connect the old optical drive via an esata cable when I need to burn some disk or watch a dvd movie
@agalin
well, I think we was talking about the place near the touchpad, wich is directly over the hdd, however, yeah, when the cpu and gpu become too hot, the whole machine start heating
oh, I noticed about your signature, nice to see some people interested in hardware modding finally
it also would be nice to hear from other people hardware modding this great laptop
also in future you can try desoldering the bios chip like I did and install a socket, that is required to mod the ME firmware and unlock BCLK overclocking for this system
-
@capitankasar now I don't know how to solder anything
And must find something to learn - working notebook isn't good idea I think
I need internal USB to use second BT device (because I want to connect Dualshock 3 via BT and it needs to overwrite drivers so BT is lost for other devices) and for the future - when eGPU will be needed, it'll be necessary to remove one mini-PCIE (and it'll be wireless+bt...)
Now I'm waiting for ssd and caddy
-
@again
well, picking old or broken circuit boards will be nice to practice
oh, I see, so you want to have two bluetooth adapters, one for normal devices, and the other one with modified drivers just for the gamming controller.
well, as for the egpu, the l502x have two minipcie slots, one is halfsize, and the other one is full size.
do you have boths slots in use right now?
I have the wireless card on the half size one, and the 3g card on the full size one. -
On full size I have TV Card AFAIK. Aida says that both are in use too.
-
well, I was more talking about if you had the two cards phisically connected, but yeah, I can see you have them ^^ (I noticed some people only got their machines just with 1 card)
well, I think the egpu setup card adaper is full sized, so you problably will need to remove the TV card to install it.
also as for the usb mod, you have to check that at least one of the cards isnt usb based, else the usb mod will not work at all.
you would need to install the usb internal mod on a slot that doesnt have a usb based card.
to check if your cards are usb based.
you can DL the app mentionated at the second page of the usb mod topic
http://forum.notebookreview.com/del...xps-15-r2-l502x-internal-usb-how-proof-2.html
in my case it was:
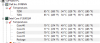
![[IMG]](images/storyImages/usbdu.png)
the small intel wifi card wasnt usb based, but the dell 5540 HSPA card (3G and GPS card) was usb based.
that is why I did the mod on the small wifi card slot to prevent issues, all the devices all working fine at the moment, both minipcie cards and the internal modded usb device. -
Isn't half mini pcie compattible with full mini pcie? And it seems that there are cables to extern mini pcie, so there is option to make free space to use half size...
And this program says for me that free is only USB with TV Card Detects WiFi/BT minicard, so it's in use...
But it's nor proper place nor time to discuss these topics I'll maybe start discussion again in the future (but no near future about egpu, so maybe you'll use another notebook at that time...)
-
@agalin
cards are compatible, the problem is that just the card may not fit in the small size it is.
for example, if you try to swap the cards you have, you will notice the small one fit without issues into the another one, but the bigger one will be unable to fit at the other slot due some case stuff blocking it.
well, dont trusth that app, use the usb app we pointed at the other topic, it will clear any doubt about
well, about my laptop, I will still using it for a long time, I have no money even for a proccesor upgreade so I will keep investigating this hardware for a while
-
That's what I mean
Instead of disconnect TV Card, on full size m pcie, I can connect cable to to get half size out from notebook - and outside is unlimited space
With laptop I'm in similar situation
-
not sure if I am explaining myself correcly
this is the kit u need to get the egpu working, you also need a external power suply, but that is other history
![[IMG]](images/storyImages/PE4H-PM3N-ver2.4.jpg)
I never used this setup, but I read a lot from it since I was considering trying it when getting some money
look at the adapter, its name is PM3N,![[IMG]](images/storyImages/PM3N_ver11_P_1S.jpg) this is the internal adapter to be connected inside the laptop, not the external adapter or the external gpu itself.
this is the internal adapter to be connected inside the laptop, not the external adapter or the external gpu itself.
u can see probably the sizes comparisions, , it have secrews on the half size and at the fullsize, mayne the full size parts can be removed easly and let it to be a half-size card.
the issue is the cable to be plugged in.
look at this other laptop:
![[IMG]](images/storyImages/imag0480.jpg)
it have two minipcie with room for full size, the one from top is another card, and the one near it is the PM3N, u can see the cable is very fit with the laptop case even it is fit on a full size minipcie slot.
what I mean, is that you probably will have issues fitting that on the small wiifi card from the half size slot. (the connections are the same, but the space ammount to get the card fit is the half)
to get the PM3N working on the half size slot, you will need to mod the laptop by removing metal, plastic and other stuff to let it fit, that is what I mean ^^ -
Yes, I know what you mean. I think about something like this: Amazon.com : KZ-B22 (mini PCI Express / MiniCard Extender) : Computer Memory Card Adapters : Computers & Accessories
Not sure if that's cable which I need, but means: cable with male connector on one side and female on second.
And maybe in the future, there'll be half size version
L502X modded bioses download (GPU voltages and more!)
Discussion in 'Dell XPS and Studio XPS' started by capitankasar, Dec 30, 2011.


