@XMG
Hey there.
Saw the Reddit post about your plans with the XMG Fusion 15 for now and the future.
You were mentioning a possible upgrade to the RTX 2070 max q Super and still discussing about it. Since the post on Reddit is 2 months old, I am wondering whether you already made a decision or not. Since I plan to buy the Fusion 15, it would be a pity if e.g. in 3 weeks there would come an upgrade to the Super GPU.
Cheers and thanks for the support so far!
-
-
If anybody is looking for something to replace the inbox "fibre" screen protector sheet, a Logitech G240 mousepad (cut to 19.5mm) fits the QC71 perfectly - right between the top edge of the keyboard to the bottom edge of the touchpad.
The screen almost closes all the way too (like almost 98%, thanks to the G240 being only 1mm thick), and as a bonus, you get a decently sized travel mousepad.![[IMG]](images/storyImages/YAZ4xFM.jpg) Last edited: Nov 26, 2020Randomisity likes this.
Last edited: Nov 26, 2020Randomisity likes this. -
Apologies for the late reply. It was never locked in the first place. I opened up afterburner and was able to raise the power limit to 125% without any modifications.
-
Can you please elaborate on this? It's the first I'm hearing of anyone able to adjust this. In my Afterburner, that setting is locked. The only thing I can do that makes any difference is using Asus GPU Tweak and increasing the GPU Temp Target setting to 87.
Below you can see the Power Limit in Afterburner is locked...
&EDIT: Ignore the circle in the right-hand Afterburner Monitor portion of the screenshot. -
Oops my bad, I was thinking about my main rig instead of the laptop. Yeah it was 87% power limit.
Also, I didn't know that asus gpu tweak actually worked. Been using afterburner to raise the power limit and was bummed when afterburner couldn't raise it anymore after the last bios update. -
Supposedly it does work after BIOS 0122, but only with Benchmark Mode engaged (and only to the NVIDIA max which is 87c anyway).
Gott wonder though, does UV-ing the GPU through AfterBurner help much with the temps, if at all?Last edited: Nov 30, 2020 -
Without any modifications, the temp limit caps out at 77C which I felt was way too handicapped for my taste. A 83C temp limit would make more sense but maybe Intel's playing it safe. UVing would handicap the GPU even more since it's already handicapped right out of the factory.
-
Well, there's always GPU Tweak and Benchmark mode. For now most of the stuff I currently play on the thing does pretty well at FHD 72FPS capped (under various settings), even without uncapping with GTweak or any other GPU mods.
Hopefully CP2077 will too lol.
Right now I'm trying to figure out if I can force the RGB Keyboard OFF at Boot (while keeping it ON in Windows). Or at the very least change the colour from Blue-White to something else (and tone the brightness down).
As it is the thing's blinding me with white during bootup
Played around with CC's reg entries but no joy so far. Managed to edit CC a bit more to my preferences though along the way (change the CC "name", bottom colour banner and make the tray icons change as per your chosen profile).
There's seems to be some weird RGB lighting modifier app somewhere that seems to be usable on the old 1st-Gen GK5CN5Z (ID-Z/Mech 15) chassis however, that seems to be able to change the "default" RGB light colour on those. I wonder if it still works for the QC7 (and where to even get the app as the links over at the GK5CN5Z thread is dead).
Link to the post in the GK5CN5Z thread (with the dead link): https://bit.ly/2Jz8cYU
Link to the original Baidu thread: https://bit.ly/3mI8g6PLast edited: Dec 4, 2020 -
Yeah but benchmark mode forces the fan at 100% all the time but I just want to raise the limit without having my laptop sound like a 747.
In other news, trying to get a working keyboard driver for Linux. Some drivers do let me change the colours but it turns off the keyboard backlight after a certain amount of time which is distracting especially when watching videos. Anyone has any solutions to solve that? The driver I was using was the avell unofficial control center and I could change the colours but my damn keyboard backlight still turns off after like 30 minutes or so -
Yeah this is unfortunately pretty true. Guess that's just the limit we have to live with for now, though I DO hope @XMG is actually working on something for when the thing reaches EOL (and Intel doesn't care any more). Similarly @Prema.
Isn't Tux Control Center also thing? But yeaaaa I kinda didn't really see an RGB control panel applet in the pictures. Was a about to suggest Avell but yeah you mentioned it already.
There seems to be ONE other LED control applet for Nix that I kinda stumbled upon while searching for the solution to the TURN OFF THE BLOODY KEYBOARD AT BOOT ONLY conundrum. Lemme see if I can find the link to it.
EDIT: Here, if you haven't seen it already: https://github.com/pobrn/ite8291r3-ctl
Reddit post of the same thing: https://bit.ly/2VFFkRkLast edited: Dec 4, 2020 -
Also still unsuccessfully trying to figure out how to mod that bootup RGB settings lol.
If I can't turn it off, why can't I at least change the colour or make it NOT blast white at high brightness all the time ¯\_(ツ)_/¯
That said, it's pretty telling that this (and that 75c cap) is pretty much the only unsatisfactory things about the QC7. In comparison, the quirks and flaws on my old ID-Z pissed me out a lot more.Last edited: Dec 4, 2020 -
Something rather interesting to share. I suspected that OemServ *might* work with the QC7 (in regards to modding the pre-Windows RGB keyboard) and surprisingly, it was capable of something.
Well, at least it does return values, but I'm not entirely sure if the values returned are accurate or if OemServ can even modify anything.
It does accurately portray my Lightbar as being "turned off" however (as it is), so that's better than nothing I guess.Last edited: Dec 6, 2020 -
HOT UPDATE: "Pre-Windows/Boot RGB" issue is SOLVED. Solution wasn't even OemServe, it was EVEN SIMPLER.
The key to all this apparently was the ages old " MyApp" that people used to use for TongFang laptops BEFORE Control Center came along.
DISCLAIMER: This is a HACK and might or might not cause your FUSION to lose its RGB settings and need a BIOS "clear settings" or at the very worse, a BIOS reflash. This has NOT happened to ME but this is in no way a guarantee that it would NOT happen to YOU. ALSO, this has only been verified to work with the QC7/MAG15/Fusion 15 (and the GK5CN5Z, because I also have that).
Steps are as below:
1) Download the latest available MyApp from the GK5CNZ thread's front page sticky (should be 1.16.1 or something).
2) Unzip the folder somewhere (there was no need to even install the darned thing).
3) Close CC (by exiting via the tray icon). Also Project Aurora if you have that running.
4) Run MyApp.exe (from your unzipped MyApp folder) and click on LED Keyboard (or was it RGB?).
5) At this point your keyboard will turn into a 4-coloured zone (no matter what your previous CC settings were). Don't panic.
6) Select "Welcome" and set whatever you want for your "pre-Windows" keyboard. Click "save" when you're done. DO NOT CHANGE ANYTHING ELSE (ONLY "WELCOME") OR RISK BORKING YOUR CC RGB CONFIGS. Unfortunately there also isn't any "live previews" so you're gonna have to imagine what the settings will look like
7) Close MyApp (AND exit via the tray icon).
6) Reboot. Notice your Keyboard now following whatever settings you set before under MyApp prior to entering Windows.
7) The moment you enter windows and CC loads, your previously saved CC RGB setup will take over. And no, MyApp will not (and isn't supposed to) start at boot because it wasn't installed.
Done. Enjoy your non-blinding white customized Pre-Windows RGB.
I'm not sure if the settings will stick forever, but for now no matter what changes I make to the RGB keyboard in CC, the MyApp-adjusted "pre-Windows" RGB settings seem to be unaffected (at least with mine set to low-brightness red breathing for "Welcome").
But yeah, I'm gonna keep MyApp around just in case anything gets changed again. Which I FULLY expect to happen once the next BIOS update comes.
Also, I haven't yet tried to "turn off" the RGB for "Pre-Windows" only (and keep it turned on in normal use) with this method. But considering the slider for brightness does look like it goes all the way down to zero, it might just work.
In the same vein, if your RGB keyboard is NOT the default blinding white (and you somehow like it that way), you can change it back with the same method above.
Finally, this SHOULD (probably) work with Project Aurora installed but again, both PA and CC needs to be fully exited before you do your thang with MyApp. After saving and rebooting, CC and PA SHOULD work as usual (I can't actually verify because I... actually don't have PA installed lol).
(CREDITS: Some guy on the XMG Reddit who mentioned that MyApp was able to change the preboot RGB settings on his Mech 15 G2. That got me thinking...)Last edited: Dec 7, 2020Randomisity, St00pid and Prema like this. -
Hi all,
Fantastic thread here. Have been following along for a bit and ultimately bought my device thanks to the combined efforts of everybody here.
I'm wondering if anyone managed to solve their sleep battery drain issues?
Even after going through the steps mentioned (disabling hibernation, wake timers, wake alarms etc.) I'm still losing ~1%/hr in sleep mode. Sounds like very little, but it equates to waking up the next day to find myself 10-15% down on the day before, sometimes more. Obviously, this causes issues if I forget to plug it in over the weekend and need to crack on with work come Monday morning...
Anyone come up with a solution so far?
Cheers! -
Apparently sleep will ALWAYS drain because of the keyboard IR sensors (the "Opto" part of the OptoMech mechanism). They don't turn off during anything but S4 state (hibernate) AFAIK, regardless of the keyboard lights themselves being on or off.
Why? Coz if those IR sensors were turned off the keyboard wouldn't function, and S3 ("normal" sleep) is designed to be "wakeable" from a key press.
So yeah, as if right now only Hibernation will result in zero (or almost zero) battery drain, if I'm not mistaken.
As such, I'm not entirely sure if it can even be "fixed" do to it being fundamentally down to how the keyboard works. Hopefully Intel can prod stuff so that the IR sensors are better drain-optimised with future BIOS updates, but that is best case.
Well IMHO anyway lol. I think I read about all this somewhere before but correct me if I'm wrong.
As for me, I've forgone sleep altogether and have made the system go straight to hibernation instead on battery. Yeah it's not as instant to resume but it doesn't really take all that long either.Last edited: Dec 8, 2020Randomisity likes this. -
I've posted this to Reddit but lemme just cross-post for a bit:
I've got an interesting question: Do you guys observe performance dips (random stutters) after using the Fusion 15 (or in my case, a random unbranded QC7) LIGHTLY for long extended periods of time (like for web surfing, downloading, etc for above 1 hour) AND THEN gaming?
I've observed (in both Fallout 4 and Wildlands, not exactly heavy games per se, but still), that games get kinda stuttery and frames are kinda all over the place on my unit under the scenario given above.
Which is strange considering right after a reboot, everything is a heck of a lot smoother. There are frame drops (of course) but no serious dips or stutter.
I frame limit my games to 72fps, and generally set them up to hold steady around there so I don't actually hit the GPU cap all that much either. But this still does not explain why the stutters ONLY start after long idle (or low load) uptimes - and a reboot INSTANTLY clears this up.
Also, this is under the "Balanced" profile mainly (because I normally tune my games to the limits of that profile). That said, switching to "Performance" after those long uptime situations don't actually make things better either.
I do have Rainmeter and CPUCool running for monitoring but again - why does a reboot clear things up? If I do suspect anything, it might be the monitoring buffer in either of those apps doing something to cause this, but otherwise I'm stumped.
Any thoughts folks? -
Try this; cold boot, make sure you're in performance mode in CC, run benchmark mode for a bit, turn off benchmark mode and use normally. I found that the increased PL stays but the fan curve goes back to normal. Two notes if whatever you're doing generates too much heat the fans will still hit 747 levels and the most useful classic point of all it works for me but ymmvRandomisity likes this.
-
Just adding on, apparently UVing the DGPU (have my 2070MQ adjusted to around -160 by curve) with Afterburner is actually kinda helping with keeping CP2077 smooth.
Also seems to have dealt with those idle stutters I've been having too. For now anyway.
To deal with the "AB Battery Drain" due to it polling DGPU from time to time, I have AB set to apply my curve preset at startup... and have an accompanying Task Scheduler task setup to "kill" the AB process 15 seconds after boot (which seems to have given it enough time to set curves).
Now I've got a UVed DGPU curve AND no AB drain, which is pretty nice. -
Thanks for the reply and explanation, eiraku. Makes sense and you're right; I have a vague memory of reading similar somewhere but couldn't find it again to verify prior to my post!
From a purely logcial perspective though, it would make sense to give the user (perhaps 'advanced' user?) the option to disable the keyboard power supply when disabling wake priveleges for it. Call it "Battery Saving Sleep Mode" or some nonsense, meaning the power button could be used instead to wake the device. Seems like it would only be a couple of lines of code. Seems lazy to not address that level of obviously poor optimzation.
Dunno. Maybe 2020 has made me cynical. -
Don't suppose you mind posting a screen shot of your AB curve... For educational purposes?
-
EDIT: The Long Dark crushed my previous -140 CPU UV and BSODed + crashed a couple of times. Now running at -135 CPU instead and it's running okay.
Also I have since moved on to a "flat curve from 1500 and pulling up a few points before 1500 up to UV" method to adjusting the GPU, because it seems that while the style below works, the GPU Core Freq seems to flactuate A LOT and it stays mainly around 1500 anyway so meh, let's just keep it there. It still runs pretty well with a 72FPS cap despite not being able to boost higher lol.
I'm literally basing my Curve from what some guy posted on the XMG Reddit. This is LITERALLY NOT recommended SOP for UV/OC, so I'm just going to tell you what I did instead.
1) Make sure your system is setup for Afterburner (go watch MrFox's very educational YouTube video about it).
2) Open up the curve editor.
3) Click the FIRST node (1400?).
4) Hold CTRL before dragging it up (say to +150-ish). It should be around 1500 now. With CTRL held now the entire bottom end of the curve will shift with the node selected. The top end will stay.
5) Repeat with the top end (hold CTRL, shift up +150-ish).
6) You'll end up with the standard curve literally LIFTED WHOLESALE above the default curve ( without having to go through the whole annoying "adjust each node" thing). Click "apply" and go game for a bit.
7) If satisfactory (nothing effs up or crashes - make sure to game AND idle in menu to let the DGPU go through its full paces), click Startup and save preset back in Afterburner. If not, lower the OC and repeat.
8) Go to Task Scheduler and setup a task to kill AB after it applies the curve to make sure it doesn't do the infamous "Burner Drain" by keeping your GPU alive (at login of any user, delay for 15 seconds, command to be given is "taskkill /f /im MSIAfterburner.exe"). Don't forget to clear the " stop if computer ceases to be idle", " start the task only on AC power" and " stop if the computer switches to battery power" checkmarks under " Conditions" (the ThrottleStop startup task guide online does mention all these in more detail).
I tend to leave the top with a lesser OC than the bottom if they can't be equal. Ended up with +152 bottom and +150 top being stable (+168/160 crashed CP2077 a couple of times). Working pretty well so far for me but as these things go, YMMV.
TBH, I don't know why but the 2070MQ base curve looks hella wonky to me. If I do the normal "take a point and flatline the rest" thing it LITERALLY means I'm going to take that first point and flatline everything. I still kinda want my 2070MQ to boost sometimes, so I did the above.
To be fair I'm not entirely sure that's the optimal way of doing it though, but it gets CP2077 to run High decently (50-72 capped FPS) on "Balanced" and I'm already pretty happy. Might tweak the thing later tho, will update if I do.Last edited: Dec 21, 2020St00pid likes this. -
BTW, my 5x2.5mm Chicony A12-230P1A spare adapters have arrived, and yeah they fit the QC7 quite well (specs and jackwise).
Size wise, they're a bit shorter, a lot fatter and somewhat heavier - which works out just fine as the OG FSP230-AJAN3 can now be repurposed for "exclusive mobile use".
The jacks are also a bit different, as in the plastic housing. The Chicony is a lot... bulkier.
Pics are as below:
![[IMG]](images/storyImages/2eRTnhg.jpg)
![[IMG]](images/storyImages/Fa4p5cG.jpg)
![[IMG]](images/storyImages/MFNEOcr.jpg)
![[IMG]](images/storyImages/2HiZTWL.jpg) StormFalcon and Randomisity like this.
StormFalcon and Randomisity like this. -
Does anyone know if it's possible to get the eluktronics lettering off the top of the keyboard? The logo on the back is quite attractive IMO, but the lettering does not do it for me at all. Seems to be laser etched so I was thinking the best way would either be a dbrand skin without the logo cutout, or a simple sticker. I don't really want to spend $15 though, and I don't even think the no logo cutout option is offered anymore. So my next best option is a sticker of some sort, although I can't really think of anything that would be the right dimensions to cover up the text. Any ideas? Or am I just going to have to live with that?
-
The no logo thing is still offered over at Dbrand, last I checked.
If you're good with your hands though just do what I did and buy a roll of automotive vinyl sticker (of whatever design) and make your own skin.
At the very least, a small straight panel for the top bar (with a single window cut into them for the power and profile buttons using a cutter knife/xacto) should suffice and not be too hard to make DIY. Heck if you don't mind the contrast you can even cut it short of the buttons and not even have to bother with a cutter lol.Randomisity and StormFalcon like this. -
BTW xposting my findings on Reddit about how NVCleanInstall can effect C8 Residency (and thus battery life in general) with the wrong options selected, at least for me:
EDIT: Forgot to put "Optimus" in there lol. I did choose to install it myself but thought it was a given due to it being a notebook install.
TLDR; Installing ANY NVIDIA drivers though NVCleanInstall (Driver, OPTIMUS, Physx, Type-C and HD Audio) with HD Audio Timeout and Message Signal Interrupt "Expert Tweaks" selected SOMEHOW borks up the CPU's ability to enter C8
Installing through NVCleanInstall with NO "Expert Tweaks" SELECTED (or installing the unmodded drivers DIRECTLY) seems to allow the CPU to enter C8.
Well it works for me at least (BIOS 0122 + latest CC). YMMV, but hopefully might help SOME folks out there.
A little backstory, from the first day of getting my QC7 (a month ago, yeah I'm late to the party), I've been gaming largely on AC so I haven't actually been paying much attention to my battery life. Cue yesterday, I was a tad curious about it, so I ran my QC7 off the tap for a bit.
Suffice to say it barely lasted 2 hours IDLING. Le gasp.
For one, the thing was draining rather copious amounts of watts. For another, the CPU was barely breaching C3 state.
So what followed was a frantic struggle to find out WTFish was happening.
The first thing I ended up doing was:
- Using DDU to uninstall BOTH the Intel and NVIDIA drivers (in safe mode OFC).
- Reinstalling the "stock standard" Intel drivers provided in the XMG download "package".
- Reinstalling the latest (460.89 DCH) NVIDIA drivers using NVCleanInstall (with Physx, HD Audio, Type-C and Optimus selected + HD audio timeout and MSI "Expert Tweaks")
So I DDUed again and installed the full fat, non-slimmed NVIDIA Driver Package instead.
THIS time it worked, and the CPU was finally finding some empty C8 rooms to inhabit.
BUT, being the obsessive tweaker that I am, it bugged me why the slimmed down driver didn't work when the full fat one did?
So one more round of DDU and driver reinstall. Only this time I went through NVCI AGAIN, same component choices BUT, with no "Expert Tweaks" selected.
It worked. Free C8 Suites For EVERYONE.
Haven't yet tried with a more up to date version of the Intel HD drivers either, but considering its working oooookay now (and I didn't even have to wipe Windows), I'm not really that bothered anymore - FOR NOW.
So yeah, one of those two "tweaks" (or both of them) somehow is borking C8 Residency. Anybody have any idea why though (considering that they weren't really doing anything to my old MSI PS42's C8)?
(As a nice bonus I'm down to around -7W "Balanced" minimum brightness idling now compared to the monstrous -30W+ that it was sucking up before. OFC that probably can be improved on further, but maybe next time lol)Last edited: Dec 21, 2020Randomisity likes this. -
Does anyone know the screw size for the bottom panel? I've opened it twice and the screws get more stripped each time.
I've been looking for the size but haven't had much luck other than the reddit post "SCR,MAC,M2*6T1.2D3.5,BK/ZN/Y/BLU,FLA,FKY"
Would it be fine to just get M2x6 wafer head screws?
Thanks and happy holidays to you all. -
This is actually a very relevant question. I can legit feel the cheapness of the bottom screws every time I go in there to do work. I do vaguely remember @Mr. Fox linking to a bunch of relevant (but higher quality) screws in a webstore somewhere in this thread but those were out of stock.
My Screwnese is rusty but imma thinking that yes like what you said that description means M2, 6mm wafer cross/Phillips head screws. Don't take my word without confirmation tho.
EDIT: Here's that post I was talking about:
EDIT2: After reading more about screws, that whole cryptic line probably means M2, 6mm length, head thickness 1.2mm, head diameter 3.5mm, black, zinc, flat/wafer (with a buncha other things I don't really know lol). The "zinc" and "flat" bit is probably why it strips so bloody easily.
Considering those D3.85 panheads that @Mr. Fox ordered seem to fit (the Mech-15, but they're brothers anyway), I'd wager the holes would accommodate something up to 4-5mm in diameter. Do measure the screw holes to confirm if you're getting different head type screws tho.
I just ordered some M2x6mm panhead stainless screws off a local webstore myself (for cheap). Let's see if they're decent enough to use (and can fit).Last edited: Dec 20, 2020Randomisity and Rippern like this. -
Hey @eiraku, just wanted to add to this: as well as I was the one talking with you on reddit about the best settings for Cyberpunk haha. thanks for the info on DLSS AMD btw, did not think it was an open option since I was getting good fps. Also after update 1.05 of cyberpunk, I am also running 2-5C cooler in some areas.
I reply to share my knowledge to help others as well as to add to your info here.
So for this, basically you are only OC by adding core speed by 150mhz, which can be done in the main menu, without having to go to the curve editor. I aslo watched MrFox's video, with his settings for undervolting, which is easier to understand than a lot of videos made by others.
Simply said after following the video, we just need to find the stable GPU speed and voltage, but since the Tongfang QC7 (and most gaming laptops) share a heatsink between CPU and GPU, I did my stress test for both CPU and GPU. Since only stressing the GPU, doesnt show the case of gaming at max resolutions (gaming stress both CPU and GPU). After I got that baseline, I just tried lowering the voltage of the stable MHz.
For example after running benchmark/stress test on my 1660 Ti for 30min you get:
1900Mhz @ 1.012mV
-Then use AB to change voltage (undervolt):
1900Mhz @ 950mV
-If Stable while gaming for a few hours, then we look at GPU temps:
1900Mhz @ 950mV = 75C
now, since we play on laptops, we add
-If too hot then we lower the speed and voltage, but keep the curve:
1800Mhz @ 850mV = 70C
-If stable, then have fun gaming!
So we get lower clock speed, but stable FPS, stable clock speed, while lower voltage as well as lower temps (but we may lose some FPS). This is my understanding as to how best to undervolt while also getting lower temps hahaha. Used the same method to Undervolt my CPU using throttlestop.
As for this, for one thing, NVIDIA Optimus is a must on all notebooks, and for others, disabling telemetry or disable checking for updates may cause the app or the drivers to keep active in the background and cause the GPU to keep active which pings the CPU and causes battery drain. On my case, I used O&O Shut Up 10 to disable all telemitry of Windows apps and that caused a lot of problems, with updates, also kept my laptop from sleeping as well as causing problems with Wifi and Ethernet (had to live with that for 3 weeks!).
I also used most of the tweaks given in the Battery Boost/Saver thread in this forum, from using Throttlestop and DGPU Off, etc. And for the most part, while only browsing and typing, my battery drain sticks around 3-6watts, I dont know how some people can get it lower than 1watt. Oh I keep my battery at max 60%, and after a year, my battery wear is only 2%! -
I kinda figured it was you. But yeah, can't deny that it's a lot more crowded over there than here.
Actually, I didn't mention Optimus in my initial post coz I thought it was a given considering we're on laptops (I did actually have it selected lol). Will edit the post accordingly to reflect this oversight (both here and on Reddit).
Also, I use O&O ShutUp as well and yeah just don't mess with the "red marked" options (unless you know what you're doing) and you should be fine? The only "red" option I picked was disabling "Windows Updates Driver Updating" because that messes a lot of things up.
As for telemetry, well, installing the driver from NVClean already kills a lot of the telemetry crap to begin with, so yeaaaa. But the "Expert Setting" stuff worked well on my MSI PS42 so I didn't think much of it. Unfortunately those options (still not sure which exact one of the two really) simply doesn't play nice with the QC7 lol.
As for the OC, now that I think more about it, it does sound exactly like what would happen if I used the slider lol. Never really noticed.
That said, I have since moved on to legit limiting the entire curve to 1500 instead with a bit of UV (the normal "adjust and flatten" way). Reason being if you look at plotted Core Speeds across a few hours of playing CP using my old "Core OC bump" method, it hovers around 1500 anyway, with only very limited boost spikes up to 1800/1900. It also ends up having some occasional deep dips down once you pass the 2 hour mark (which I guess is the point when the heatsink gets thermally saturated, considering I always game on Balanced only).
So yeah, limited the entire shebang to 1500 (with a +400 memory OC). Runs 70-72c max, at 50-72fps which is... pretty similar with my previous attempts but with the advantage a much "nicer" looking Core graph (when I graph the plotted data) with no long term dips.
Also in regards to drain, considering that @XMG's measured base idle drain for the Fusion 15 (with no extra crap installed) is at -7w, you getting it down to -6w is a feat of its own TBH.
Myself I get around -6.9w on "Battery" profile, RGB KBB off, and minimum brightness idle (more like -9w for "Balanced" idle though with RGB on).
Somehow I suspect that peeps quoting -1W is actually just looking at ONLY their CPU Package Power. With C8 set up proper I can actually hit -1W Package Power pretty often at idle myself - but Battery Bar still reports the normal -7 to -9W drain for the entire laptop.Last edited: Dec 25, 2020 -
Thanks for the response! You got further with the cryptic screw info than I did. I was thinking D3.5 might be diameter but the rest just didn't make sense even after a couple of hours of google search.
They're definitely very cheap and strip easily. Let us know if the screws you ordered are a good fit! -
My new screws are here. Thankfully, they do look like Stainless Steel as advertised. Unfortunately, they probably are 300 series Austenitic Stainless Steel because they're not magnetic at all (they don't stick to my magnetised driver bit).
Also, the ones I got turned out to be "normal" round-ish heads rather than "deep-groove" panheads so driver bits do still "slip" sometimes. That said, being stainless (aka a LOT harder than zink), the heads are at least not stripping every time I slip lol. And they fit perfect.
Need to be careful and use similarly strong driver bits tho, as these would probably ruin a cheapie alloy bit head easily. Similarly, these might not "break when overtightened" (it will break other things instead) so use with care.
So 2+ and 2-. Though for the price I paid for a pack of 50 pcs (less than USD 2), I can't complain. They also look hella spiffy when installed, giving the bottom a bit more contrast now.
Also I'm pretty happy that TongFang had the foresight to use the same screw for the entire bottom (unlike my GK5CN5Z, which IINM had a mix of different lengths). So now I have 5 full sets of backup screws lol.
Some photos below:
![[IMG]](images/storyImages/qwvrG37.jpg)
![[IMG]](images/storyImages/bT6QNEV.jpg)
@Rippern if you're interested these were advertised as "M2X6mm Screws Stainless Steel Round Head Plain End Phillips".
Pitch was as standard for M2 (0.4mm), and the head diameter on these was quoted as 3mm.Last edited: Dec 28, 2020Randomisity and Rippern like this. -
@eiraku the contrast does look good. Thanks for the follow up!
-
You're welcome. Good luck on sourcing replacement screws!
-
hey guys.
do you think or actually know whether other Control Centers than the basic XMG Control Center work on the XMG Fusion 15, MAG 15 or Vapor 15? Like any other Tongfang Control Center, e.g. this of the XMG Neo 15/Eluktronics Mech 15 G3 or the XMG Core with Intel CPU?
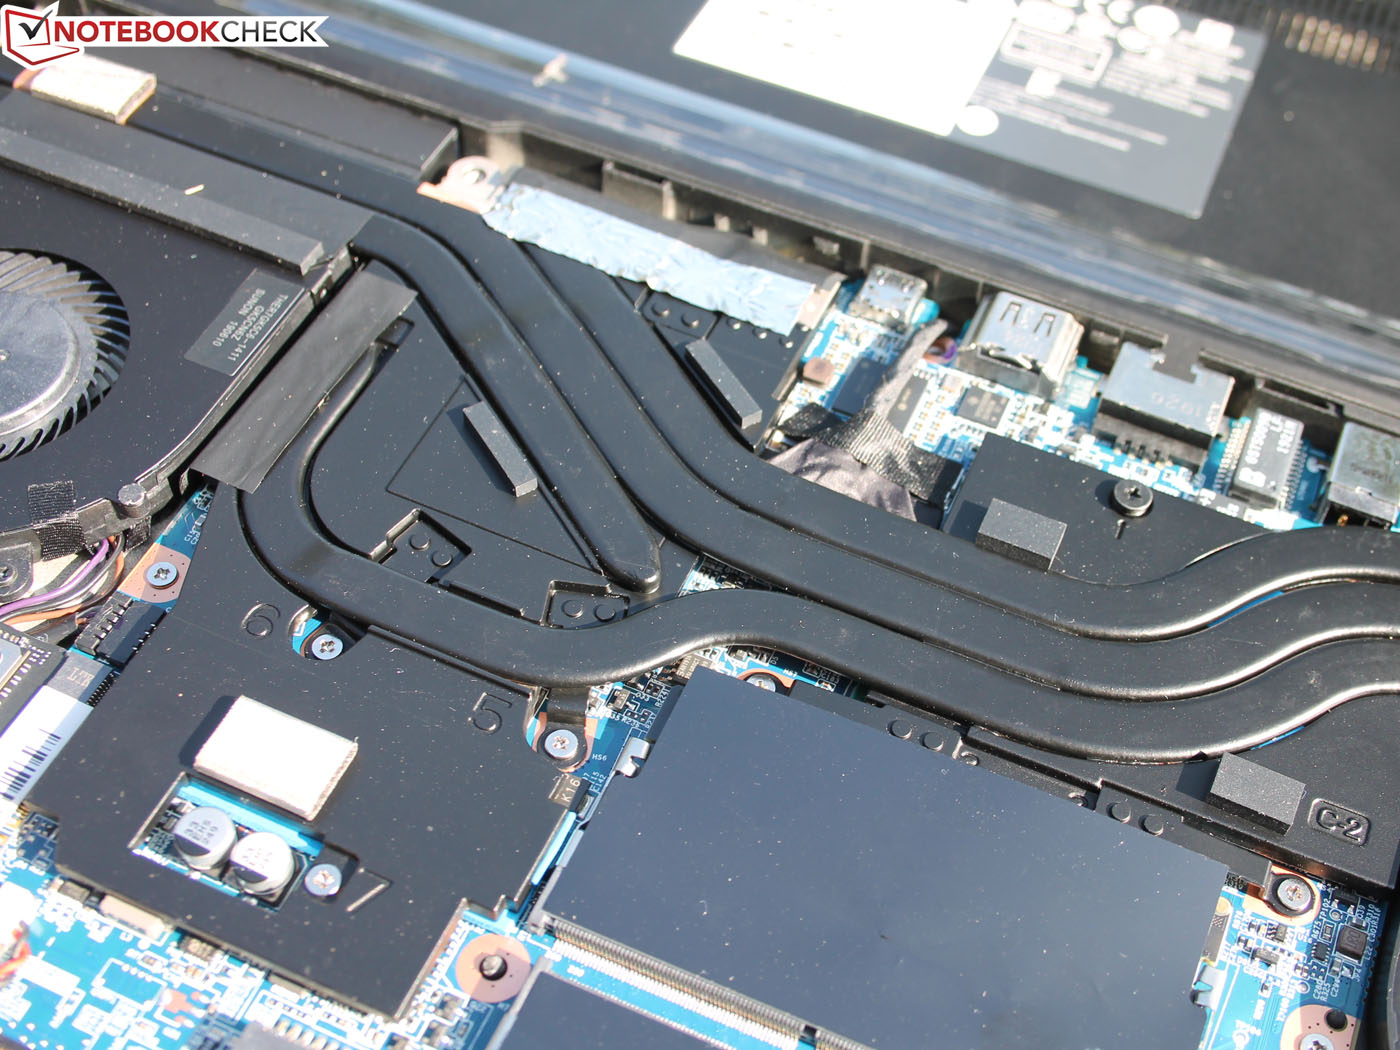
Also, could any of you tell me what this silver "conductors" are on the heat pipes and also this small black rectangles? Silicon based thermal pads or sth similar?
Thansk so much in advance!Attached Files:
-
-
Unfortunately the TongFang control centers are segregated by Intel CPU gen, so 10th gen "new" CCs are supposedly not compatible with older hardware.
Not to mention it's customized per-model, so yeah. Like the Max/Mech versions have access to Fan Curves that we don't?
We already have 3 "main" branches to choose from (Eluk, XMG and Intel/Generic) although the actual difference between them are mostly cosmetic. Heck you can adjust the image resources used (and edit some registry or pre-install INI strings) to legit make your own if you wanted to.
Like I've already modded mine to display different Tray Icons based on what CC profile it's on.
As for those thingies on the heatsink, I'm not entirely sure TBH. Maybe a thermal bridge to help conduct a little bit of the heat to the bottom grille?Last edited: Dec 29, 2020Randomisity likes this. -
@eiraku
thanks for the very fast reply and the input!
Yeah I reckon it is sth about thermal bridge but would like to buy some more of those...dunno where to find them or what I am actually looking for, hence my question here
-
Hmm, they might be constrained by Intel's specced max skin temps tho, hence why there aren't too much of those.
We forget sometimes that the QC7 actually did seem to take a lot of "proper" R&D to actually produce - hence all the limitations.
On the other hand, TongFang other models can sometimes feel like someone strapped rocket engines to bicycles engineering-wise (which legit might be something that some people might prefer, I guess lol).Last edited: Dec 30, 2020Randomisity likes this. -
You can modify the fan curves, also thanks for the C8 fix that worked for me
-
Np for the C8 thing was just sharing what worked for me.
Also, does that (kinder's app) work for fan curves on the QC7? Was under the impression that it didn't (or wasn't working as intended at least).
Ironically I was around with my GK5CN5Z when Kinder was developing the app (and yes the GK5CN5Z was primarily what he developed the app for TBH).
Never really ended up using it tho as my GK5CN5Z legit ended up being a stationary computer due to the very small battery so never really needed much fan adjustments lol.
That said, even the old MyKey app still works for the QC7 (when it was originally made for the GK5CN5Z) so I wouldn't be surprised that old fan-related system hooks might be similarly applicable.Last edited: Jan 4, 2021 -
Using kinders app right now.
-
BTW folks, updated to the latest Nvidia Drivers today with NVCleanInstall. Did so with the "Message Signal Interrupt" expert option selected and so far I'm still able to enter C8.
So yeah that effectively eliminates that one option out of the three EOs available (Telemetery Off, Sleep Mod and MSI) as the culprit behind my C8 troubles for now.
Also it's pretty whack that on 60% charge limiting this thing is capable of longer battery life than my GK5CN5Z lol... but yeah the elder unit does have a smaller battery after all.
Now trying to figure out how to autodim the RGB under various conditions (timeout while on battery and stuff like that) without having to resort to Aurora. It's been pretty hard thus far because the only "hook" we have are hardware level switches (Fn+F6 and Fn+F7) which I can't seem to emulate through AHK.Last edited: Jan 10, 2021 -
Hi there, has anybody used an egpu/external GPU enclosure on one of these models?
I currently have a vapor 15 Pro and thinking of getting and egpu. -
It should work, but why?
Due to the limited bandwidth and CPU bottleneck you're only getting pretty limited performance even if you put a 3080 in there (maybe akin to a full sized 2070 desktop without thermthrottling, but that's probably it).
It should provide an improvement but again, the cost to performance stats do seem a bit... dubious.
Unless you have a very specific use case scenario that is (like wanting to add RTX to a 1660, but even than, as I mentioned before, massive diminishing returns).Last edited: Jan 16, 2021Randomisity and seanwee like this. -
I'm trying to play VR for Dirt, Xplane11, and Microsoft Flight Sim and I'm only getting low frame rates. I was thinking that using an egpu will allow me to play those games at higher frame rate.
I also want to test mining using egpu.
I guess I'll have to extend my research if egpu will be a good solution.
-
Thanks again @eiraku for your help with the screws. Finally managed to replace mine with new ones (M2x6mm pan head, stainless steel 304). They fit well.
![[IMG]](images/storyImages/ZRJvYiT.jpg) Randomisity and eiraku like this.
Randomisity and eiraku like this. -
Hi Folks,
I recently started playing games again and I noticed that the fan is not as loud as I remember and I am worried if the fans are faulty. I opened and cleaned both fans just in case they are dusty - both have some dust but not really thick that should cause any concern. Also, I am always using a cooling pad (though it only has a single big fan in the middle).
Anyway, would you mind sharing the Temp / fan rpms you are getting while playing? I would like to compare to what I'm getting.
Here's my laptop and temp/fan speed:
i7-9750h, RTX 2070 mq, 16gb ram.
processor - 80 deg C
gpu - 73 deg C
Fan speed 4800 - 5200 rpms
Thank you -
I get this in hitman if I alt tab or just watch youtubes before playing, normally I'd reboot before starting a gaming session but being able to watch some youtube guides helps with hitman. Did you ever solve it? Wondering if islc might help
-
Just picked up a model of the TongFang at a local store. Overall an impressive machine, I really like almost everything about it - except for the horrendously loud fans. I'm not sure why they're that loud when under modest load.
I mean, I'm playing some Eve Online, and I capped FPS at 72 - still blaring fans. I have a Lenovo Legion 5 with specs that aren't too far off (2060 instead of a 2070 MQ), and that thing is whisper quiet compared to this.
Any success in cutting fan noises, or adjusting the fan curves? I've downloaded all the recent drivers/bios, tried switching between the three modes.
Intel-TongFang QC7 (Element/Fusion 15/MAG-15/Vapor 15 Pro)
Discussion in 'Other Manufacturers' started by B0B, Sep 2, 2019.