
I unloaded and saved the files but; i cannot get these steps accomplished:
BIOS rom, WinFlash (or Afuwin), as well as other files are extracted in that folder. If you try to run WinFlash, it will not go through, giving the error "Flash BIOS is not an upgrade (same or older version number)!" Other users have reported that their system uses Afuwin instead of Winflash.
3. In cmd prompt, run below: (change the *.rom to your rom found in the samsung update folder, and of course make sure you have cd to directory with both WinFlash or Afuwin and the rom).
I have no idea where the BIOS Folder is. and i have no luck running the winflash or afuwin. cmd prompt tells me: If i use WinFlash.exe afuwinx64 that they are not recognized as an internal or external command, operable program or batch file.
-
-
You are not trying to flash a BIOS, merely to run WinFlash with the /cvar parameter in order to clear your NVRAM (or maybe afuwinx64 if it too has such a parameter). isosunrise's guide gives you the details of how to find the Temp folder where the BIOS contents are extracted.
The information is all in the various links that John and I have given you. But it does admittedly require some lengthy and fairly technical study of those threads AND the links within them.
Until recently, we had to tell members to have their motherboards replaced when their laptops became bricked or semi-bricked due to NVRAM corruption. This procedure to clear the NVRAM gives a new lease on life for those laptops, but it is still not a trivial or risk free procedure. For some members, having the motherboard replaced may still be the best option. -
I know i'm not trying to flash the BIOS. I am just unable to use either winflash or afuwin. I have extracted the files and copied them. But the Temp Folder with the Samsung Update doesn't have the BIOS folders. I am only asking where are those folders?!
-
OK, I see. I tried using isosunrise's procedure some time ago, and the Temp folder contained the ROM files (not folders). Of course you have to copy the Temp folder while the BIOS Updater is still waiting for you to OK/CANCEL.
I am afraid I don't have any further information beyond what's posted in those threads. -
I believe i have your model. My model is "NP700Z5C-S02UB".
If i do would you be able to help me a bit more? -
I have a different, older Series 7 model (NP700Z3A). But that's not the problem, I help members regardless of their model. But in this case the information is really in those other threads and guides, you just have to follow the exact steps posted there.
Isosunrise's guide spells out how to locate the latest BIOS version (or earlier ones) for a given model, how to download it from Samsung's server, and how to extract its content, with specific steps for each.
Then, once you have the BIOS file extracted, you use either SFlash or WinFlash with the /cvar parameter to clear NVRAM. The actual BIOS (.rom or .cap file) isn't even used. That part is described in Fitztorious' thread.
Alternatively, you can force flash an older BIOS version, then update again to the latest. That's what isosunrise's guide is actually for, and it too will clear the NVRAM.
Check it out, read everything, and try the steps again. I'll take a look before heading out tomorrow for any questions you may have. -
I can't even get " sflash64 /cvar /patch" to work what am i doing wrong?
-
Depending on your WinPE version, try Sflash32 instead. Some members reported they had to do that.
Edit: Wait: didn't you say your BIOS used afuwinx64 instead of Sflash? In that case Sflash32 or Sflash64 won't work. You either have to use afuwinx64 (which I don't know if it has a /cvar or similar parameter) or you use WinFlash (which was confirmed in Fitztorious' thread to work with /cvar).
If you post a list of the files extracted from your BIOS, that will help. -
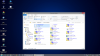
Here is a Screenshot of all the files. I enlarged them in order to be read easier
-
Got it, thanks. Looks like your BIOS uses SFlash64 after all.
After copying the Temp folder, make sure to CANCEL the BIOS Updater (which is still waiting for OK/CANCEL) so that it doesn't block access to the BIOS. This will delete the Temp folder, but leave your copy intact.
What you want now is to open an Admin Command Prompt in the folder where you have those files: Locate Command Prompt in the Start Menu, right-click and Run as Administrator.
Then change to the drive and folder where you copied the BIOS files:
B: (to change to that RAMDisk in your screendump)
cd \__samsung_Update (to change to the BIOS folder)
(You can also open a Command Prompt directly in the BIOS folder by right-clicking it with Shift pressed. But you (usually) cannot create an Admin Command Prompt this way, which may be needed for SFlash64 to work.)
Now execute the SFlash64 command:
SFlash64 /cvar /patch (to clear the NVRAM)
Once it (hopefully) completes that, close the Command Prompt, shut down WinPE, reboot into BIOS and follow from step (5) in that guide in Fitztorious' thread ( here).
Please keep us posted -- although I may not be able to respond for the next few days.
Disclaimer: of course I cannot guarantee that this will work and that it will not damage your computer. I rely on information shared with other members, but only few have confirmed this so far, and everybody's situation is a little different. -
The flash command worked; but, the drive order is still incorrect.

-
Argh, that sucks. So NVRAM wasn't the problem to begin with.
We have had many reported cases of the drive numbers changing, depending on the boot device (USB, DVD or HDD). I have seen it on my own Sammy as well. But I have NEVER heard of any who had problems performing a Windows installation from DVD on ExpressCache models, regardless of what drive order was displayed. OTOH most everybody has problems installing from USB and need to use the workarounds on the first page.
It's so long ago this discussion began, please remind me again why it isn't working? -
I was going to install the Win7 with USB Flash but the drive order isn't the same as it should be in order to install it correctly. When i tried converting one of the drives to MBR mode; my BIOS settings were CSM only.Should I of changed them to UEFI and CSM to format both Drives to MBR? what were the steps in order to do so? Thanks a bunch!
-
I've just come across a link to Disk drive numbers may not correspond to the SATA channel numbers when you install Windows on a computer that has multiple SATA or RAID disks.
It may be relevant.
John -
It is common on ExpressCache models that drive order gets wrong when booting from USB flash drive, causing Windows Setup to incorrectly identify the iSSD as the boot device and placing its boot partition there (the so-called MSR), when in fact the iSSD cannot be booted. That is the entire reason for this thread in the first place.
The easiest solution is to install from DVD instead of USB flash drive. For those who MUST install from USB, the first page of this thread contains several workarounds for manually putting an MSR on the boot device (primary HDD or SSD).
For models that came with UEFI enabled originally (Win8.x models) and when re-installing Win8.x, I recommend staying in UEFI mode ( OS Mode Selection=UEFI OS). In that case, make sure the disk is GPT before starting installation. Also, temporarily disable SecureBoot and Fast BIOS/Fast Boot during installation.
However, if installing Win7 on such models, I recommend switching to legacy BIOS mode ( OS Mode Selection=CSM OS) and converting the disk to MBR before starting the installation. This install guide has the steps (post #40 in this thread).
On older models which came with UEFI disabled originally (Win7 models) I recommend keeping it disabled regardless of which OS is installed (Win7, Win8.x or even Linux). For this, the disk must be MBR before starting installation.
Note that the workarounds on the first page for installing from USB on ExpressCache models ONLY applies to legacy BIOS mode (CSM/MBR). For UEFI/GPT installations I don't know a workaround (though there may be one). You generally MUST install from DVD to make sure the ESP (EFI System Partition) ends up on the primary disk.
In your case, I'd say switch to legacy BIOS mode (as I think you did) and convert the disks to MBR (as I think you did too) even if you have one of the newer models. You still want to install from DVD because of the iSSD. Otherwise (if you must install from USB) you have to follow one of the guides on the first page (which should work as long as you install in CSM/MBR mode). -
Hey just made an account to thank you so much for this. Been trying to get my laptop to have Win7 since the day I got it (~2 years ago). This worked flawlessly. A+++ many many thanks!
-
Hi op2rules, welcome to NBR.
Good job getting that working. You used hanime's guide in the opening post to work around the ExpressCache issue? -
Good News: I installed my OS last week via DVD before my road trip.
Bad News: I modify my install ISO quite often and reformat with them so that would be several DVDs that i don't have. I like the speed of Flash Drive Install.
If i was to use these steps: "Remove the battery, it slides out in my case (NP700Z5C-S02UB). Also disconnect the backup battery connector (small circular black covered battery) with a black and red wire coming out of it. Leave the laptop for a few minutes. Flip laptop over and press power button a few times to drain power. This resets firmware so you can do some stuff."
Do you think it might fix my drive order?
If not; I will try to use workarounds 1 or 2Dannemand likes this. -
That is good news indeed. Well done being so persistent!
To answer your question, I don't think there is anything you can do to permanently change the drive order. It is an issue between how these models were designed and how Windows Setup determines a boot device.
If you reinstall frequently, I would agree installing from USB is preferable, and just use the workarounds on the first page.
Now that you have it working, just leave the current MSR alone on subsequent reinstalls, and just format (don't delete) the Windows partition. Setup may still place a new MSR on the iSSD (when you install from USB) but the old MSR should still be present on the HDD and point to the same old Windows partition. Once Windows is running, just delete partitions on the iSSD before installing ExpressCache. -
-
Changing HKEY_LOCAL_MACHINE\SYSTEM\MountedDevices is the way to change drive letter of the system partition (which cannot be changed in Disk Manager). I used to do that a lot back in the days when a system partition became D instead of C. But this only affects the drive letter in a Windows installation, it has no effect on the drive IDs seen by BIOS or Windows Setup. And the MSR boot partition doesn't have a drive letter anyway, it's hidden by Windows.
So unfortunately I don't think it will solve the issue of installing from USB on ExpressCache.
I hope I am wrong, though, as it would help a lot of people! -
Perhaps this discussion is also relevant.
John -
I am sorry, I feel like such a spoilsport: That article is about editing BCD entries (Boot Configuration Data) which definitely can be used to determine which OS is loaded (from which partition). But that only kicks in after Windows boot manager has booted (from the MSR) and loaded the BCD store (also from the MSR) -- and our problem is that Windows Setup insists on placing that MSR on the iSSD during USB installation.
The Microsoft article here discusses the random nature of how SATA devices are enumerated, which is our problem in a nutshell. Given this realization on their part, Microsoft should give us a way to manually choose the boot device during Setup (i.e. on which disk to place the MSR). But strangely, that never seems to have occurred to them
And as you suggested here in our ExpressCache thread, if only Samsung had given us a BIOS setting to disable the iSSD, this problem (and others) could be completely avoided by temporarily disabling it before Windows Setup.
Short of such a feature to disable iSSD in BIOS, I think the only "permanent" solution is to modify the BIOS to recognize the iSSD so that it can be placed lower in Boot Priority. However, that would probably hurt the ability of ExpressCache and Intel Rapid Start to automatically detect the iSSD during their installation.
As it is, by far the easiest fix is to install from DVD whenever possible. Or leave the original MSR and Windows partition intact on the HDD when installing from USB (just format the Windows partition). -
Oh well!
Perhaps I'm trying to solve the wrong problem.
John -
You are merely following your inquisitive instincts -- which I've always maintained were more than just moderate
John Ratsey likes this.
-
Hi, I just created this account to thank you guys for this tutorial, it works really well,
Also, I don't know if theres anyone cheking this topic since it's a bit old, but I just wanted to ask, if it would not be possible to install de OS in the iSDD and then copy the 350Mb boot files to HDD partition, to be able to use the much faster iSSD -
Hi sandeman. Thank you for signing up, and welcome to NBR.
If you have an iSSD large enough for it, you should be able to install Windows there. Mine is only 8GB or I would have done it myself. But others have 16 or 24GB iSSD, which is plenty if you disable Hibernation and move the pagefile to the HDD.
As you point out, the small Microsoft Reserved boot partition (so-called MSR) must be on the HDD and be marked Active.
The easiest way is to run Setup and install on the iSSD without touching the existing MSR and Windows partitions on the HDD. But DO make sure to uninstall the ExpressCache software and Intel Rapid Start first, and delete partitions on the iSSD.
If you install from DVD, Setup should correctly identify the existing MSR on the HDD as the boot partition and simply add the new installation to its boot menu. (If you install from USB, it will create a non-functional MSR on the iSSD, as you know).
The point is, this way you can boot the original Windows installation on the HDD if needed, and edit the boot menu using EasyBCD. Once the new installation on the iSSD is working, you can delete the Windows partition on the HDD (or keep it as fallback). But of course DON'T delete the small MSR partition on the HDD since that's forever the boot partition
-
Thanks for the quick response, yeah my iSSD is the 24GB model so I did exactly what's in the turorial, but instead of installing in the HDD I did it on the iSSD and it works great.
Again, thank you very much guys -
I installed successfully windows 7, 8, 8.1 on my samsung s5 NB530 thanks to the instruction. But this time, after installed windows 8.1, I could not boot to windows. It keeps rebooting after samsung logo. I check everything, partition, hard disk letter, created successfully boot files ... So frustrated.
Any one has any idea about this? Follow exactly steps in the instruction but no luck.
One more thing, though I set the boot order priority on my SDD, it still boots to my connected USB. Crazy. -
Hello,
I have a problem with following this guide. I have installed a 256GB SSD in the place of the optical drive with a HDD caddy. I tried following this guide to install windows on that SSD and not the original 1TB HDD, creating the 350mb partition and installing windows there instead of the TB HDD. Basically I followed this guide in every way, although everything done to the 1TB HDD (in the guide) i instead done to my SSD.
I tried this and it would not boot from my SSD. It is weird because I then installed windows onto my TB and then that worked perfectly?
I am very unfamiliar with these kind of things, why wouldn't it work on the SSD? It seems like it does not recognise it.
Please do help if possible.
Note I am very newbie at with these kind of things. Thank you so much, any contributions would be greatly appreciated. -
Hey I get the dreaded missing boot mgr. even after I copy partitions. Help please!
-
Welcome to NBR
Please be a little more specific: Which model du you have? Which procedure did you attempt? There are several guides and procedures shared in this thread, both on the first page and on later pages.
By far the easiest way to install Windows on models with ExpressCache, and avoid any issues, is to install from DVD instead of a USB stick.
Note that none of the procedures in this thread were written with UEFI mode in mind. If you are performing an UEFI installation, you absolutely want to use a DVD. There is a real risk of bricking your computer if you suffer NVRAM corruption during installation (as happens with this generation of Samsung laptops) AND the EFI system partition ends up on the iSSD. It can be very hard to fix. -
This post has great info but I need a little hand holding. Working on a friends np700g7c-t01us. Came as Windows 8. Converted to Windows 7. Upgraded to 10 from 7. This was done by the previous owner. Trying to get back to 7. We didn't know what we were doing and we deleted all the disks thru the Windows 7 Enterprise DVD Installer. Now we can't get any of the drives to install Windows 7. We get the standard 0x80070017 error.
We have a disk 0 at 14.9GB, disk 1 at 465.8GB and disk 2 at 465.8GB. All are completely free of data. We don't know what disk 0 is. We assume we want to install on disk 1. We cannot figure out how to change the order or if they were ever correct.
We followed the diskpart commands to select disk 1 and convert it from GPT, we have changed the BIOS settings matching the commands listed on the link below:
http://forum.notebookreview.com/thr...eon-hd-7970m-geforce-gtx-675m.654377/page-231
Specifically the Fast Boot and OS settings.
We overstepped and are just trying to recover. Having read a couple posts here we know this is a bigger issue and we're just kind of spinning our wheels now. Looking for specific steps to resolve this issue. Its late and we've burned a couple hours on this and I know there will be more questions. I just wanted to start the process. Any thoughts would be appreciated. -
Hi Gabe, welcome to NBR.
You have gotten into an area with multiple trapdoors:
1) That of the small iSSD (8-24GB depending on model) which is used for ExpressCache only, but where Windows 7 Setup erroneously places its boot files, causing a boot failure. That is the subject of this thread. The easiest solution to avoid this trapdoor is to install from DVD instead of from a USB stick. On models without DVD drive an external DVD drive can be used. For users who MUST install from a USB stick (or insist on it) posts #1 and #2 of this thread contain the necessary workarounds.
2) The issue of UEFI (used by Win8.x and Win10) vs legacy BIOS (used by Win7 and earlier) which has caused huge amounts of confusion for users. UEFI can only boot from a disk with GPT layout and BIOS can only boot from a disk with MBR layout. Converting between them generally looses all disk content. As described in the post you linked ( here) BOTH the disk where you install Windows AND the small iSSD must have the correct layout.
Studying your post, I think that is the cause of your problem: You have to convert BOTH the small iSSD (14.9GB in your case) AND the main disk (465.8GB in your case) to MBR using the DISKPART commands in that post:
DISKPART (to start the Disk Partition manager)
LIST DISK (to show all your disks. Notice which one is the main disk)
SELECT DISK 0 (assuming 0 was the number of the main disk)
DETAIL DISK (just to verify that you selected the right disk)
CLEAN (to wipe the disk)
CONVERT MBR (to convert the disk to MBR)
Repeat to convert BOTH the main disk AND small iSSD to MBR
EXIT (to close DISKPART)
EXIT (to close Command Prompt)
Disk numbers can change, and may not be the same in BIOS and in DISKPART, so this may or may not be disks #0 and #1 in your case.
Use the following BIOS settings when making this conversion (some models don't have some of these settings):
Fast Boot / Fast BIOS = disabled
Legacy USB = enabled
AHCI = Automatic
UEFI = disabled (for Win7 models)
SecureBoot = disabled (for Win8 models)
OS Mode Selection = UEFI & CSM OS (for Win8 models)
Once both disks have been converted to MBR, go back to BIOS and set OS Mode Selection = CSM OS (for Win8 models -- Win7 models should already have UEFI disabled at this point). Also in BIOS, make sure Boot Priority is set to boot from the main HDD/DVD.
Now install Win7 from a DVD (using F10 to select a boot device) and choose your main disk as destination. Use the Win7 install guide in this post (#40 in this thread) and everything should (hopefully) go smoothly with no workarounds required.
Once installation is completed and running smoothly, you can improve boot time a little by changing the following BIOS settings (not all models have both).
Fast Boot / Fast BIOS = enabled
Legacy USB = disabled
Try and follow this to the dot, and keep us updated on your progress.
(Again, for those who need more details on these steeps, see this post. It applies to all models with ExpressCache)John Ratsey likes this. -
Thanks so much your response.
1. The device does have a DVD and we have been trying to install W7 Ent from it.
2. This makes a lot of sense and is what I had found from the initial posts. We thought we had changed things properly but we'll step thru your steps one at a time.
All disks have been coverted to MBR. Current diskpart list disk shows as thus:
DISK ### STATUS SIZE FREE DYN GPT
Disk 0 Online 465 GB 465 GB
Disk 1 Online 465 GB 465 GB
Disk 2 Online 14 GB 14 GB
Fast Boot/BIOS has been disabled
There is no settings for Legacy USB
AHCI has been set to Auto
There is no specific entry for UEFI
Secure Boot disabled
OS Mode Selection was set to CMS, changed to UEFI & CSM OS
Changed OS Mode Selection to CMS. Verified boot order for DVD first.
Started Windows 7 install.
In the Windows install the disks appeared as such before I started the install:
Disk 0 Unallocated Space 14.9 GB 14.9 GB (I could install here but gives warning "The recommended free space for installaiton is 33201 MB.)
Disk 1 Unallocated Space 465.8 GB 465.8 GB (Windows cannot be installed to this disk. (Show details))
Disk 2 Unallocated Space 100.0 MB 100.0 MB System
Disk 2 Unallocated Space 465.7 GB 465.7 GB Primary
Copying Windows Files happens quickly as I expect.
Expanding Windows percentage never increases and everntually errors out. I have used this DVD (burned from an ISO) on other computers and it has worked fine.
Install errors out:
Windows canoot install required files. The file may be corrupt or missing. Make sure all files required for installation are available, and restart the installation. Error code: 0x80070017
I will burn a new DVD from ISO and try again. It appears I have the other settings correct. I will repeat them all before I attempt another install. -
Rebooted.
Went into BIOS.
Changed OS Mode Selection to UEFI & CSM OS.
Booted into Windows install. Shift F10 to get into diskpart.
Disks showed as:
DISK ### STATUS SIZE FREE DYN GPT
Disk 0 Online 14 GB 14 GB
Disk 1 Online 465 GB 0 B
Disk 2 Online 14 GB 0 B
Selected both Disk 1 and 2, cleaned, ran convert to MBR even though they were already set for that. Before I exited disks showed as:
DISK ### STATUS SIZE FREE DYN GPT
Disk 0 Online 14 GB 14 GB
Disk 1 Online 465 GB 465 GB
Disk 2 Online 465 GB 465 GB
Exited install and rebooted.
Entered BIOS.
Changed OS Mode Selection to CSM OS. Saved and exited.
Booted from newly burned W7 SP1 Ent 64 Bit DVD (SW_DVD5_SA_Win_Ent_7w_SP1_64BIT_English_-2_MLF_X17-58882.ISO).
In the Windows install the disks appeared as such:
Disk 0 Unallocated Space 14.9 GB 14.9 GB (Windows cannot be installed to this disk. (Show details))
Disk 1 Unallocated Space 465.8 GB 465.8 GB (I can install on this disk)
Disk 2 Unallocated Space 465.8 GB 465.8 GB (I can install on this disk)
I picked disk 1 as opposed to only disk 2 being available. This happened to us before when trying these processes on our own.
Disk 0 Unallocated Space 14.9 GB 14.9 GB
Disk 1 Unallocated Space 100.0 GB 86.0 GB System
Disk 1 Unallocated Space 465.7 GB 465.7 GB Primary
Disk 2 Unallocated Space 465.8 GB 465.8 GB
System partition of disk one shows some use out of the 100MB.
Started install.
Same error occurred.
Windows canoot install required files. The file may be corrupt or missing. Make sure all files required for installation are available, and restart the installation. Error code: 0x80070017
I will see if I have another DVD. It could be my burner. It could be my ISO. I have other versions I can download and attempt to install but I have technically tried this already.
Do you think my error still has to do with the specific issues of this model of laptop? -
Thank you for those updates and for being so thorough about this.
At least the problem is not what I thought it was (that either the iSSD or the main disk had not been converted to MBR).
I suppose it is possible that there are issues with the ISO or the burner, but there could also be something else going on we haven't realized yet. You can try with another ISO.
You could also try installing from a USB stick, just to see if it will complete copying files. Windows Setup will almost certainly put the BCD store (boot files) on the iSSD and fail to boot. You can copy the BCD to the main disk afterwards or create a new BCD as described in posts #1 and #2.
Something else I would try: Disconnect the second hard disk before installing. The disk numbers keep changing between iterations (we've seen that before) and this would be one less disk to confuse Windows Setup.
And run a disk test on the disk you are installing to before the next install. There might be bad sectors where Setup is trying to write files, which could cause exactly the kind of error you get.
In DISKPART, you could try CLEAN, CONVERT GPT, CONVERT MBR (ie convert back to GPT, then back to MBR) to see if that helps flush out gremlins that might be hiding in the partition table or boot sectors. You don't have to set OS Mode Selection=UEFI & CSM OS each time, just leave it at OS Mode Selection=CSM OS -- as long as you are able to boot and run DISKPART.
I hope the problem isn't a defect on the iSSD. We've had reports of that from time to time, and it requires a motherboard replacement to fix. But when installing from DVD, Setup shouldn't need to write on the iSSD at all.
I have to run now. Keep us posted on your progress.Last edited: Feb 29, 2016 -
Dannemand, thanks for all your input.
UPDATE: I jumped in and did a couple of your steps rather than one each to see what it specifically was. I unplugged the second hard drive, redid the diskpart steps, and created a proper USB thumb drive boot option and I was able to get Windows 7 installed and patched.
This was certainly an adventure but I'm glad this forum exists and was so detailed in response. Thanks!!!Dannemand likes this. -
Well done! Thank you for the update.
Did you have to copy/move the BCD (boot files) from the small iSSD? When installing from USB, Win7 Setup normally gets confused about the iSSD and thinks it is the boot drive and places the BCD there, causing a boot failure. If you did NOT get this problem, I wonder why.
In any case, great that you got it working
-
No, the iSSD stayed out of the way and the primary hard drive created it's boot partition and used that. Worked exactly as I expected it to. I was watching it and when it didn't come up I counted myself as lucky.
Dannemand likes this. -
Thank you. Interesting. I wonder what the difference is, and why Windows Setup didn't get confused in your case. How are your Boot Priority options in BIOS set?
-
Thanks for this useful post! I had search this for a day with this problem.
-
Hi – I’ve just joined up in the hope that someone can help as I’m getting very frustrated with this. I’ve read through this whole post and not found anyone with a similar issue, if it’s posted elsewhere then please feel free to re-direct me.
I have a NP700ZC-S02UK which originally came pre-loaded with Windows 8. It has a 750gb HDD and an iSSD. Previously I made two USB restore disks, one a bootable one and one not, but I don’t think this worked as one of the previous posts said if it takes a long time to create them then it hasn’t worked and I’ve not been able to get it to work and boot from this – it just stops after a few minutes.
Anyway I previously installed Windows 7 and had it all working except over 6 months it got slower and slower to a point that I think it became corrupted so I decided to wipe it off and install it again.
I’ve followed the instructions detailed on the original post and those specifically on the lower part of page 4 being
“Win8-delivered model: UEFI mode with GPT disk” and then back to step 5 of
“Win7-delivered model: BIOS mode (non-UEFI) with MBR disk”
as I'm installing Windows 7 pro from DVD and have the drive formatted to NTFS and partitioned with Drive 0 Partition 1 as 100MB, and Drive 1 Partition 2 as 7.4GB both marked as primary in the Windows Installation screen that asks “Where do you want to install Windows?”. So far so good I hope.
However, from this screen I cannot get to move forward using the NEXT button. It keeps giving me an error message “The selected partition requires at least 9903 MB free space”. Now I’m sure that 7.4GB is larger than that so that can’t actually be the error. I’ve tried deleting these partitions and using a single partition, or re-creating them using this installation screen (not DOS) but no matter what I do I can’t seem to get past this screen.
In one of my initial attempts I could see the iSSD drive in this list but this has since disappeared – or I may have deleted it so isn’t visible now – I don’t know if this is relevant to anyone’s assistance.
I've tried this several times over now and am not getting anywhere, I've tried searhing for a solution but this post seems to be by far the best and most relevant I've found. Any suggestions or help would be much appreciated.
On a separate note is there anywhere I can download or regenerate the recovery USB drive? -
Hi @Skirat01, welcome to NBR.
I just saw your post, and unfortunately I am heading out for rest of the day. I'll study it more carefully when I come back tomorrow.
Just quickly: If you are installing from DVD and you see two drives (disks) in Windows Setup, then one of them is certain to be the iSSD, most likely the 7.4GB one. That is NOT where you want to install Windows.
Did you delete all partitions on the 750GB main disk? You don't have to if you want to preserve data, but at least format the partition where you previously had Windows installed, so that you get a clean installation.
If you are NOT concerned about preserving data, I suggest you delete all partitions on the main disk -- or use the DISKPART commands in the install guide you used ( here) which will wipe it completely.
Also, make sure to study the last few pages of this thread (if you haven't already) for details on correct BIOS settings. -
Thanks Dannemand
-I've tried changing BIOS and it's set correctly to the older CSM OS option
-I did have 2 drives visible but now only one - even when there was 2 visible I guessed which was which and was trying to install in the right place
-the 7.4GB dive is part of the 7.5GB HDD as the 7.4GB plus 100Mb partition is the total of 7.5GB
-I've given up preserving any data - trying to get a clean install that should be stable so I've used the DISKPART commands as per others instructions
-I've read the whole thread as I try not to ask the same questions again
hence why I'm not struggling as I've tried all the suggestions so fart - Thanks for the replay and look forward to any further suggestions -
I gathered that you had done much homework in advance, which is great!
Here is what I suggest:
1) Use DISKPART commands to wipe BOTH of the listed disks and convert them to MBR. Just to be sure. Posts in the last few pages cover that.
2) In Windows Setup, ignore the small iSSD altogether (7.4GB). If it has a 100MB partition on it, it's because of a previous (failed) attempt to install Windows there -- possibly caused by installing from USB. Step (1) should wipe that. When you install from DVD, Windows Setup should see the iSSD as disk #1 so it won't be confused.
3) In Windows Setup, create a Partition of the desired size on the main disk (should be disk #0). 50GB is plenty for Windows, but some people prefer more to make room for games etc. If you want to use the entire disk as one big Windows partition, don't create any partitions at all. In any case, do NOT create create a 100MB partition, Setup will do that by itself.
4) In windows Setup, select the partition you created as destination and let Setup do its work. If you chose NOT to create a partition (use the entire disk) just select the free space as destination.
5) Just follow the steps in the install guide ( here post #40 in this thread).
I hope that helps. If it still won't complete, something else is wrong, which requires further investigation.
I really have to go now... -
Having read your response several times I've figured that I'm confusing the number 7.5GB with 750GB - I have a 750GB HDD (unlike a lot who have 1TB). The 7.5GB is actually the iSSD as you said so thanks for getting me straight on that.
I've had another look and using DISKPART and LIST DISC and I get the response of:
Disk 0 Status=Online Size=7641 Mb Free=7639 MB
This leads me to think that my Disk 0 is the iSSD - therefore I can't see/access the HDD - assuming my logic is correct I've been back into the BIOS and I only have one SATA device in the "SysInfo" screen which is the CDDVDW drive and no HDD in the "Boot Device Priority" list.
Does this mean that the HDD has failed? or could it be that last time I was installing windows 7 and using the SWupdate tool that it was updating the BIOS and has corrupted that or something similar? -
Update post above:
When I start laptop when it's been off for a bit in the BIOS I have a SATA Port 1 reporting a device ST100LM024 HM-M101MBB (SATA Port 2 is the DVD drive)
After winodows 7 installation setup starts we get to the point I described above where it doesn't show in the Windows Installation screen that asks “Where do you want to install Windows?". I have used shift F10 then DISKPART and LIST DISC command to check with the results described above - no HDD showing.
When I re-boot and go into the BIOS it no longer shows up on SATA 1.
If I turn the laptop off and wait a bit then start again it shows in the BIOS again but disappears when loading windows.
Hope this helps with any suggestions - thanks -
Hi again @Skirat1. Thank you for those updates.
I am glad you got your iSSD sorted out. It sounds like you might have tried to install on that one previously, which would indeed have failed.
There are a few possible reasons why your main HDD (the 750GB disk) doesn't show up in Windows Setup. The most likely is that the disk is partitioned using so-called GPT layout, which is used for UEFI installations, but does NOT work for legacy BIOS installations.
Your computer was delivered with Win8, which is always installed in UEFI mode from factory, and therefore the disk was GPT from factory. When you installed Win7 the first time, you probably stayed in UEFI mode, and hence the disk remained GPT.
For Samsung computers, we recommend installing Win7 in legacy BIOS mode ( OS Mode Selection=CSM OS) which requires converting the disk to MBR. But sometimes Windows Setup cannot even see the disk if you switch to CSM mode while the disk is still GPT, so converting it becomes tricky.
That's where I suggest temporarily selecting OS Mode Selection=UEFI & CSM OS before loading Windows Setup. That should help DISKPART see the disk so you can convert it. I also recommend you select the main disk as boot device in BIOS, then press F10 to temporarily select DVD as the boot device to load Windows Setup.
Once the disk is converted to MBR (assuming it shows up in DISKPART) go back into BIOS and set OS Mode Selection=CSM OS before reloading Windows Setup and actually installing Windows.
It is exactly the same procedure as I recommended in this post on the previous page of this thread (although that member's problem was different from yours).
To further increase the chance that everything will behave correctly, you can reset your BIOS to default settings (F9 on the BIOS screen) before you start this whole procedure. After that, change BIOS settings exactly as described in that post I just linked (again, on the previous page of this thread) and follow the steps there.
There are other possible causes, including the so-called NVRAM corruption you mention -- which unfortunately is common on that generation of Samsung laptops, and which is much trickier to solve. But I suggest you start with the above. I'll keep my fingers crossed that that takes care of it.John Ratsey likes this.
GUIDE: How to install Windows 7 or 8 via USB on NP700Z*
Discussion in 'Samsung' started by hanime, Nov 25, 2012.


