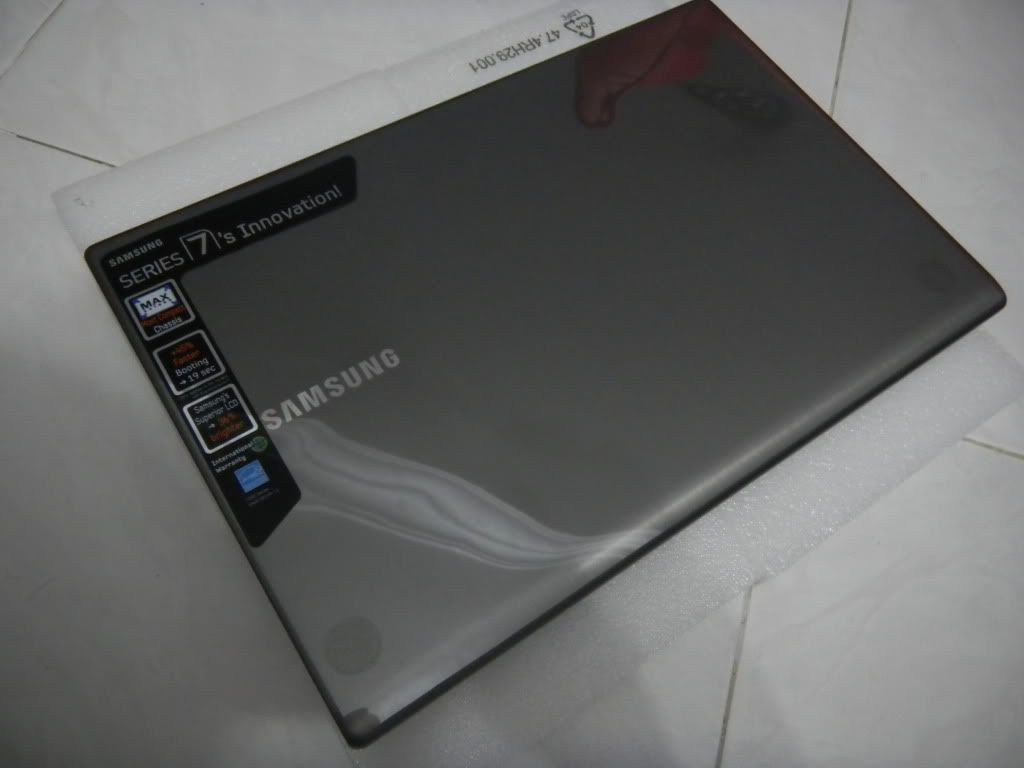
Guide can be used on the Z7 series too, but screw positions may vary.
Beware of easily stripped screws, make sure to use the correct size screwdriver!


1. Remove the screw in red circle, then take off the RAM cover. Beware of the fragile plastic tab of the RAM cover.
2. Remove the 10 screws in the green circles.
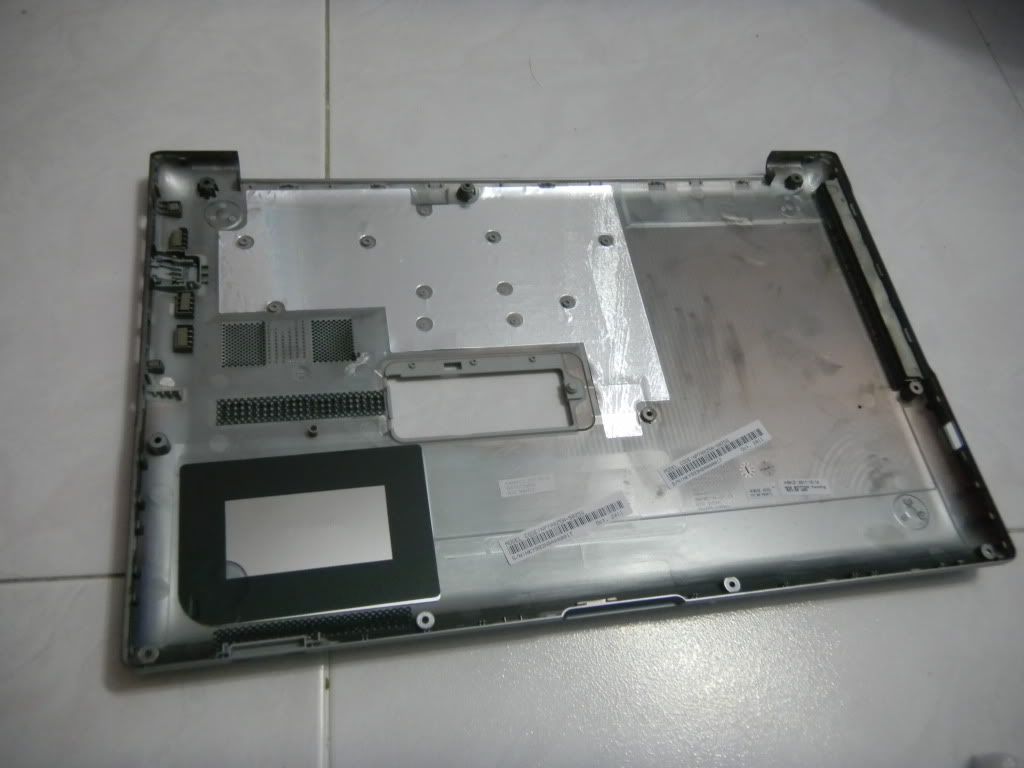
3. Proceed to slide a plastic card to remove the bottom cover. Recommended to start from each side of the hinge, and meet at the trackpad. Caution advised for fragile plastic tabs.

Bottom cover when removed.
-
-


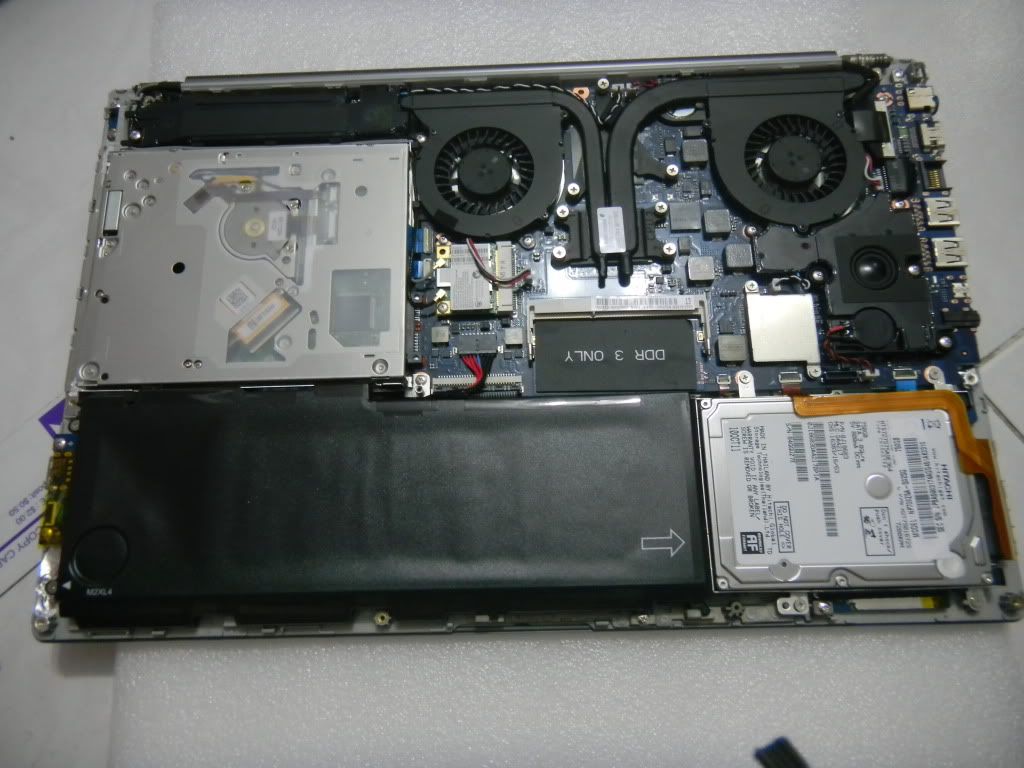
4. Remove the screws in the order shown, from 1 to 11.
5. Unplug the fan cables labelled 12 and 13.
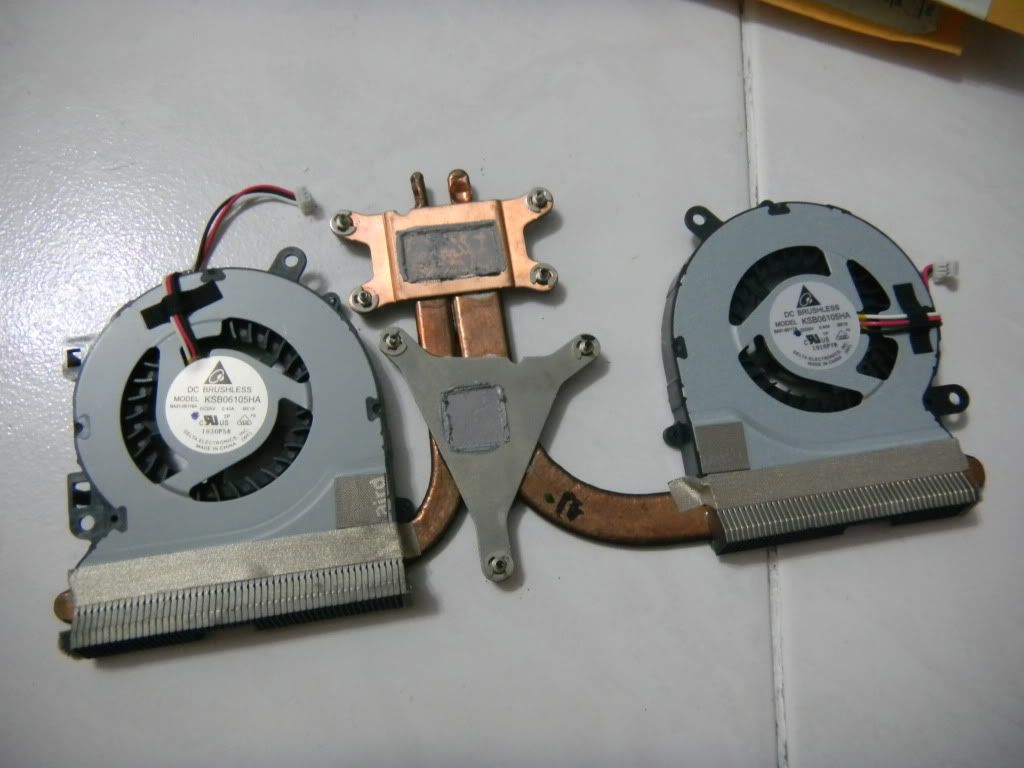
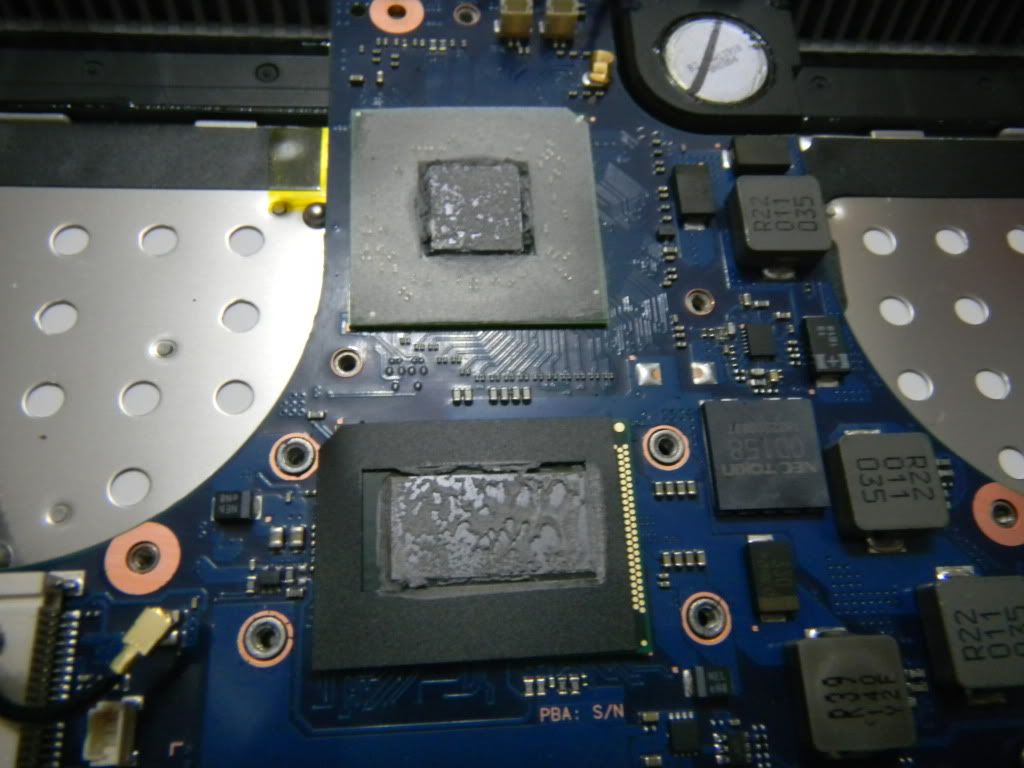
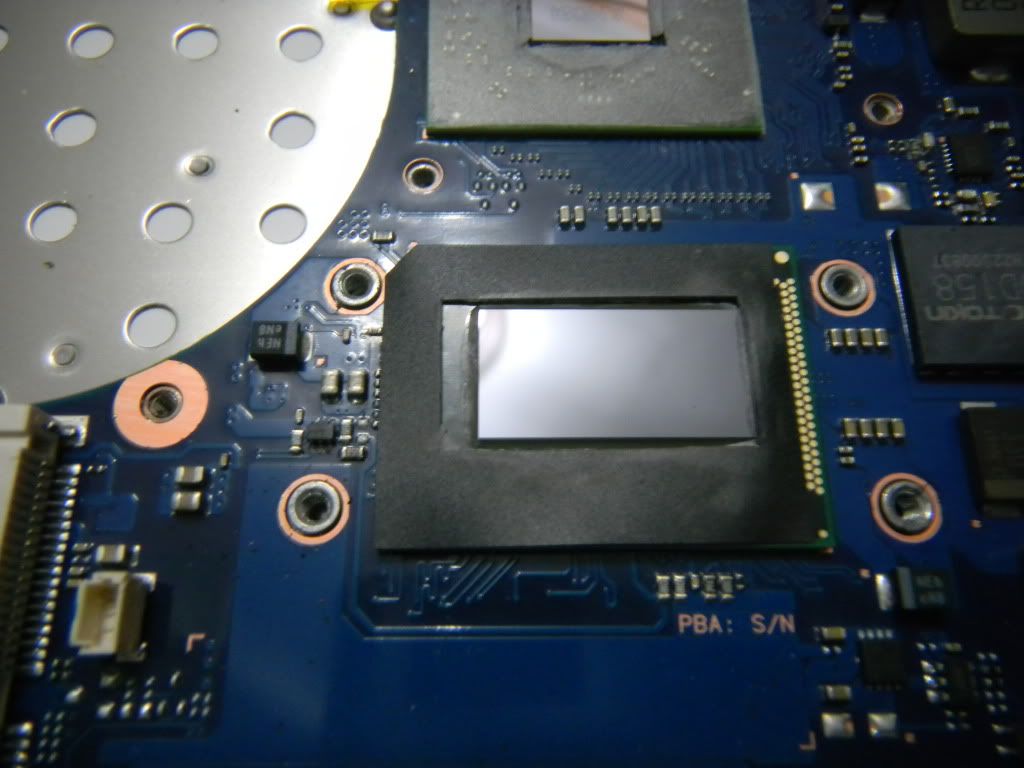
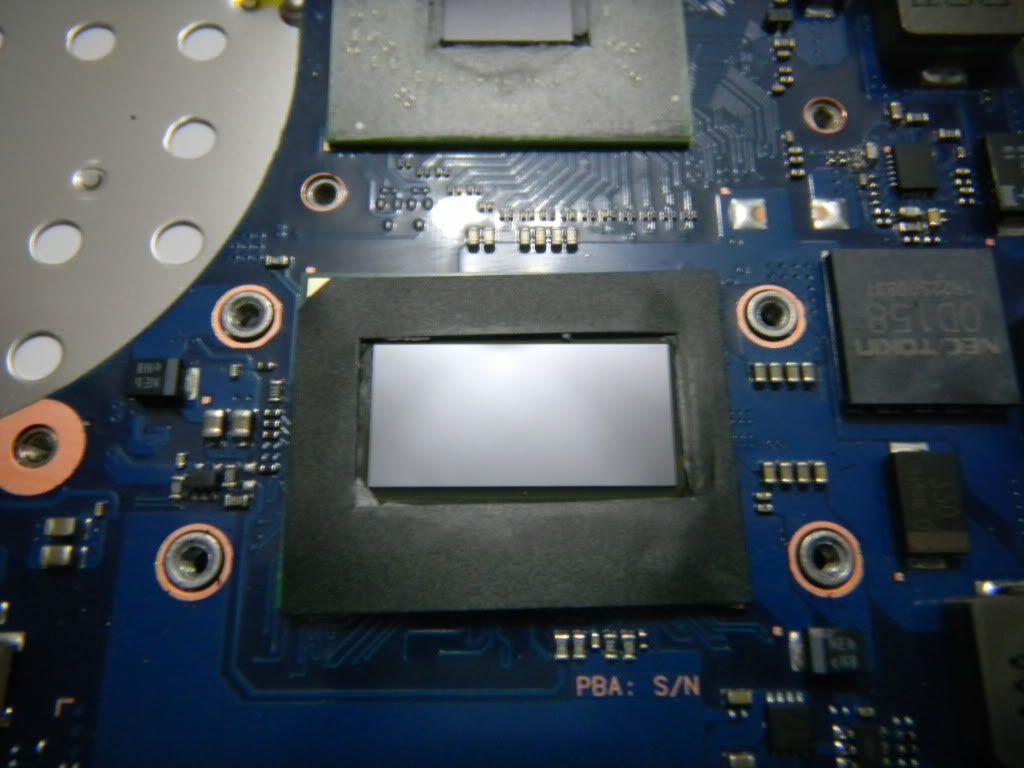
6. Remove the heatsink and thermal paste.

 hohum likes this.
 -

7. As you may have noticed, dear Samsung actually pasted the sticker on the embedded CPU in such a way that it covers a little of the CPU die. You may want to restick if yours exhibit the same issue.

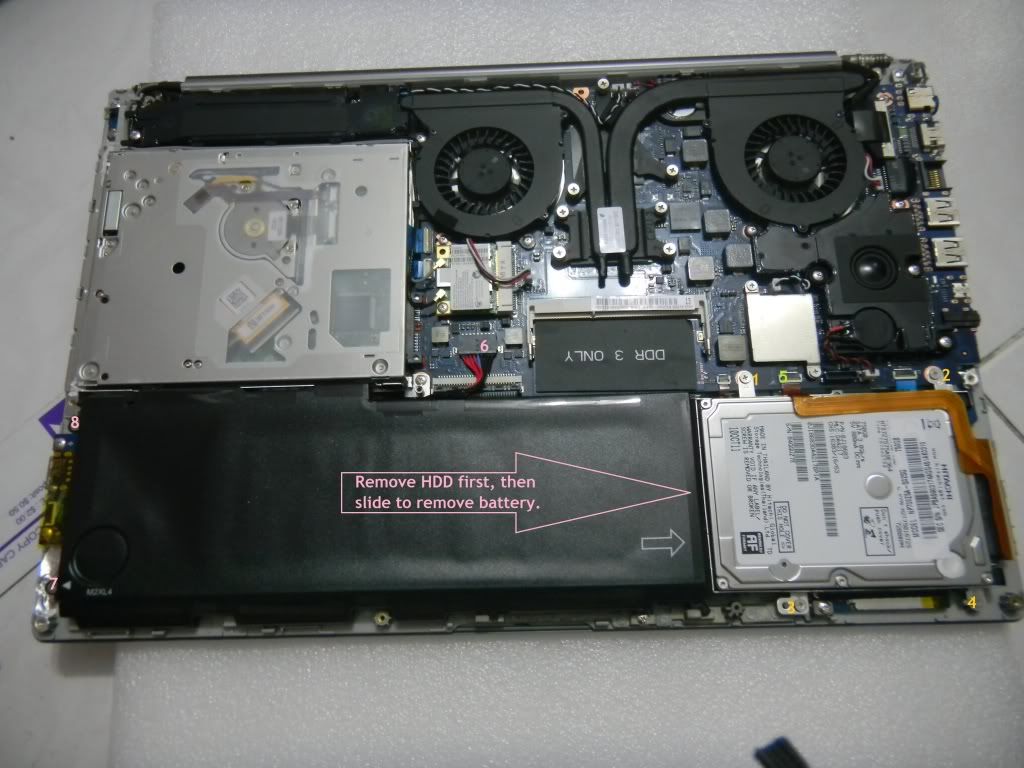
Removal of Hard Disk Drive and Battery

8. Remove 4 screws (labelled 1 to 4 in orange)
9. Disconnect the cable from the ZIF socket. (labelled 5 in green)
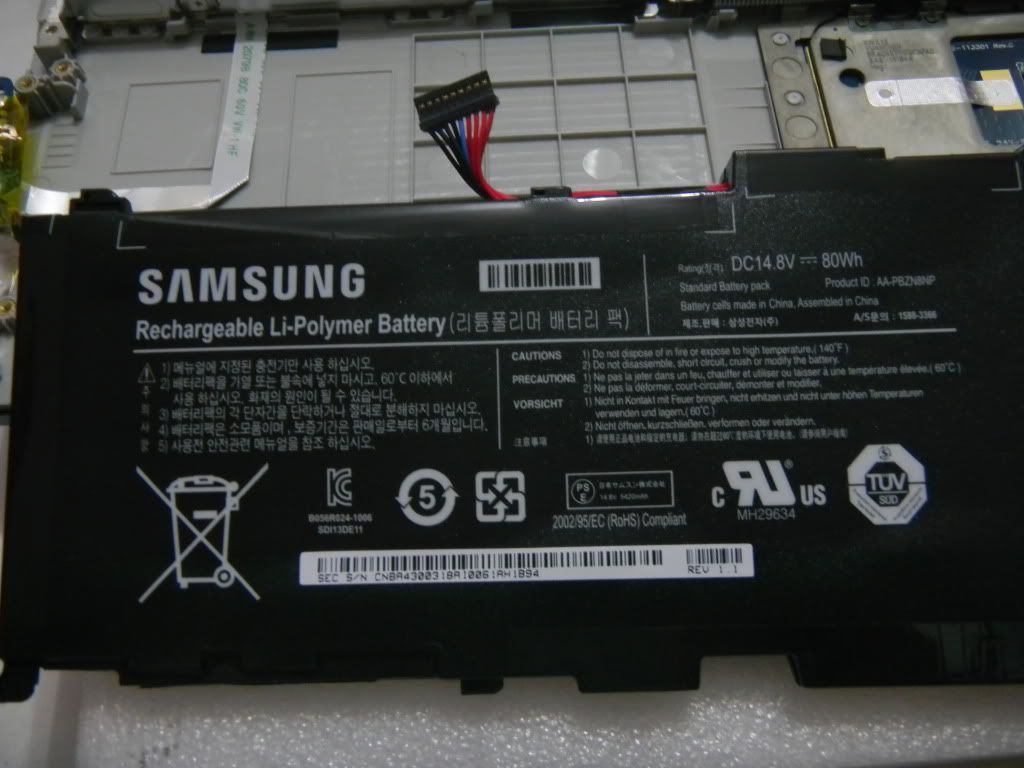
10. Remove battery cable (labelled 6 in pink)
11. Remove 2 screws securing the battery. (labelled 7 and 8 in pink)


Reverse the process to reassemble the notebook.hohum likes this. -
LCD disassembly look here
http://forum.notebookreview.com/sam...isassembled-parts-analysis-6.html#post8588358hohum likes this. -
Reserved for further 4
-
Did you make it?
Sent from BlackBerry using Tapatalk -
Rep points! Thanks yknyong1!!
-
Updated OP
-
Re-sized pics for faster loading times.
-
Guide kicks major butt. Thanks a lot. I just got a NP700 and since the back cover was kind of a PITA to remove with all the tabs I did the SSD replacement, RAM and thermal paste. One question, is only one slot available and the other slot under the keyboard or something? I got the Best Buy model and it came with 6GB, the one I removed being a 2GB stick. I put in a 4gb module but would rather have both the same sticks...
-
I am under the impreswion that 4 is saudered and we can only change the one.
Sent from my ADR6400L using Tapatalk -
Only 4GB is replaceable. The other 4GB is soldered on.
Anyway it does not really matter what kind of ram you put in as long as it boots. Intel does have Flex memory technology now.
Check this for pictures
http://forum.notebookreview.com/sam...nos-np700z5a-disassembled-parts-analysis.html -
Any pic updates yknyong1?
-
There are some new ones. Will upload more.
-
would it be possible to easily replace the wifi card?
I've read abt wifi issues with the stock broadcom card -- possibly replace with intel 6230 card[?] -
Yes, as long as you can get the bottom cover off.
-
Is the CPU soldered on, or can it be replaced
-
Soldered on.
-
I'm planning to get the 7 and wanted to know how the SSD is working with the 8GB of ExpressCache?
If my information is correct, the 8GB of Cache is soldered onto the motherboard so with the replacement of the HDD, ExpressCache would still function along with the SSD. Correct? -
Will still function. Follow this guide.
http://forum.notebookreview.com/sam...ache-i-want-my-expresscache-back-edition.html -
Is it enough to remove the bottom part if I want to replace the harddrive? Or do I need to remove the heatsinks and all the other stuff in this guide?
-
Just remove the bottom cover and you have access to the HDD. There is no need to remove the heatsink unless you want to replace the thermal compound.
-
How are the temperatures with the stock compound and with the one you added?? Is it worth it to change it??
-
I used ICD24, difference from stock - ~5C.
-
Thank you.
Oh so only 5 degrees is not much. I think I won't risk it then. If it were 10 degrees maybe...
Can we overclock the 6750M a little with the temps it has?? -
yknyong1, thank you for your pictures.
I am wondering if it is possible to add a second HDD/SSD via a 2nd HDD caddy. Do you know the height of the optical drive? I would like to know if I could use a normal slimline caddy or if I would need an ultra-slimline caddy. -
The height is 9.5mm. People did say the Newmodeus caddy can work.
-
The screws on the bottom require a 2.4mm Phillips screwdriver.
My first screw came out using a 2.0mm Phillips... Unfortunately, the darn 2.0mm nearly stripped two of my screw heads before I realized it was the wrong size and I just got lucky with the first one.
Anyone know where I can get two replacement screws? What size are these screws? (The stripped ones make me nervous.) -
The screw size seems unique to Samsung. Do not put the stripped screws in. I stripped one and due to the good quality of the screws, a notch is very hard to create to retrieve the stuck screw. Just screw the other screws that are fine back first, leaving the two corners at the palmrest side empty while you source for screws.
-
Some more detailed notes from replacing my HDD with an SSD:
1) Use a 2.4mm Phillips head screw driver for case screws. If the screw isn't seating correctly, don't force it, or you'll strip the heads! The screw notches are very deep -- if it doesn't feel like your screw driver is seating deeply, you're using the wrong size.
2) It isn't necessary to remove the RAM cover before taking the case off. It IS necessary to remove the RAM cover screw. (BTW, the RAM cover has 4 plastic tabs holding it in place. To remove it, lift at the notch (the plastic will bend) and slide in the direction of the arrow. You will now see two tabs that are free. The remaining tabs are tension tabs, which you will feel in the middle of the RAM plate. These require an uncomfortable amount of force to free. If you're taking the case off just leave it on.)
3) Be sure to remove the faux (or real) SD card from the SD card reader. The card will hang the case up if you try to remove it with it in.
4) To pop the case off, after the screws are all out, insert a plastic credit card or gift card between the plastic and metal border near the hinge. When you've popped a tab, you can gently pull the plastic away from the metal a little to make sure the tab doesn't pop back in. Once I got started from the hinge, I turned the laptop perpendicular to the ground on my lap and held on to the monitor part. I then kept sliding the credit card from the hinge around the corner towards touchpad toward other hinge, all the while gently pulling the plastic away. You don't have to push the card in too deep as I think all of the tabs are near the top (ie, towards the sky if the laptop were sitting normally.)
5) The hard drive bracket can be removed from the laptop using a 3.0mm Phillips. The HDD is attached to the bracket also using a 3.0mm Phillips screw driver.
6) To open the HDD ZIF socket, lift the outside of the BLACK part. The white part doesn't move. Use your finger nail (websites say to use a screwdriver. Don't bother, it's much harder.)
7) After the bracket has been unscrewed from the laptop (silver screws), unscrewing the HDD from the bracket is really hard (the black screws are tight.) Remove the cable from the HDD before attempting to unscrew it from the bracket as it will get in your way and you may accidentally damage it.
8) To close the ZIF socket, just insert the cable up to the white line then push down on the black part until it lies flat.
Good luck. -
Is there a way to install ExpressCache to a NP700Z5B-W01UB that doesn't includes it?
-
Not possible. It is soldered on.
-
Hi, i just bought this laptop and was thinking of upgrading the ram to 8gb. But im having problems opening the plastic holding the RAM....could u give me some tips? im afraid of cracking the plastic
")
-
Has anyone found a way to take out a key? one of mine is nearly totally sunk and I d like to take it out to see whats wrong with the spring under it.
-
Speaking of, the Envy 15 is spec'd out to 8GB capacity over two DIMMS, both accessible to the user. People have attempted and been successful in mounting 16GB by adding two 8GB chips.
The S7 line is also spec'd out to 8GB, with 4GB soldered on and a user-accessible DIMM slot pre-loaded with a 2 or 4 GB chip.
Has anyone tried an 8 GB chip on the S7 to bring it up to 12GB successfully? -
updated to 12GB last week on my S7 - no problems.
Flex the plastic door lengthwise to free one of the 2 notches that hold the door in place. -
okey so all i need to do is pull the plastic "door" towards me? or do i need to slide it to the side first then pull it towards me?
-
slide it first, then twist/flex it a bit until one notch is freed.
There are 4 notches - two that are visible on one end after you slide it and each lengthwise-side of the door has a single notch. Flex/twist until one of the 2 side notches is free; the notch on the other side does nothing once the other side is free. -
That is because there are two tension tabs lengthwise. You need to pull out the cover in a swift action, don't be afraid to exert some force as the tabs won't break.
-
Thanks for the guide. I was looking in to replacing the HDD for a SSD and in the process thought of moving the HDD to the dvd-drive. Does this have the same S-ATA connection as the HDD and what would be the best way to remove/replace the drive. I read about the drive-bracket earlier in this topic.
Thanks! -
Yes i would love to do that 2....my ambitions are kinda lower tho. i m getting a 64gb samsung 830($110) since i dont have need for large amounts of ssd storage, juz for the windows installation. i want to put that into the ODD, but 42$ for a caddy is kinda steep, esp as you can get9-10$ good quality caddys on ebay for the MBP. Any one of those fit the chronos? I am getting my laptop tomorrow, until then I cant physically check the drive size. But a generic size for the caddy makes sense, i think both the MBP/my thinkpad use the same size caddy.
How about this?
http://www.ebay.com/itm/2nd-SATA-HD...C_Drives_Storage_Internal&hash=item1c23dc2d8e -
You will probably need to remove the plastic bezel to get it to fit internally, but it's worth a try.
John -
I am trying to swap out my HDD for an SSD in my 7 series, but ran into a problem as one of the screws would not come out. I ended up stripping the screw, and have tried multiple ways to get it out including: using superglue with a screwdriver, using a "screw extractor" bit.
None of the above worked, and I even called a local computer store and they just told me to go to canadian tire and get one of the screw extractors. I am at a loss right now, and very frustrated. Does anyone have any recommendations on who i could contact or what to do to get this stupid screw removed? -
You have to create a notch and then use a flat-head screwdriver to take that stripped screw out.
And screw extractors are too large for notebook screws.
I encountered this, and that was why I warned against stripped screws in the first post. -
Not true. There are people on this forum who have used them to remove stripped screws in their notebooks. Forming a slot in a screw with a recessed head won't be easy. Another method that may be worth trying would be to drill a shallow hole close to the edge of the screw head, putting a small screwdriver or nail into the hole at a fairly flat angle and pointing in the direction to loosen the screw and then giving it a tap with a small hammer.
John -
I tried this.works like a dream. 16$.
SATA 2nd HDD Hard Drive Caddy for 9.5mm Universal CD / DVD-ROM Optical Bay
Link: http://www.ebay.com/itm/SATA-2nd-HD...niversal-CD-DVD-ROM-Optical-Bay-/290636895162
Sent from my Galaxy Nexus -
stripped screws
I'm a machinist: you will have to drill the screw head. Find a dirll bit the size of the screw stem, you can do this by hand, and go slow. I usually use a vacuum to suck up derbri while dilling. you are not trying to drill the whole screw but just the junction of the head to the body. keep stopping and checking with flashlight and don;t expect perfection, just that you can remove the back cover. after remove what is left of the screw stem with pliers of small vise grip. good luck.
I have a old box of ex-Dell laptop screws i took/take off of old laptops. most computer repair store can match any screw you bring. I like the black dell screws. NEVER be reckless with screws in electronics. get the correct $5-10 screwdriver its worth not wasting 1-2hr reapiring what you F$#@%UP
This disassembly thread rocks yknyong1! -
Hi, Thank you very much for your Disassembly Guide. I had a question and was hoping you could help. 1. Can this laptop ram be upgraded to either 12gb or 16gb? 2. If so who is the manufacturer of the current RAM and what is the spec? e.g. PC3-10600/DDR3-1333 or PC3-12800/DDR3-1600 etc. Thank you in advance!
-
Thanks for your compliment, hope many others will find this useful.
@ravik: Maximum 12GB RAM. 4GB soldered + 8GB stick. -
From further up this thread, 4GB is soldered so there is only one slot. That gives 12GB as your limit. I wouldn't worry about precisely matching the RAM. Any modern BIOS does a good job in figuring out the fastest speed supported by all the RAM.
John
Samsung Series 7 Chronos NP700Z5A Disassembly Guide
Discussion in 'Samsung' started by yknyong1, Dec 16, 2011.