Could be the HS adjustment and screwing down may wasn't optimal. See also above.
-
-
So you are suggesting there might not be good enough pressure/contact on the GPU side of the HS? How would I try resolve it? (without trying to mend the HS itself) put a bit more paste?
-
Just to piggyback on a related note, what kind of paper and paste do you need to use to test the level/evenness of the CPU/GPU and the heatsink?
-
I know Fujifilm Prescale has been suggested but that stuff doesn't come cheap.
edit: I see you have pretty much the exact same system I do, what CPU/GPU temps do you get under load? -
Currently undervolted my core/cache at -140.6 mV. I have yet to repaste because the Thermal Grizzly Kryonaut and Conductonaut (I bought two just so I can start conservatively with Kryonaut) won't be arriving for a week more.
Core temps are around 50 to 52°C (just 1 to 3°C differentials), core package indicates it's at 51°C, and the GPU is at 50°C. Ambient temperature is 24°C with the laptop lying flat on a wooden dining table. All of this is while I'm just browsing the forums.
Also, holy crap. The Fujifilm Prescale costs $250 for the sample pack over Amazon Canada.
EDIT: Mind sharing your temps and mods that you've done so far? -
Open up and see how paste was spread. Then put more or less paste depending on the results.
-
I doubt its humanly possible (at the very least for me) to put less paste than I did I think, so it should probably be more thenLast edited: Oct 5, 2017
-
My original intention was to repaste with Conductonaut since temps on stock paste made me wanna cry, but I decided to be a bit more conservative at first and go with Kryonaut. Thats how I learned that I have an uneven heatsink problem, with two cores being about 15C higher than the other, therefore liquid metal was not an option any more. I have since repasted with IC Diamond (temporary solution, but worked ok-ish) and just recently again with Phobya NanoGrease Extreme. Now with -124.0 mV x40 on all cores CPU temps are between 75-80C under heavy load (AIDA64 CPU+FPU+GPU).
GPU is undervolted to 0.95V at 1951MHz, temps were about 80-87 after several hours of heavy gaming with IC Diamond, now with Phobya it's wild 90C and constant throttling after like a minute, which (I hope) is most likely due to incorrect application on my part.
Would be interesting to know what results you get once you repaste, good luck! -
Will LM be really not an option? I thought it was a major design flaw, but some people here used LM successfully despite knowing the fact. I'm going the same way as you, trying Kryonaut first before going with Conductonaut. I'm just trying to makes sense how big of a mishap it can be if I proceed to use LM with an uneven CPU/GPU-HS.
Also, why didn't you undervolt further? I can't quite tell if I've undervolted too much already since I'm only expecting a BSoD for that, and I haven't gotten any yet at my current levels.I'm new at OCing, and I've only done some undervolting with the core/cache/iGPU. Regarding the multiplier, can you simplify it for me please? The multiplier for my TS profile is still set at 29 (default one I believe). My stock temps are bad as you can see here. -
Wrong. Should be 3.9 GHz and (4 cores up to 3.5 GHz).
-
I see. I just assumed it was the default as I haven't touched it at all when I used TS. Do I just set the multiplier to 39(?), or do I have to change something in the FIVR as well?
OT: Thanks for always helping. -
I have only received comments that I'm in for some trouble if I try going LM with improper contact/pressure between the dies and heatsink, both here and irl, so I'd rather not risk it personally, no performance gain is worth potentially bricking the whole thing imo.
Regarding the multipliers- basically x100 gives you the clock speed you will get, 29 is the default one, you don't need to mess with it, what you might want to do (once you repaste) is go to the FIVR tab in TS and set Turbo Ratio Limits there, that would essentially be the CPU clock you are going to get if no form of throttling occurs. I actually found myself running into TDP throttling once thermal issues were resolved, but you can alter TDP values both directly in BIOS as well as in TS.
I didn't undervolt any further because going lower with my current clock speed results in a crash. -
Wait are you talking about the default non-boost multiplier? Or the ones in FIVR?
-
In main TS window 39. FIVR (1 core 39 - 2 core 37, 3 core 36 and 35 for 4 cores (default). In TPL put at least 100 for all power limits. Then run tests again.
-
I currently have 29 default and 40 for all core combinations in FIVR, during tests the clock is stable, what am I looking to achieve with changing the default 29? Also 100 for all power limits? So both in package power, as well as primary plane? what about TDP level control?
-
All as in the 3 Package Power Limits and 2 Primary Plane Power Limits?
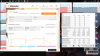
Here are my current TPL/Profile settings:
![[IMG]](images/storyImages/LKEFDP5.png)
Am I correct to check those 4 boxes in the profile page?
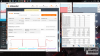
EDIT: I forgot to post the picture with the proposed changes.
![[IMG]](images/storyImages/T8dCIXC.png)
-
Put all power limits to at least 100. A limit is only a limit. Change also Windoze power plan to high performance. If you have put 40 for everything, you should see 40x in stress tests.
-
Yeah thats what I get, 39xx MHz, that's why I was wondering what will the 29 to 39 change do. I tried running a test with the settings you suggested, lovely 60-63C but the clock is 500MHz lower
-
29x is the base clock frequency for 7820hk. Aka no turbo Boost.
-
I was under impression that if there is no throttling going on turbo boost is essentially "always on" anyway, is that not the case?
-
I'ts also quite funny that turbo BOOST in this case is a downclock
-
With high enough power limits, shouldn’t clocks go below max turbo Boost in fully load. Run tests or benchmarks and follow clocks, temp and Cpu Package Power.
-
After adjusting the TPL settings and keeping the undervolt (-140.6 mV):
![[IMG]](images/storyImages/noYcxxm.png)
Stress test using AIDA64:
![[IMG]](images/storyImages/iENtdWD.png)
Am I missing something here? Is FID supposed to go down when stress testing?Vasudev likes this. -
I believe that is thermal throttling, and should not happen after you repaste.
-
-
I thought so. I'm learning!

I guess I can't have a definitive notion of my unit until I do some repasting next week. Funnily enough, this last AIDA64 test was different than the first two I did. The fans weren't spinning loudly.Vasudev likes this. -
I use scotch and if you buy the flat copper shim it should be good to go without modification.
-
Normally you'd shave off a good ~2mm and for the 15R3 ~1mm more than the 17R4.
CheersPete Light, Vasudev and Vaeron like this. -
Hey iunlock! Thanks for clarifying things.
Can this be used? I just searched for "aluminum heatsink" over Amazon Canada. Also, I'm assuming you used a metal file. Is that the right tool for the heatsink? -
Most of those heat sinks will come at a standard size and will need to be shaved down. I use a sander belt at the shop to shave it down. You could use a metal file as well. Also, I tend to opt for the sinks that are walled as oppose to the cross cut ones due to the walls providing more surface area for heat dissipation. Just personal preference.Vasudev likes this.
-
I see. What’s the optimal size of the heatsink?
-
Repaste with Noctua NT-H1, replaced thermal pads with Arctic SILICONE based thermal pads 6W/Mk.
Marked the bald patches on the heatsink plates and lapped then polished these patches, no bending of any part of the heatsink.
Initial temperatures as received and stressed with standard clock speed (no overclock)...#O 98°, #1 77°, #2 93°, #3 72°, GPU 43°
Resulting in what I'd consider to be reasonable temperature but still slightly concerned with the Core differentials so when I have more time, I'll lap those bald patches further, hopefully all four cores will max below 70° under stress.
-
2. Use Aluminium for sure. Thermal properties of this metal lend itself to this situation (from @iunlock) more than copper.
3. Use Kyronaut thermal paste not a pad (again down to thermal property of aluminium, you want a high conductivity paste)
4. Don't bother too much with Fujipoly if you can't find it. It's hard to work with, can only be used once per application and is not squishy which has lots of other advantages and in my opinion lends itself more to this situation
20mm x 20mm x <=4mm for the PCH
Nope its worse and as @iunlock said in another post, you'll need the walls for the best results (remember to apply the walls horizontally as well). Cut down the aluminium heatsink, it's worth it
Classic heatsink rebalance needed I'm afraid...
Try taking it apart, cleaning up the paste and putting a thin artic, squishy 0.5mm thermal pad on the CPU die and screw the heatsink back down as you would normally. Then take it apart again and I can predict now what you'll see: Greater Imprints on the lower / south side of the CPU die (quite evenly from left to right) with almost no imprint on the north side (again, across the left to right).
Note when you do this, so you don't interfere with results, don't apply any pressure to the middle of the heatsink over the die at any time during the test.
Try fixing this yourself but if you get real stuck PM me -
I guess I’ll delay the PCH mod since I haven’t ordered any of the materials needed. Amazing reply, @Pete Light. Thank you.
Pete Light likes this. -
Hey guys,
I'm having a reseller try the fujipoly pads on my 17r4 with the 7820hk and gtx 1080 I sent them the recommended
3x1mm pads and 3x.5mm based off the image from the first page.
My question is what pad thickness are you using on the motherboard to the left? And for the 1.5 mm parts in image it says to stack the pads, is this optimal? -
I'm just gonna ask this here as well.
Context: It's hard to order Fujipoly thermal pads in Canada, and I just remembered a website called eBay. /facepalm
1) Are sellers there reliable when it comes to thermal pads? They're top-rated (99.1% positive feedback).
2) Will the XR-m version (17.0 W/mK) be better than the X-e version (11.0 W/mK) that was recommended here? -
Attached Files:
-
-
when did you received your system?
did the D P/N 0FRPY8 heatsink come with the system or was it a replacement part?
if it is a replacement part, when did you receive the D P/N 0FRPY8 heatsink?Last edited: Oct 7, 2017 -
No it's not optimal but will make so little difference it doesn't matter. I stacked some of mine...
Asking others what the pad thickness is will not be the correct approach. Others may have done it wrong. Like I said before, stick to the guide and only add pads where it's needed from physical checking the pad after its screwed down. I strongly recommend you dry fit the heatsink first before any paste to get the pads right...
Sent from my SM-G935F using Tapatalk -
It will be higher conductivity but I've used the 17, 14 and 11 and all of them are use once only, a pain in the arse, difficult to work with.
Seriously the Arctic 6w/mK is perfect for this application, squishy (important if you don't get things 100% right which you won't first time for sure), easier to work with and MUCH cheaper!
Sent from my SM-G935F using TapatalkVaeron likes this. -
I got the Fujipoly X-e ones as Arctic was out of stock with their 1.0 mm variants. I'll make sure to use them next time.
-
It was a replacement.... but it was supposedly the newest version of the heatsink according to the place I bought in Singapore.
-
I forgot to metntion I replaced all pads with Arctic too, and honestly I'm not sure if it had any additional benefit on top of the repaste, but they are indeed a breeze to work with.Vaeron likes this.
-
Yeah, I’m probably gonna use Arctic once I need to change the pads. It’s just a matter of stock availability at this point.Vasudev likes this.
-
Repaste, repad and do the PCH mod at once because you won't be opening the PC again after getting unusual thermals down.Vaeron likes this.
-
Yep. That’s the plan. Just waiting on the thermal pads and heatsink right now.Vasudev likes this.
-
My small achievements (after 5 repairs of the unit from Dell)
My config: 6820HK (the same reason Dell is denying me the replacement unit) + GTX1080 + 120GHz 2k display (replaced three times).
What I changed in my unit:
1. I bought at the factory in China newest cooling system (DP/N: 04RFW1). Tripod sells parts at low prices (~ two times lower than on ebay)
2. Replace all thermal pads to Gelid Extreme (They are very soft, but at the same time do not break when installing).
2.5 Made a hybrid system of thermal paste from Thermal Gryzzly Kryonaut placed on the video chip and Thermal Gryzzly Conductonaut placed on the processor.
I'm afraid that over Conductonaut will damage the video chip and the motherboard components
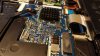
3. Add small radiator on heat pipes.
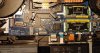
4. A serious modification of the PCH (I used the laser machine to cut a new hole in the front panel) with 5mm in height heatsink.
What are the results I got:
60-65°C on PCH
75-77°C on CPU (4GHz -0.040V)
67-68°C on GPU (~1850MHz Overclocked vBIOS)
after 5 hours of play in owerwatch
Thanks to all who helped me on this forum) After 5 months of suffering I was able to get my system stable and cool operation)
Last edited: Oct 10, 2017iunlock and Pete Light like this. -
Do you have hwinfo capture as proof showing all limit and throttle reasons and all temps, voltage and clock frequencies for CPU, GPU, PCH and SSDs? Claims mean nothing on this forum! Haha
Can you provide an hour benchmark of running BF1 as well with hwinfo screenshot? Overwatch doesn't push the machine enough for me and a lot of othersLast edited: Oct 10, 2017 -
I don't have BF1
Sorry, but the video can not be overclocking at 6820 unit (curve in afterburner don't change anything).
Results of synthetic tests are not impressive... Sad but overclocking potential units on the 6820 is at zero level (stupid gpu power limit)
3DMark default:
Superposition 4k optimized:

Heaven:

But the difference between the CPU cores is 2-3 degrees.

Last edited: Oct 10, 2017wuyungfu likes this. -
Is the SSD heatsink a priority mod? Also, that heat pipe mod seems interesting.
[Alienware 17R4 / 15R3] - Disassembly + Repaste Guide + Results
Discussion in '2015+ Alienware 13 / 15 / 17' started by iunlock, Oct 22, 2016.