Hey everyone, I'm new here and have the M15 R3 with an i7-10750H and the RTX 2070 (max-p, if I needed to elaborate). I just wanted to start a thread on shunt-modding the GPU, as I wanted more performance out of the GPU, as I have thermal headroom and I usually have my laptop plugged in to the power socket, so battery life isn't of concern to me. I've been looking everywhere for a guide for this specific model, but couldn't find one, so this would be helpful for others attempting a shunt mod, too. I'm not very experienced with circuits and resistors, so I'm not exactly sure how I would go about shunt-modding my laptop. I'll try my best to send pictures of the motherboard, but I'd have to do it quite sneakily, since my dad would not be happy if I was opening up my laptop, so it'd be preferable if someone else could send mobo pics. I know that seanwee is super helpful with that kind of stuff, so if you're seeing this, could you help or send a link to a guide if someone has already done this? Thanks so much.
-
-
You can send high-res motherboard shots here or PM me
-
Alright, great. I'll get some pictures as soon as I can.
-
Welp, I got to taking the motherboard out of the system, but the motherboard screws were too tight to take off, any suggestions as to how to get them off?
-
Which screws, the heatsink?
What I ended up doing was taking the motherboard out and placing it onto a firm yet soft surface and pushing down a lot harder than I felt comfortable with doing while having my hand on the opposite side providing pushback so the board wouldnt flex. I was able to get them out that way. -
Yup, the motherboard screws. I tried doing that exact same thing on a towel, and the board flexed a little, so I started panicking and said oh hell no I'm not doing this. Thanks for the advice, I might try again later.
-
Yeah just hold the board and place your fingers directly behind the screw. Be careful since they are super soft and will strip before you know it, so put a lot of force directly down and turn slightly till the pop and break free.
-
Hey guys. I need some help. I have an alienware m15 r3 with the 300hz. I swapped the panel to a 144hz 1080p panel to hopefully get optimus and the ability to switch graphics. It's probably a long shot but can anyone with a 2070 super gpu and the 144hz screen make a copy of their vbios and upload it? I would be very thankful.
-
If anyone is interested, I have a 17 inch 1080p 360hz gsync ips panel and lid assembly for the m17 for sale. Brand new, never used from dell. Pictures attached
Attached Files:
-
-
Does anyone know if there is an aftermarket compatible QHD display for the M17 R3? I have the M17 R3 model with a 2080 super and i9-10980 hk w/ 60Hz 4K display and prefer a faster refresh rate QHD 2560x1440 display or a faster 4K refresh display
Last edited: May 30, 2021shardey likes this. -
Anyone know of a compatible QHD 2560x1440 display for the 2020 M17 R3? I want to change my 4K display, or even a high refresh rate 4K display ?
-
Can anyone upload their 3070 vBIOS for me please?
-
I was just wondering, because Dell replaced my laptop recently with a 2080 super max-q because of overheating issues, if I could flash my vbios with a modded, 150w one, and if anyone knows if that's safe. I was looking at this tool called Mobile TDP Tweaker ( https://github.com/LaneLyng/MobilePascalTDPTweaker). My new laptop is now fine, and my GPU temperatures are rarely above 65 degrees, and the CPU with the power limits removed doesn't thermal throttle.
-
Using an unsigned modded vbios to flash onto the 2080 Super Max-Q with nvflash will not work. Flashing a Max-P vbios will put the card into safe mode. One reliable way to increase the TDP is to shunt mod your laptop. There are many such posts floating around here on how to do that.Papusan and TheMiataFanatic like this.
-
Gotcha, thanks for letting me know that!
-
Also, is it possible for me with a 2080 super max-q to flash it with a Dell AW m17 r3 2080 super max-p vbios? From what I can tell, the amount of vram, memory bandwidth, and cores are all the same, but the only difference is the power limit (which I believe is 150W instead of 105W) and clock speeds on the memory and core. It shouldn't have an issue with the vbios being unsigned, right? I would like to rule out all other options before shunt modding, because that seems like a really treacherous endeavor in itself.
Edit: Oh, I see you have already said that flashing a Max-p bios will put my card into safe mode. Oh well...Last edited: Jul 20, 2021 -
I have noticed that there is an update of BIOS released in 2021.
BIOS update v1.9.2 - date: Jul 30, 2021.
Official info about the update:
- Firmware updates to address the Intel Security Advisory INTEL-SA-00459 (CVE-2020-24507, CVE-2020-8703, CVE-2020-24506, and CVE-2020-24516).
- Firmware updates to address the Intel Security Advisory INTEL-SA-00464 (CVE-2020-24511).
- Firmware updates to address the Intel Security Advisory INTEL-SA-00463 (CVE-2020-12359).
- Firmware updates to address security vulnerabilities.
Link to file:
https://www.dell.com/support/home/e...ode=wt64a&productcode=alienware-m15-r3-laptop -
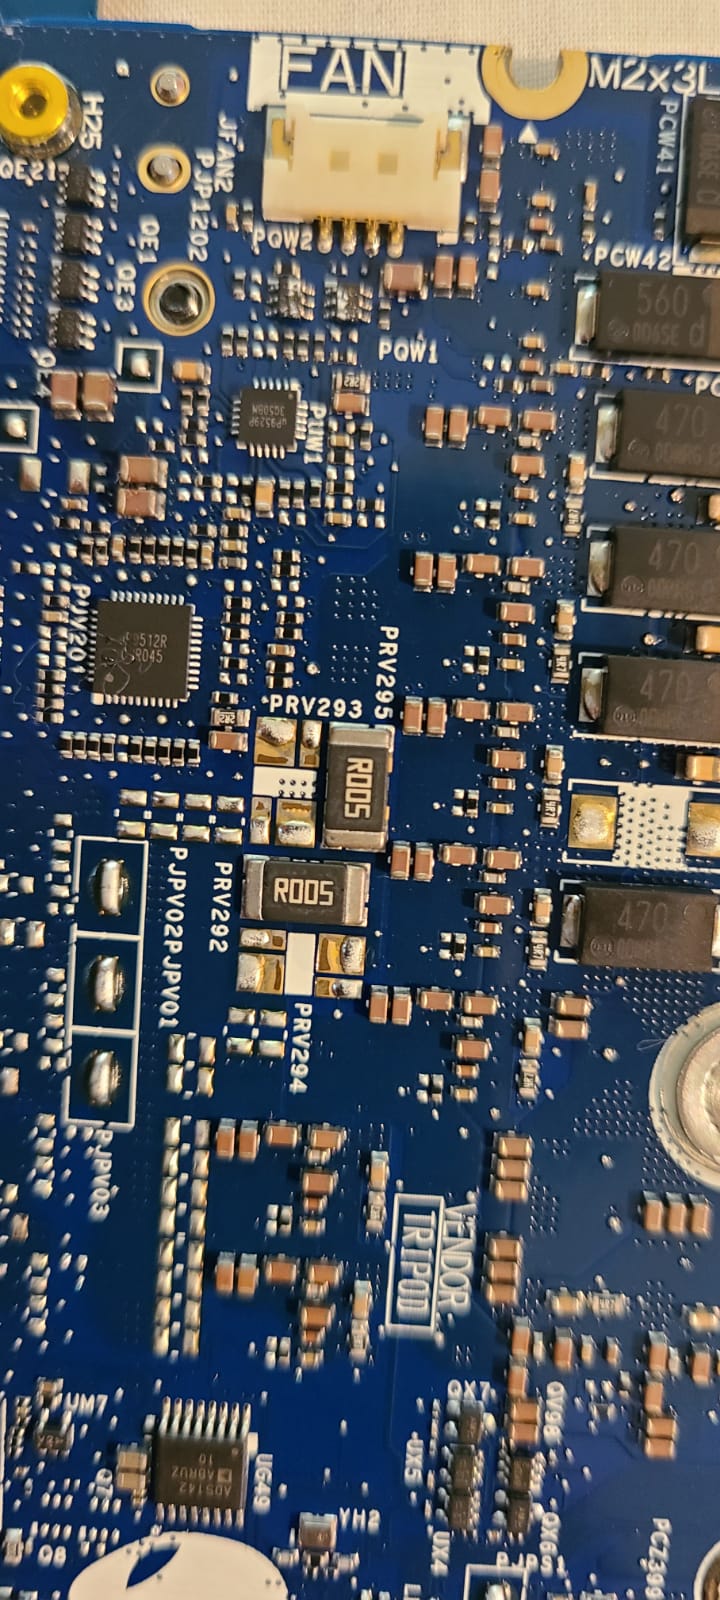
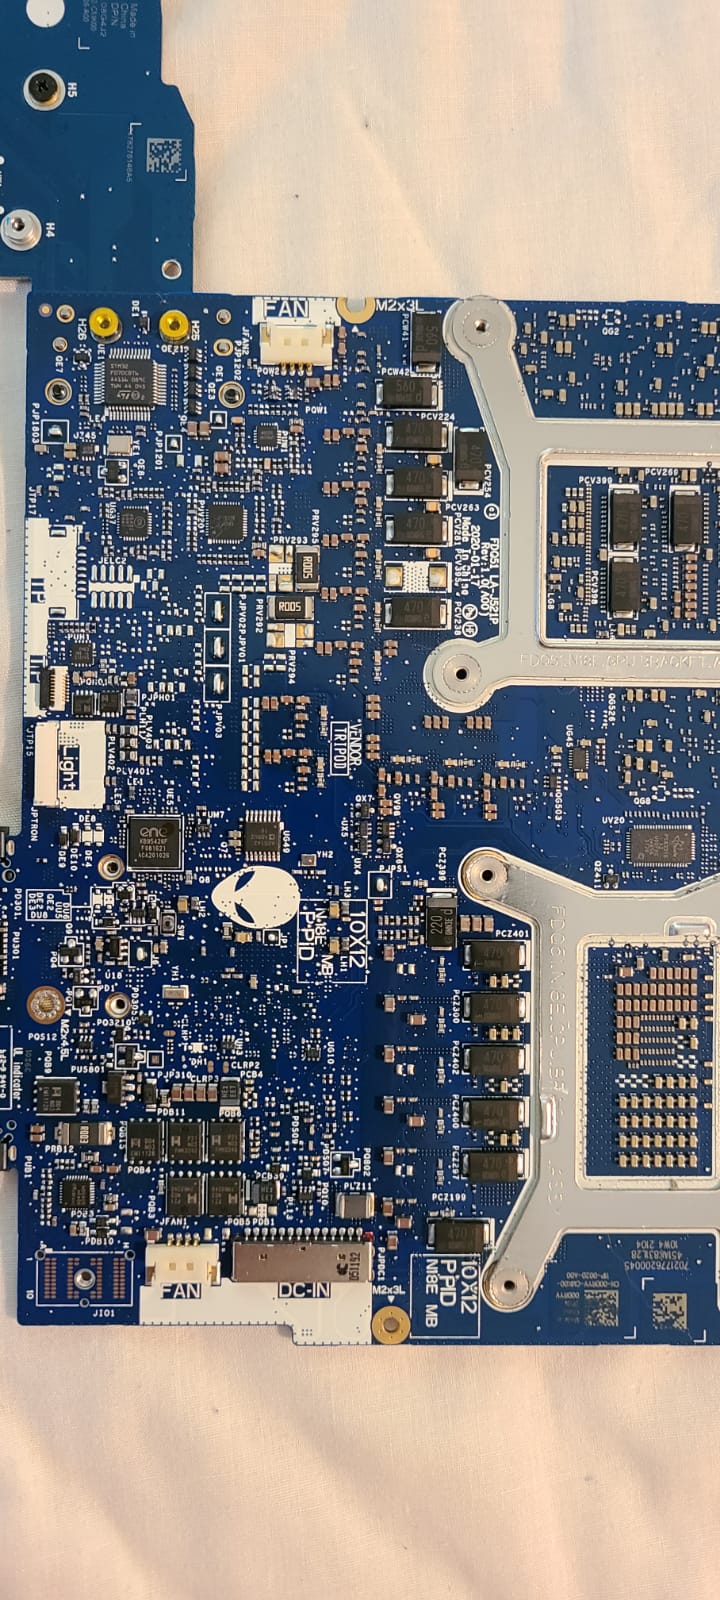
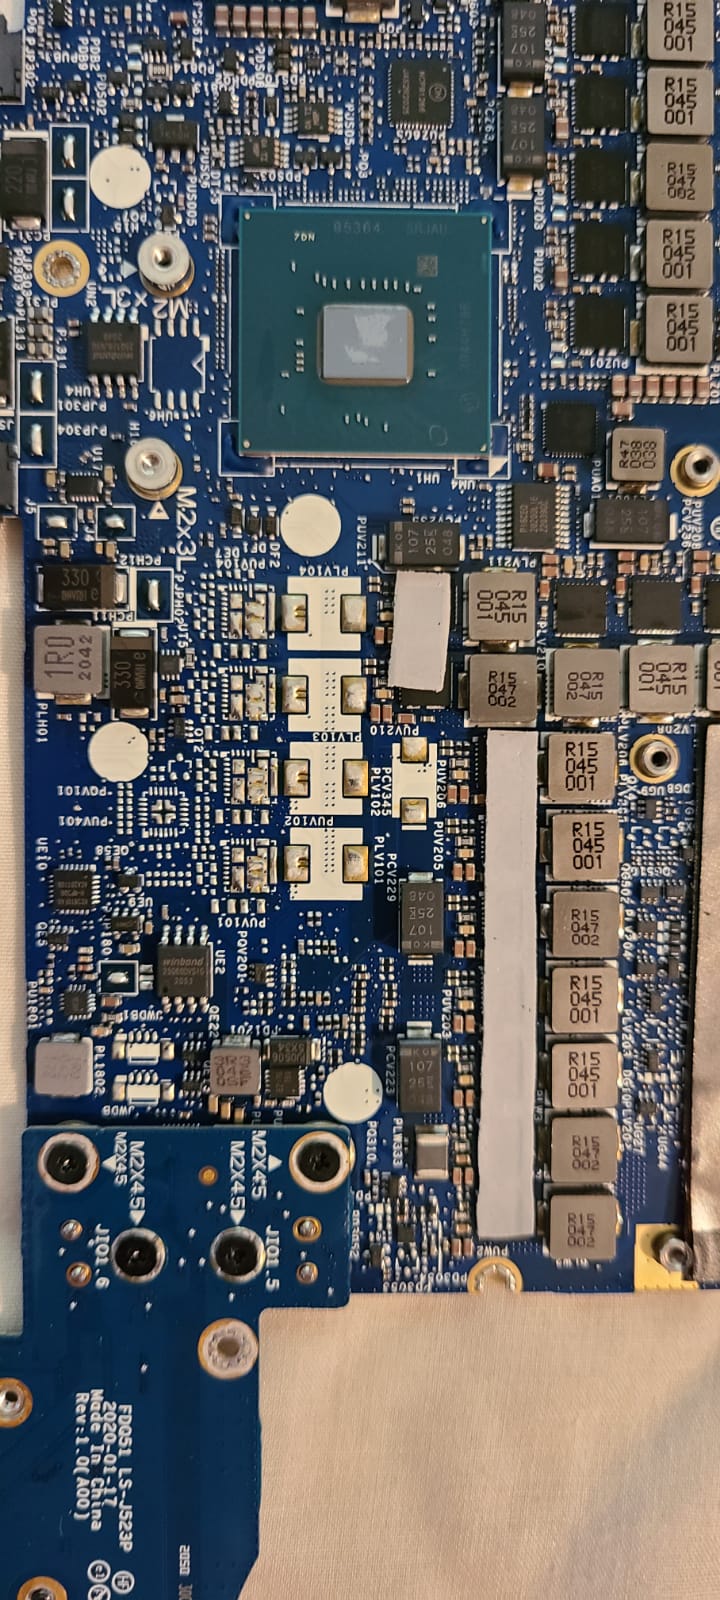
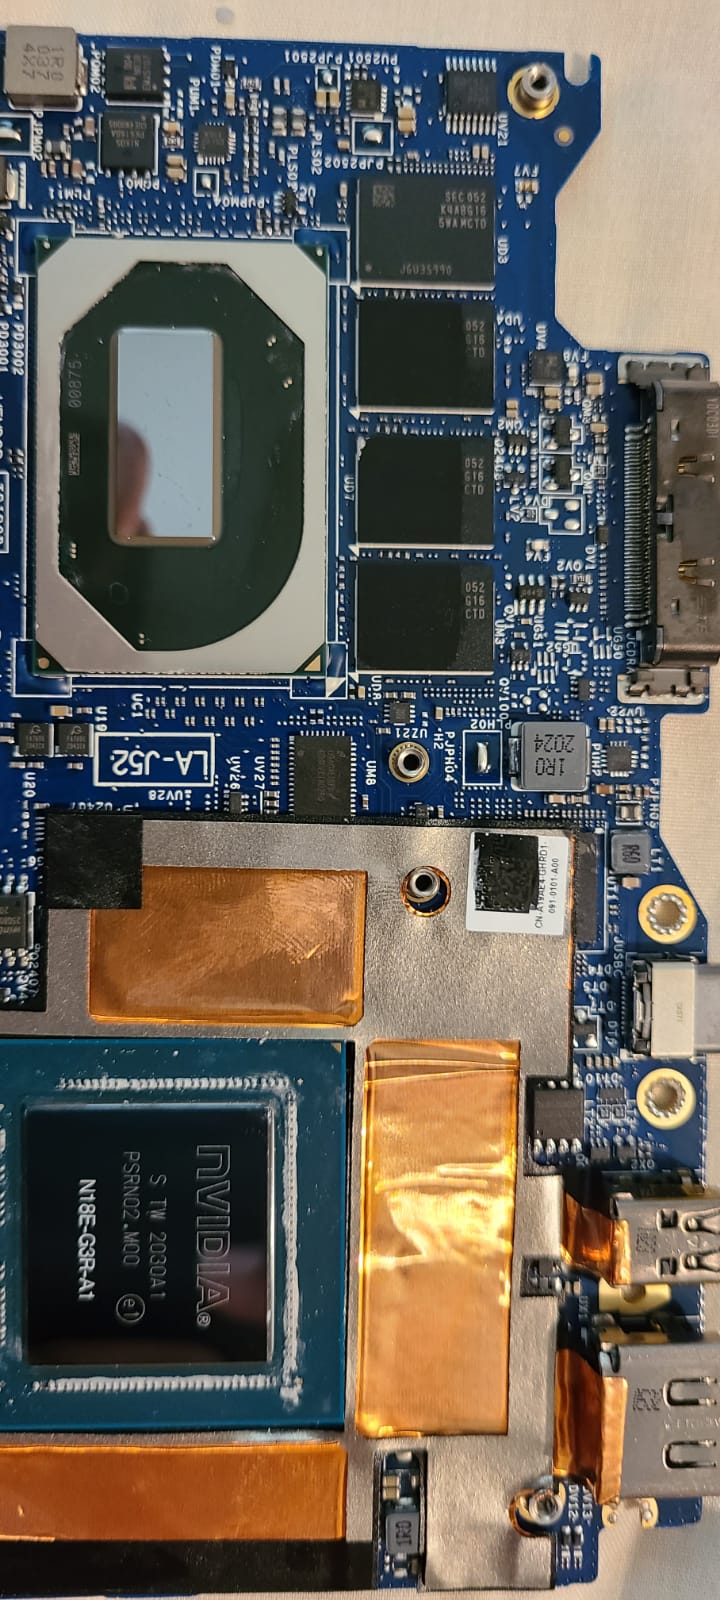
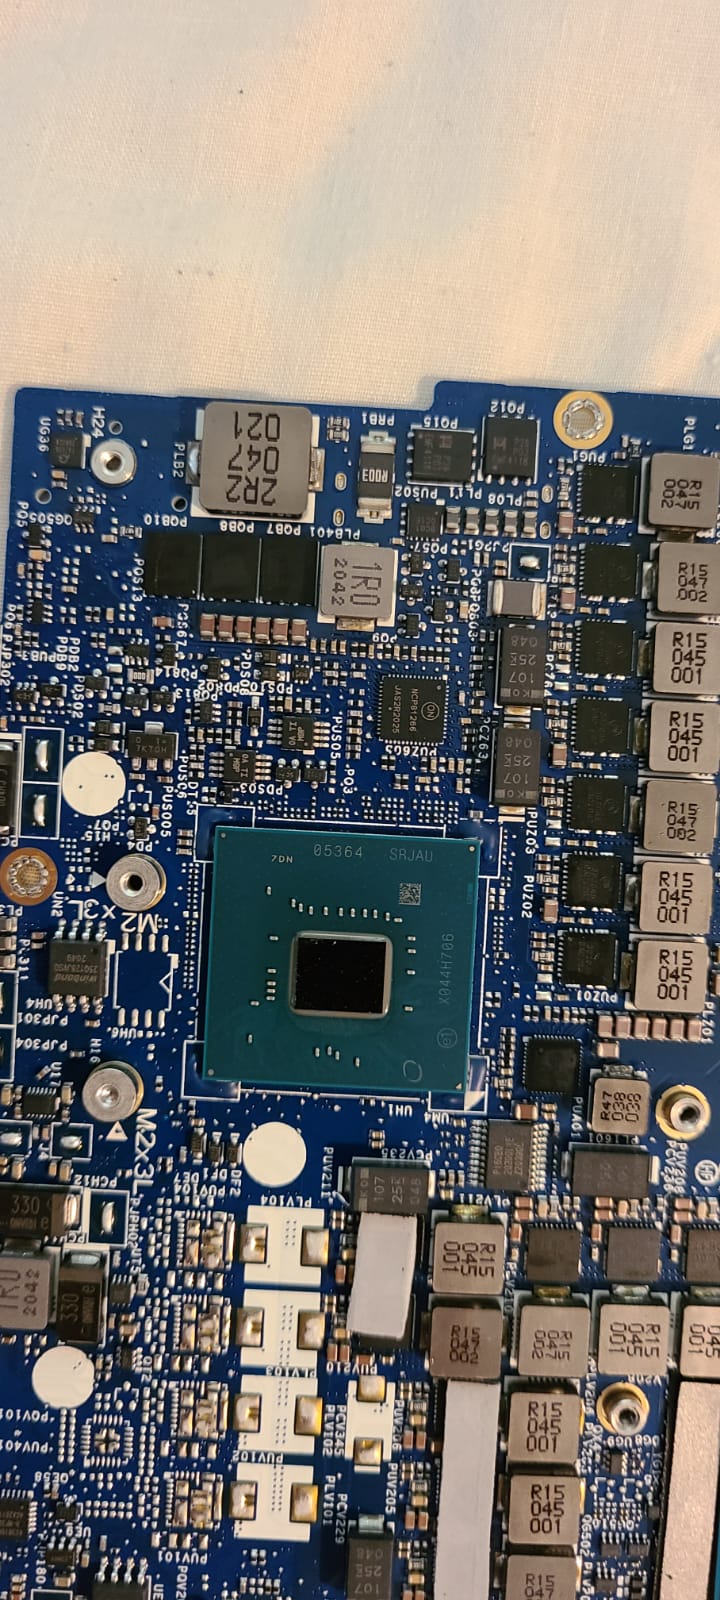
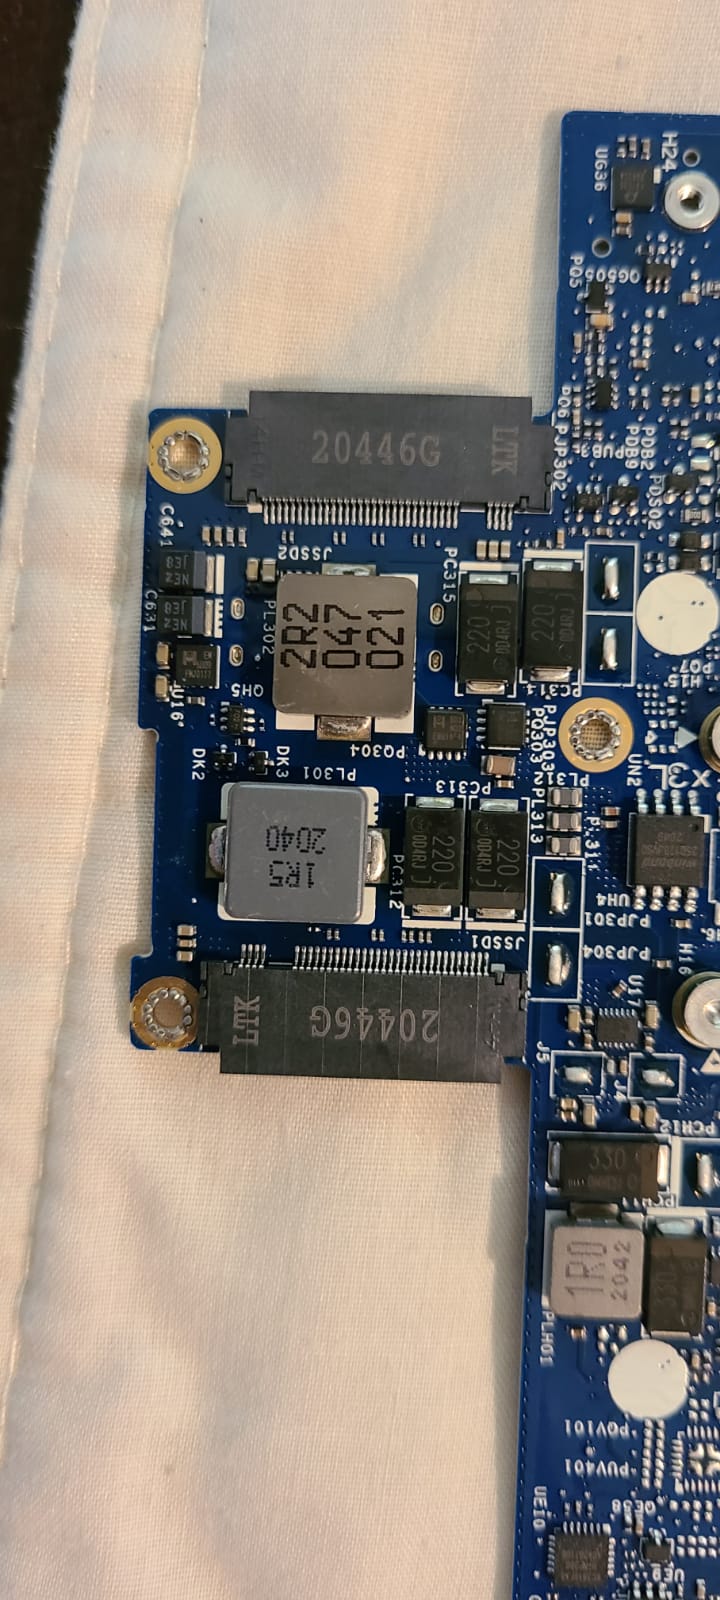
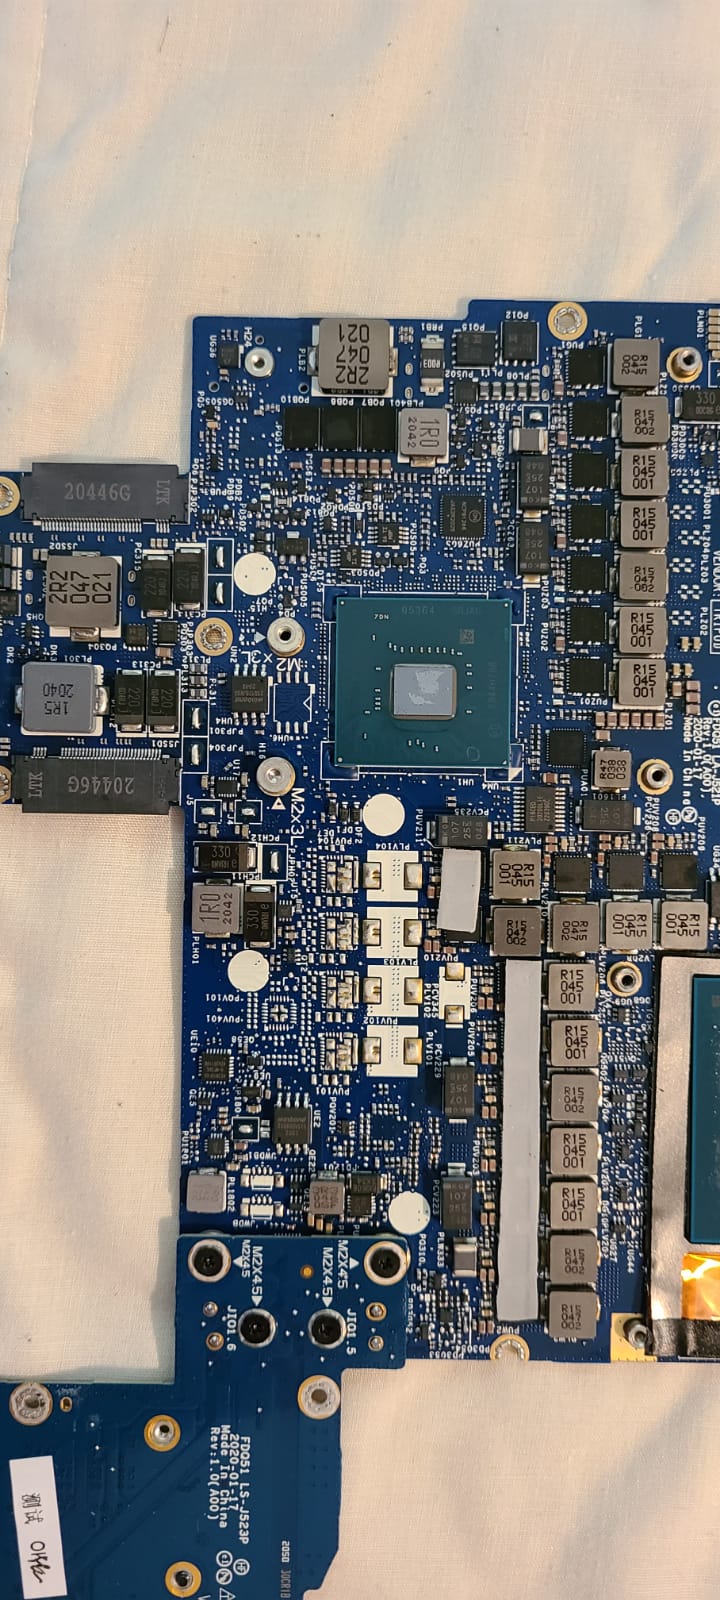
More mobo pics in the next msg
Attached Files:
-
-
One more coming up
Attached Files:
-
-
@seanwee Are these pictures high res enough for you to analyze and let me know how to shunt mod and how much power my VRMs can handle?
Attached Files:
-
-
Can't see what specific mosfets they are using, they are covered by a thermal pad.
That said, that should be an 8 phase vrm so even if they used cheap 30A mosfets it should still handle 150w provided the vrm cooling is adequate. Do you have a pic of the heatsink? -
Oh ok, I can get pictures of the heatsink and take pics of the vrms without the thermal pads blocking them probably by tomorrow or the day after. Also, just wondering, are those 2 R005 resistors what I need to shunt mod?
-
Yes, the two R005 resistors 90 degrees to each other on the back of the motherboard.TheMiataFanatic likes this.
-
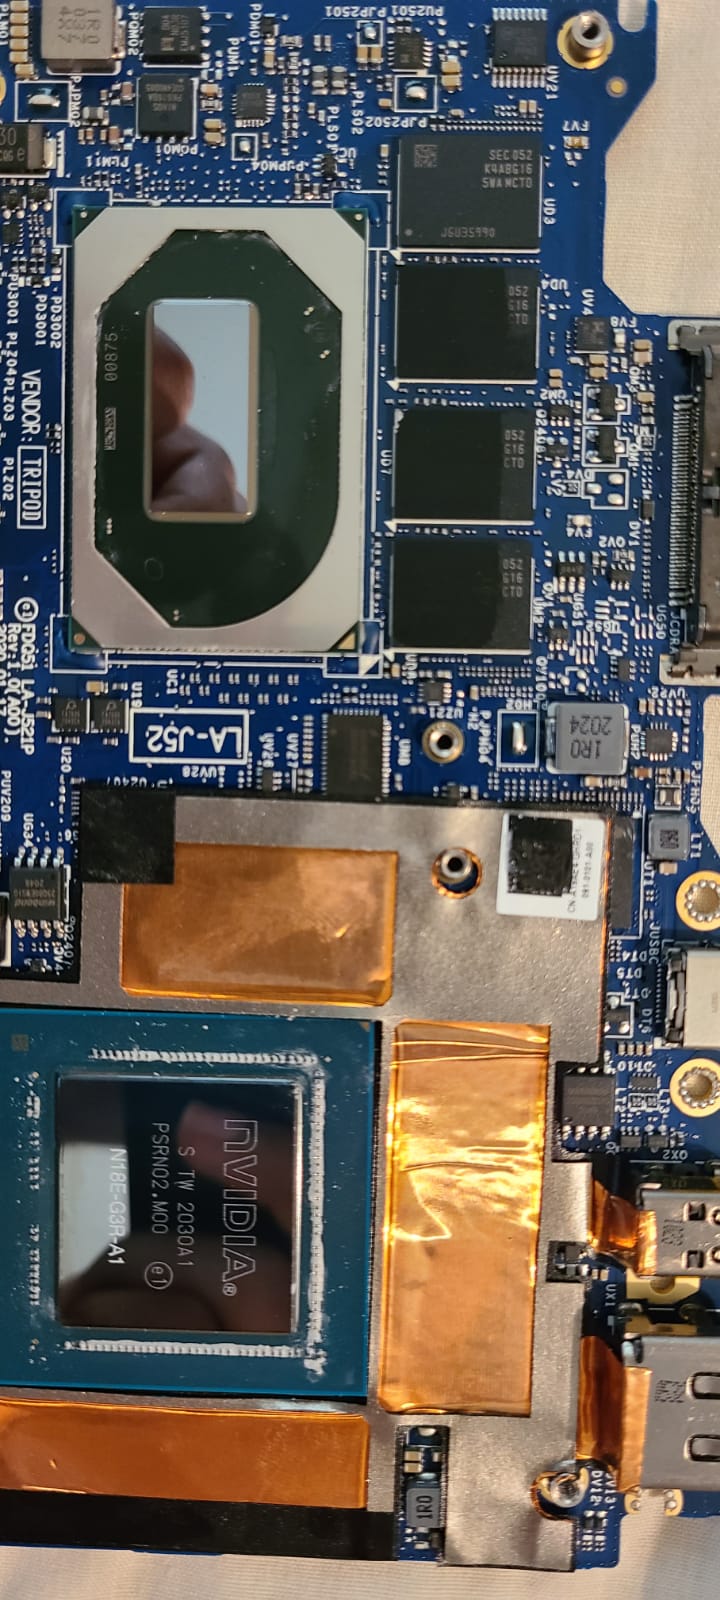
Akh, I'm really sorry for getting back to you late, I was busy with school, and I had to open this laptop up 7 different times to repaste because of one issue or another, but with power limits unlocked and turbo time limits unlocked at full load, I'm getting 86 degrees on the CPU (105 W of power dissipated) with Coollaboratory's Liquid Pro, and at full load on the GPU, I'm getting 61 degrees with boost lock on and a 125 mHz overclock using Kryonaut. Anyways, I'll send the heatsink and VRM pics now.
-
-
After a few days I admit defeat. The mosfet brand is Alpha and Omega but I can't find what the exact model of the mosfet is.
Looking at the markings pdf from their site of the mosfet seems to be of the DFN3.3x3.3-8L package but thats as far as i got.
Heatsink practically ignores the vrm cooling btw so thats not good.
Assuming Alienware used 30A-ish mosfets a 25% power limit boost should be safe. Just swap out the R005 shunts with R004 shunts. -
Yeah, it looks like the heatsink isn't really contacting the vrms. I appreciate you spending time trying to figure out those mosfets, too. If I do shunt mod with R004s, how much will my final GPU TDP be, and how do you feel about these resistors? https://www.amazon.com/50PCS-Chip-R...&keywords=R004+resistor&qid=1630271239&sr=8-3 Also, how do you feel about me using liquid metal to shunt mod? I know that Louis Rossman advised against it, but if I responsibly apply it, will it cause any issues? Oh, and also, on another note, how did you overclock your memory?Last edited: Aug 29, 2021
-
On a laptop? Thats just asking for a dead motherboard.
What you can do is use a conductive silver pen to bridge across the shunt resistors but i have no idea how reversible that process is. It might be a one way ticket so you will have trouble in the case you need to rma your laptop. That and it is effectively a shunt bypass completely removing the power limit of the gpu and at that point its totally up to you to keep the vrms from overheating by limiting clockspeeds in msi afterburner.
R004 shunts will give you a 25% boost in tdp like i mentioned before, which is a safer and reversible method. -
Alright, gotcha. So how exactly would I go about shunt modding with these resistors? Would I just place these R004 resistors over the R005's, make conductive contact with the resistors, and solder or hot glue them together? Is there also a way I could possibly get 150W out of the shunt mod as well? Apologies, not too knowledgeable on the process.Last edited: Aug 31, 2021
-
-
I have noticed that there is an update of BIOS released in 2021.
BIOS update v1.10.0 - date: Sep 06, 2021.
Official info about the update:
- Fixed the issue where the SATA storage information is not displayed in Enhanced Pre-Boot System Assessment (ePSA) diagnostics.
- Firmware updates to address security vulnerabilities.
Link to file:
https://www.dell.com/support/home/e...ode=wt64a&productcode=alienware-m15-r3-laptop -
I have noticed that there is an update of BIOS released in 2021.
BIOS update v1.11.0 - date: Oct 05, 2021.
Official info about the update:
- Firmware updates to address security vulnerabilities.
Link to file:
https://www.dell.com/support/home/e...ode=wt64a&productcode=alienware-m15-r3-laptop -
Yep, noticed that BIOS update too. Shall try it out. Have just update the latest internal Intel UHD video driver too. Seems ok but took a while to install tho.
-
I just got the R004 resistors. Sorry, but I don't fully understand what you mean by replacing the R005s with the R004s. Could you walk me through the process?
-
Desolder the existing shunt resistors on your motherboard and solder in the new r004 shunt resistors.
-
I have noticed that there is an update of BIOS released in 2021.
BIOS update v1.12.0 - date: Dec 14, 2021.
Official info about the update:
- Firmware updates to address security vulnerabilities.
- Firmware updates to address the Intel Technical Advisory INTEL-TA-00562 (CVE-2021-0157).
Link to file:
https://www.dell.com/support/home/e...ode=wt64a&productcode=alienware-m15-r3-laptop
*OFFICIAL* Alienware m15 R3 / m17 R3 Owner's Lounge
Discussion in '2015+ Alienware 13 / 15 / 17' started by Game7a1, May 25, 2020.