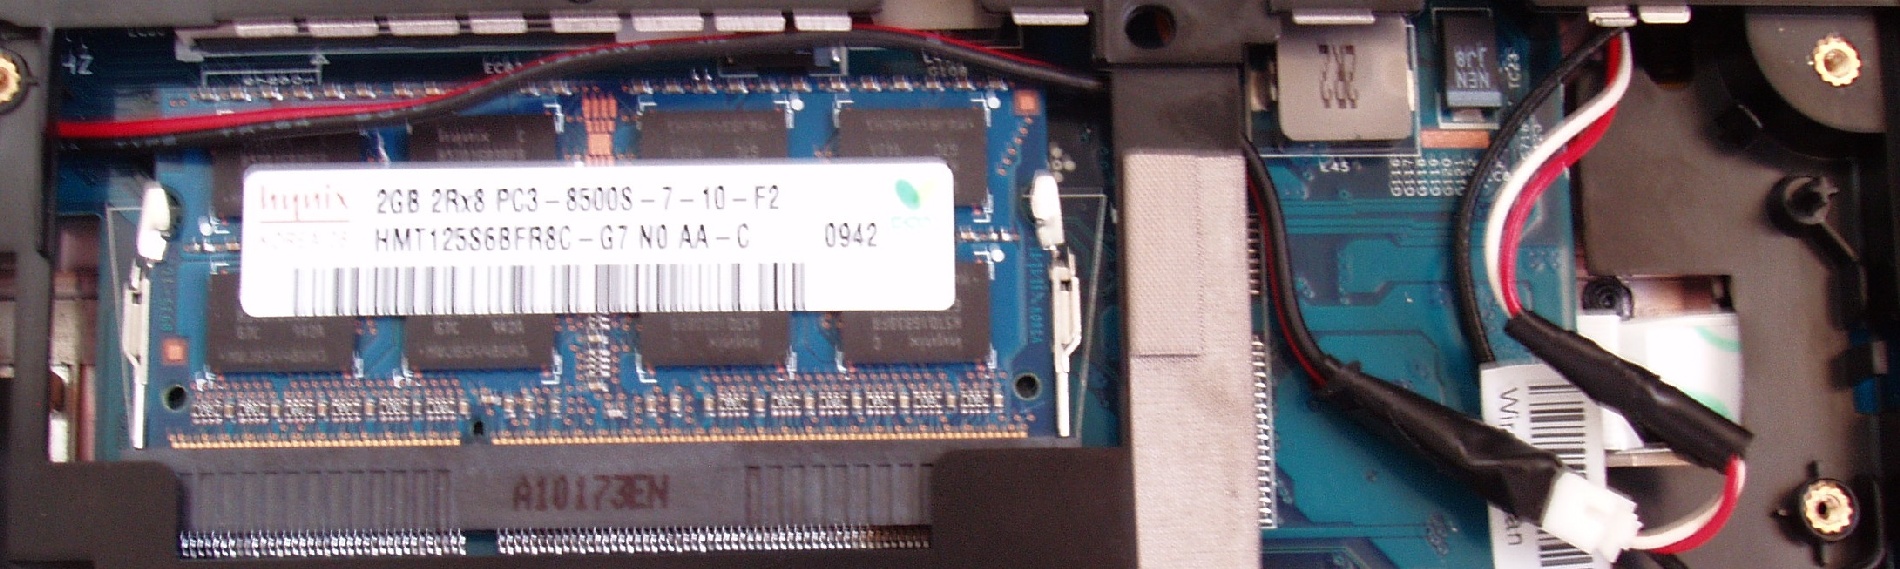
I got that keyboard last week and I have to return it because there no backlit function. I don't think it's a backlit keyboard so watch out.
-
Bronsky just out of curiosity how to the switch stay in place in the hole. is it glued or something?
-
Yea ... it is larger than the kensington opening so you just have to glue it on the back at a couple of spots with crazy glue making sure not to glue the slide mechanism
") .
.
Bronsky
-
Just ordered my backlit keyboard. i think its coming from hong kong. hopefully its the right one. it showed the extra power cable in the pic. it came to about 45 bucks with shipping. hopefully it wont take to long for it to get to the united states. trying to get my naked copy of windows 7 ready for when it gets here also so i can remove all the garbage then backup with acronis true image.
-
Any canadians swapped out their annoying French keyboard with a US spec one yet? Care to comment on the difficulty?
I'm not planning to do backlit, can someone confirm that this one will work with my 3820? Thanks
http://iphone.ebay.com/Pages/ViewIt...l?ViewItem&item=250597362585&autoredirect=off -
I installed a switch yesterday and it works fine. However, I am not really satisfied with my installation. There is a slight bulge where I installed it. I think I made a couple of basic mistakes and I'll probably have to change it for another switch tonight or tomorrow. The good thing is that all of the wires are run and all I have to do is a small bit of fitting work on the new switch.
The main thing I did wrong is leave in the kensington lock plate (the part on the inside of the hole cutout) in-place. I should have used a dremmel to take that out and make more room. The other thing I did wrong was install the switch with the pins facing up and had to shim the switch underneath to make it fit in the kensington hole. I think it's too crowded in there with the Ethernet card and the switch fighting for room. If I take out the other piece of the lock, the switch will fit better. If I put the solder pins on the bottom, it will give the whole installation a lower profile.
Has anyone thought about putting a connector on the KB wires so it can be disconnected when working on the notebook? It is really a pain in the butt to have to keep moving the KB. -
I too installed the switch over the weekend. Used 30 gauge kynar wire for the hookup. Hendrickson's guide was right on!! Removing the lock plate (I used my iron to melt the plastic tabs) and then placing the switch with the pins facing down worked best as it practically sits flush against the lock slot. I had to use super glue ultra bond for the switch to stick properly (crazy glue did not work at all). Now the fun part for me was getting the keyboard to clip in and that's were I brilliantly ripped the backlit flex cable!!(
. Did you guys use a dremel tool to shave down the metal (on the keyboard) where the upper & side clips rest? This was the only way I could get the KB to clip in like the original...
I just ordered another KB from HK so it'll be a week or so before I'm back at it again. I have to admit, backlit KB is awesome and love the switch on the side!!
Also redid the GPU/CPU and replaced it with MX3...temps are a few degrees less than the stock paste noticed that the fans don't kick in as aften as before. -
I've did this mod today, and have made an improvement. I added a SMT connector to the motherboard (power supplied by fly-wires, female connector super-glued to mobo)) and added a corresponding quick-connect to the backlight power supply cable... No power switch... Pics to follow.
-
Hey guys, I've been following this topic for a few days now.
I'm working on a similar project (only with a dell 1525) and have a few questions that I would be super grateful if you could hep me with. I've not looked at electronics in years and am very rusty...
I plan on buying a backlit keyboard for a studio15 and putting it in my Inspiron 1525 (it looks like its the same size/connector and I've seen sellers offering a non-backlit keyboard that apparently fits both models. At £10/$15 its worth a try).
My question is: will it be fine to draw the power for the back-lighting straight from a usb port, and if so, could I chuck in a potentiometer (I'm thinking about removing my s-video port and shoving it in there) to act as a dimmer switch?
I've luckily managed to find the board my usb/s-vid ports are on so if it doesn't go well, I can revert back to the original. Here is the board...
Any words of advice would be very helpful.
Sorry for hijacking your thread, but I'm still kinda 'on topic'.
Ross. -
Here is the placement of the female quick connect (scavenged from a dead laptop)
![[IMG]](images/storyImages/large.jpg)
And here is a view of the modified top shell...
By the way, between those two points I am getting 2.5V -
will this work similarily for the 4820TG?
-
Incredible job Tgoode. Your soldering skills are way beyond me.
Nice to be able to remove the BL KB. I just finished my switch and it works fine now.
Bronsky
@aristar - they are the same keyboards. It should work. -
Got mine today, installed it this evening. The spots for the 7 clips (five rear, one on each side) need to be filed down, which is tricky. I used a Dremel. Not all clips are secured but it seems to be held tightly enough and is laying flat, so I'm not concerned. I have not tried to attach the back light yet, although there is indeed a power cable on the back. It was only $18 including shipping for the backlit version so I figured I might get brave down the road and give it a shot. The one you linked to seems fine to me, the same as the one I have but without the backlight power cable obviously.
There was, however, one issue I came across, and its a pretty big one. The left, down, and up arrow keys and backslash (above enter) do not function at all. I'm going to check if the cable is loose but that doesn't seem to make sense. I might have a dud. Such a shame if everything else worked except a couple stupid keys. Has anybody else encountered this? Any suggestions?
EDIT: Took it apart, reassembled, even gave it the old Nintendo cartridge blow. Down, Up, Left, and Backslash still don't work. Time to consider getting a non-backlit from a different seller or just going back to my old bilingual piece of crap. Would a regular non-backlit have the same problems with the clip spots needing to be shaved down? Would it be just as thick? Hard to tell if these discrepancies are due to the extra space required for back lighting or if its because its from an older model. The actual 3820 keyboard is quite a bit thinner and lighter than the 4810 backlit. -
No ... all my keys worked perfectly.
Bronsky
-
Installed my new backlit keyboard yesterday.
Ebay. $25 (make offer) shipped from Illinois. Seller has many offered.
http://cgi.ebay.com/ws/eBayISAPI.dll?ViewItem&item=360299094175
All keys work great.
Instead of using speaker connection for voltage (similar as tgoode measured, only 2.4v, and wanted brighter), or USB (5v? and always on so requires a switch to also be installed) I used the #2 pin in the MIC plug (3.4v). Nice and bright. You can probably do this without even separating the laptop. Feed wire from inside back of hard drive openings to opening near MIC and other end up through opening near USB ribbon cable.
If you do not wish to solder onto laptops mainboard, which voids warranty, and don't mind giving up the onboard MIC, (I use a headset anyway), then you could simply unplug the MIC, easily remove the current wires on cord going to MIC plug with a pin or needle, then insert your own spare wires into the now unused cords plug, then re-insert into mainboard MIC plug socket. Tape up original MIC wires. Return to stock only requires you to remove your wires from plug and insert original MIC wires.
I connected an old video card fan connector plug to the new keyboard flex cable and the left over video card fan plug socket to the supply wire, then placed these quick connects in the opening near the USB ribbon cable (accessible from bottom with access cover removed). Prior to this, during grinding/fitting the keyboard, same thing that happened to biggyrocks happened to me, as the backlit flex cable broke from a little bending early on, but you can scrap off coating and tin flex cable again to solder wire directly onto. Saved my butt.
Happy with the lit keyboard and still great feel, but not with my grinding and fitting job. Will need to go back over the ground down portions and color with black marker so that it blends in correctly. -
Fitting was tedious. I used a dremmel to make the tabs fit better but used a microfile to lengthen the slots.
Pictures are mandatory. Actually, would like to see how you tied into the mic socket and would like to see the quick connect. What kind of power readings are you getting from the mic socket.
Bronsky
-
3.4v at MIC plug.
Also added some more details to my original post for a method that could be used which should not void warranty, since no soldering needed on mainboard..
edit:
Sorry for the bad close up of MIC plug. Poor macro mode on camera.
Pin 1 would be on the right, marked on mainboard with a triangle.
I used the next pin, pin 2.
Or, unplug and remove/replace wires in plug with your own.
Flip the first two photos left right for the correct relationship. It shows wire routing path.Attached Files:
-
-
Rob if you mode the tabs on the keyboard or do whatever it is that needed to be done to the keyboard for a correct fit can you post pics. i fooled around with it and the fit wasnt good by default at all.
-
Here are the pics from my KB fitting.
http://forum.notebookreview.com/6504731-post26.html -
thanks for the links Bronsky. now i just have to get my wire sorted out. the 22 gauge i used seemed to thick.
-
Yea ... the wire has to be thin or you're unit will bulge. Take your time with the fitting. It took a lot of adjusting to get it right and sitting in there properly. Walk away from it and go back only after a few beers.
Bronsky
-
will do. beers at hand.
-
i've replaced my stupid bilingual keyboard with a US spec one successfully now
at first, some buttons didn't work like the DEL key and "s" "f" etc
however, i messed around with the keyboard settings (i'm not sure if i actually did anything) but now it works perfectly fine
mine has the backlit functionality but i prob won't set it up for now. a word of advice for whoever is planning to do this is to use some masking tape to tape off the plastic areas in case your scratch it while putting the keyboard back in. it really is quite a b**** to do it. did a lot of bending and dremelling to get it to fit. i also used quite a lot of tape in there. there is still a bit of flex (bulges up a little) but i type quite softly so i'm not too bothered with it -
I just ordered a backlit keyboard. Such a big difference in price between places! I live in the UK, but bought it off the US eBay site, but having it sent to Australia! I'll be their for holidays next week, hopefully my brother still has my dremel and soldering iron!
Can't wait to try out this guide, just hope i don't damage my new lappy. -
Can you go into a little more detail on how exactly you got your backlit keyboard to fit better?
I've installed two of these now but I still had a hell of a time on the second one lol.
Maybe i'm not doing it right... -
When you get a new keyboard, you will notice that it as a certain rim around it, esp. in the lower part with the tabs are. The first thing I did was use a dremmel with a thin grinding disk to take that small rolled edge off the portions of the KB that fit into the bottom tab holes.
Then I used that same grinding wheel to reshape the tabs into a more rectulangular shape so they fit better into the tab holes. When the tabs are inserted into the holes, there should be no gaps at all in the bottom seam. That helps get the KB all the way to the base of the lower lip and helps the upper slots fit better.
Then I start the fitting of the upper slots. I used a very small hand file for this job with a tapered tip. I slowly, ever so slowly, filed the openings down a bit. I used a straightedge to make sure that all of the slots were being filed down at the same rate. Sooner or later, you will hear one click during a fitting. I then used a small screwdriver to put downward pressure right near the clip/slot area until I heard the clips click into the slots. Even still, it took another half-a-dozen fittings before I got the right size on the slots. In all, the fitting is very slow and can take an hour if you do it right.
I did not use a dremmel on the slots due to the inability to keep the opening square. The file worked best on this. Note my credit card shield.
Bronsky
-
Good stuff, thanks!
-
Bronsky,
How did u get the two tabs on the side to fit? -
You mean the slots along the top/sides. They were the hardest to fit. It is the same. Try pushing lightly down next to the slot with a thin blade screwdriver. If the clips won't snap-in, you have to keep on filing until they do. Just be sure to file the same amount on each side. The side clips are the hardest because they actually create a small bit of flex on the KB. Try beiding the board backwards a bit before trying to install it. But, my guess is that you have not yet filed the slots down enought yet.
Bronsky
-
I just ordered a new BL KB for $20 on Ebay with free shipping. I bought it from a US based supplier. The ribbon on my KB is really beat up from all the in-and-out so I decided to fit a new board while my motherboard is being rebuilt. This way, if I have to replace my computer, I have the new KB already fitted.
Bronsky
-
I have been following this thread from the beginning and I have to tell you guys you are amazing.I decided from the beginning not to try a Backlit keyboard mod because I don't feel confident enough to perform surgery on my precious 3820TG.But following your adventures has been better than any TV series.More power to you...
-
Can you fit a backlit keyboard true the MIC jack? Can you do this without voiding the warranty and still put an on/off switch on the side (like you guys did)?
Is this keyboard better then the original? After all, that was one of the biggest compaints in all reviews I've read. Also, Is it possible to get a different bigger battery? That original one looks awful. You cant fit it in a standards sleeve like that :s
Just a few quick questions Must say, this Mod is the bomb
-
I think that any modification you can't reverse 100% before sending it in will void the warranty. The Mic jack seems to be 3.5v, the speaker jack is 2.5v and the USB port is 5v. I like the brighter KB so I use the 5v power from the USB. Putting a switch clearly voids the warranty since you have to cut out a significant portion of the case.
The KB is better than the original.
The E-Bay 9 cell battery looks better than the stock one but I wonder which would perform better.
Bronsky
-
So what's your thought on voiding it? How big of a chance is there with this laptop that it will die on you withing a short period? Any reports on that?
To my knowledge Acer doesn't do really well as it comes to reliablity. Or is that a thing from the past?
Good to hear that the KB is better. Most reviews only complain about the bad keyboard which would not be onpar with the rest. If the original one would be a 5 out of 10, what would you give the new one?
U mean THIS one? I cant really tell from the picture how much it will stick out.
How much battery life do you guys get with the 6cell 6000mAh and the the 9cell (8400 or 9000 mAh) ? -
The warranty would probably be void if noticeable modification are done, that a normal warranty tech would not have done. Soldering a wire to the mainboard that was not related to the way it came from the factory is an example of something that will probably void the warranty, even if removed before sending laptop in for repair.
Warranty is not void by opening up the unit and taking it apart, as long as all is done in a manor a normal experienced tech would do it. I have done a lot of repairs under warranty where the manufacturer send me the parts instead of me returning laptop to them, simply by explaining to them that I am an experienced tech. Point is, nothing like "Acer Certified or Authorized" is required to maintain warranty. You could take it to a local generic PC sales and service store near you to look at it, (disassemble/reassemble), and it would not void the warranty by them looking at it.
With that in mind, if you do anything to the laptop, make sure it can be undone with no signs of modifications, if you wish to keep warranty valid. The Microphone has wires that go to a removable plug. These plastic plugs hold the wires in place with bendable plastic tabs. Using a small pin, you can bend the tabs and remove the wires. Insert wires back in, tabs click into place and back to original again. If you instead use you own wires to temporarily wire the plug to the keyboard instead, then in the event you need to put it back to normal, you should be able to with no signs of modding. -
Okay, so if I understand you correctly; A backlit keyboard, connected to the MIC, won't do any harm to the laptop. What about a switch? I read that some people found a switch button that precisely fit a port on the left side?
Some glue and some wires would do the trick right? This way no harm would be done I think. -
The switch is clearly a modification and I would think your warranty would be void.
Bronsky
-
Yeah it clearly is a mod, but glue can be removed and wires too, right?
So like I said; No harm done. If I had to make use of the warranty, I would simply scrape the glue off and remove the wires... -
You have to remove the kensington lock and cut away about 1/4" of plastic in the case to make room for the switch inside. It looks factory from the outside only .
Bronsky
-
can anyone do this in Toronto, Canada? I can pay for you to do it. email me (my username)[email protected]
Thanks in advance -
Found an East Coast US supplier of Backlit KBs ($18). Identical to the one in my 3820TG ATM.
![[IMG]](images/storyImages/IMG00031-20100930-1050.jpg)
Figured that I would take advantage of the time while my motherboard is being rebuilt to fit a KB in the Acer. That way, I can put a new KB and speaker when the Motherboard goes back in. The power ribbon on my old KB is looking pretty weak. There is a slight tear at the point where the ribbon meets the Backlighting power strip. I would rather do the replacement while I have the time then when I need the unit.
I'm going to look for a small diamond file to do the slots.
Bronsky
-
Link? How long did shipping take?
-
I'm in South Jersey, just outside Philadelphia. We are literally 5 Turnpike exits from Edison, where the board was shipped. I got it in 2 days. Great to know there is an emergency source of BL KB's out there.
Bronsky
-
That's great to hear. I'd like to purchase one too, can you link me? Thanks
.
-
Here is the listing:
eBay - New & used electronics, cars, apparel, collectibles, sporting goods & more at low prices
Oops. $19.98. BTW, it shipped in the original packaging unopened.
Bronsky
-
Hey,
I haven't read the full thread. But is any one trying to implement a dimable keyboard backlight? -
erm... from the pics some of the function keys dont match the ones on the 4820TG eg. the F2 dont have the blue symbol thing bit a wireless/bluetooth on off is avable on F3 and a touch pad On off is available on F7...
izzit possible to contact the manufacturer of the keyboard to make some alterations...? -
They don't match the 3820TG either but so what.Are these minor differences that important???Remember this is a 3810T keyboard so why would the manufacturer do alterations to a keyboard that's correct for the unit it has been designed for.
-
Thanks for the guide. My mod has been successfully completed.
The only problem now is that after a period of 40 seconds the lights go off.
It is connected to the speaker power source. I suspect it has to do with the power saving options in Windows, but I don't know the settings to prevent the light from going off. Does anyone have an idea? -
First, disable ePower. Then set your settings to High Power and plug in your unit to an AC source. See what happens then.
Bronsky
Acer TimelineX 3820TG Backlit keyboard mod
Discussion in 'Acer' started by Hendrickson, Jun 12, 2010.