
Since we have an R2 model now I should state that this procedure is for the Alienware 17 R1 model only!
Good evening everyone ,
Since our 120Hz screen upgrade thread has gotten to be 18 pages or so now I thought I would create a new thread that would consolidate our info that we have in those 18 pages and condense it down to just a few posts so that anyone looking at performing this upgrade would have an easier time accessing the information they need to carry out this procedure.
A lot of this info came from this thread http://forum.notebookreview.com/alienware-17-m17x/744470-aw17-120hz-screen.html and this write up would not have been anywhere near this thorough without the input of everyone in that thread, so thank you everyone for all the info, part numbers and experience! You all made this central thread possible and are helping the Alienware community in general")
The first thing I will touch base on with this post is should you even consider the 120Hz upgrade? is it worth it? I can tell you from personal experience, coming from the regular 1080p matte screen to the better 120Hz 3D semi gloss screen was for me at least a massive improvement. It is hard to explain what you see and put it into words but everything just seems much smoother and clearer. The first thing I noticed was that the games I play seemed to animate much more fluidly and cleanly. I know a lot of people prefer the matte screen option in the new Alienware 17 models but I was not one of them TBH, I liked the deeper colors and glossy finish in the previous screens and this brings some of that back. It isn't as reflective as my screen in the R4 but it is a lot nicer IMO then the stock 1080p screen. One thing to be aware of is that if you go through with this you will lose the Intel integrated GPU as it will be disabled in the bios by Alienware and if you re-enable it via an unlocked bios you can and probably will brick your machine.
Here are some other opinions regarding the 120Hz option....
Obviously if your reading this before you are ordering your Alienware 17 and your just looking for weather or not the upgrade is worth it , there are plenty of people who think that it is. I honestly wish I had of jut gotten it with the laptop now that I have seen how much of a difference it makes. I can remember when my buddy got his Sager and it has 3D how much better it looked but we couldn't explain why it looked better being that we had the same hardware. Like I said it is hard to explain why it is better but it just looks cleaner and smoother with a noticeable difference.
So you have decided that you want to go ahead and add the 120Hz 3D screen to your Alienware 17 ! Awesome, you won't regret it! First off you need to know if you have a compatible GPU as not everything works with 3D. Nvidia gives a decent list of 3D compatible GPU's on their website ( 3D Vision System Requirements | NVIDIA ) but it does not list off all the GPU's that we are using such as the 680m or 700m series. I know from personal experience that the 780m is fully compatible but I can't say for sure about the 770m although i presume it would work ( someone can correct me here if I am wrong ). The bad news here is if you are using an AMD GPU then you do not have the option for 3D and your journey ends here. Although I don't know for sure, I would think that the 120Hz screen would still work and you just wouldn't get 3D? Again I don't know for sure and someone would have to test it which could be risky and I wouldn't recommend it.
So what do you need to get started? Well there are some specific parts that your going to need that may be harder to come across....in particular the video cable that runs from your motherboard to the screen/camera/ir emitter. This cable has been a pain for a lot of us to get our hands on while others have gotten it with relative ease. I will list off the parts list first and then go into details about where to get them.
Parts Required for the upgrade (These can all be found and confirmed in the Alienware 17 Owners thread
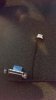
- New Video Cable ( Dell part number N392W )
- New Screen ( laptopscreens.com screen ID 653787 , Dell part number GN36T *There may also be a 0 in front of the G* ) IMPORTANT UPDATE: We have had a few users report that screen revision C01 is NOT working for them. The laptop either won't boot with that screen or the 3D will not function. I would avoid using revision C01 at all costs. We know D02 is still working ATM. It may be harder to find an approved working screen then it used to be due to all the different revisions.
- IR Emitter (Dell part number XX7CM) *Only if you want the 3D, not needed if you just want the better screen*
- Nvidia Stereoscopic Glasses *Only if you want the 3D, not needed if you just want the better screen* These will be labeled as 3D Vision 2 for the newer 2nd gen glasses or 3D Vision for the first gen.
WARNING: I take no responsibility for anything that does not go according to plan in this guide. You must be aware that if anything does not go according to plan then you may end up bricking your machine and be left with esentially a paper weight. If you choose to move ahead you do so at your own risk.
Ok so you have your shopping list! Now to actually find the parts, the hardest of which is probably going to be part number N392W otherwise known as the LCD cable. This one can be hard or easy to find depending on where you are and what kind of mood Dell spare parts is in that day
The screen should probably be your next stop as the cable and LCD screen are the most important parts of this upgrade. My suggestion and I am sure the suggestion of most others that have done this upgrade is to head on over to laptopscreens.com and search for screen ID 653787 which will take you to the exact screen you need for this part of the upgrade. The screen is going to run you roughly $105 plus shipping but they ship pretty quickly and you should have the screen in a few days depending on where you are ( Mine was shipped and in my hands in 48 hours ). You can also buy a screen from Ebay or a few other various suppliers but when I had a problem with the first screen I ordered ( stuck pixels ) they were quick to action the problem and get a replacement on the way, and they also offer 3 year warranties on their screens :thumbsup: .
The IR Emitter seems pretty easy to find on Ebay although you may be able to get one through the spare parts department as well should you choose although Ebay just seems easier and it seems to stay around $12+ shipping and always available. The one thing of note is that this piece will not come with a screw to attach it to the inside of the bezel above the screen so you will have to find one elsewhere. I robbed mine from the bottom panel that covers up the entire bottom of your Alienware 17 since it was the only 2 screws in the system that seemed to fit. Simply search for dell part number XX7CM and you are set to go ( This will come up as an IR Emitter for an R3 but it does work none the less.)
The last piece of this jigsaw puzzle will be your 3D glasses should you choose to go the full path and get your 3D working instead of just the 120Hz screen. These are pretty easy to find and can be found on Ebay or on most retailer websites. If you choose the cheaper option then your best bet is Ebay as they can be found anywhere from $25 and $70 depending on where your getting them from. Most online retailers will charge you about $100 ish or in that area for a new pair of 2nd gen 3D Stereoscopic glasses. There was one person on the forums that had to get 3 pairs off ebay before he found a pair that worked so I opted to go through NCIX and the first pair worked without issue , and also gave the peace of mind of a warranty but I did pay $115 for them.
INSTALLATION! (These steps are provided as a guide but I do not take any responsibility for any damage that can occur from anything in this guide, you continue at your own risk!)
Ok so you got all your parts and your ready to do the upgrade! Keep in mind that you don't have to have the glasses or the emitter to enjoy just the screen with 120Hz, only if you want 3D of course! So if you have the screen and the cable you can begin the process and simply add the emitter later on down the road! The first thing you should do is look up a good tear down guide for the Alienware 17 , luckily our own Mr.Fox has taken a ton of pictures showing his tear down of the 17 and showing us an amazingly detailed view of taking apart your Alienware 17, and those can be found here Alienware 17 Teardown Images - Imgur . There is also a pretty good youtube video on getting under the keyboard . First off make sure you unplug your machine from it's power cord, then your going to want to remove the 2 screws on the bottom cover and then slide that cover towards you and off of the machine. After the cover is removed you should immediately unplug and remove the battery that powers the laptop when not on AC power ( There are 2 more screws holding the battery in the machine). After the battery is removed turn the machine over and hold the power button down for 30 seconds to drain the system so that you can reduce the chance of static shock. Once that is done you will want to remove the GPU and CPU heat sinks from the system as it makes it much easier to access all the required screws that hold the palm rest down. ( I have been corrected that this step is not necessary to gain access under the keyboard and all palm rest screws are accessible without pulling the heat sinks! So this is optional but a good time to re-paste if you are so inclined, if not skip to after the heat sink removal. ) In order to remove the heat sinks you need to first remove the CPU and GPU fans which are held down with 3 screws each and plugged into the motherboard via a small cable. Carefully remove the power cables and then the 3 screws that hold down the fans (these screws don't come all the way out , they stay attached to the fan housing ). Lift the fans out set them aside, keep them marked so you know where they go back in. Once that is done you can remove the heat sinks by carefully loosening the screws that hold down the heat sinks ( be sure to follow the order listed on the screws, they are numbered). The CPU heat sink comes off quite easily but the GPU can be a little more difficult because the heat sink is somewhat stuck on because of the heat dissipation pads that are sticky and might be stuck to the heat sink. Once the heat sinks are out of the way set them aside with the fans and be careful not to mix them up. Next you can start removing the screws that hold down the palm rest, most of which should be marked with a "P" and a number beside them. it is important to point out that there are 2 different lengths of screws in the system and it should be noted where each screw comes from as if you put them in the wrong spots you will damage the palm rest and it can end up looking like this http://forum.notebookreview.com/alienware/751192-amyone-else-s-aw-getting-zits.html . The screws are marked beside the holes with the proper lengths and it is pretty easy to tell which ones go where if you pay attention. There are quite a few screws to remove, I am not sure on the exact number ( have been informed it was 22
The next step at this point is to remove the bezel that sits over the LCD, and the good news here is there are no screws! You simply have to get your fingers down between the LCD and the bezel and pull it gently towards you being careful not to pry to hard as the plastic clips can break. I generally start at the middle bottom right above the Alienware logo as there is a lot of bezel there to grab. If you can't get it to release at that point they maybe try on the side. This youtube video shows a the removal of the bezel on a 14 but the process is the same Laptop screen replacement / How to replace laptop screen for the Alienware 14 - YouTube . Once the bezel is removed you can see that the LCD is being help down by a series of screws on both the left and right side of the LCD on each corner. I would start by removing the LCD cable from the motherboard, this will require unplugging the video cable and the power cable and then making sure the wires are as free as you can get them so that when you lift the LCD away from the computer. Also note that you need to remove the cable at the top of LCD that connects the webcam to the laptop as the webcam is secured with more screws to the cover. With the cables loose go ahead and remove the screws in all four corners that hold the LCD in place and once removed lift the LCD out and away from the laptop. On either side of the LCD you can see there are 3 more screws on each side that hold the metal frame to the LCD which in turn hold the LCD to the laptop, these will need to be removed and the metal frames removed. You can simply set the LCD and old cable aside as you won't be needing them anymore hopefully
In order to install the new LCD and cable you need to first attach the new cable to the new screen. Line up the connectors and connect the two very carefully, don't force them in any way, they should just slide together. (CAUTION:BE CAREFUL!) peel the backing off the 3m tape and attach the cable to the screen just like the old cable is attached to the old LCD. There are 2 more points where there is 2 sided tape to attach to the LCD, one to the right of the LCD 40 pin connector along the bottom and one at the top just below where the webcam plug in is situated. When you line up the top webcam connector make sure it lines up with the webcam port as once it is stuck down it does not have any room to bend or flex. Now that the cable is connected we can put the metal frame on the new LCD making sure to line up the holes and replace all 3 screws on either side. Run the cable so that the LCD sits back in the cover properly and make sure all the cables run as they were originally were. Replace the screws in all 4 corners making sure the LCD is secure and the cable is run properly and lined up with all the cable channels. Now comes the time to connect the new cable to the motherboard... CAUTION:If you look at the motherboard where the video cable was plugged in you will see another similar video connector right below it. THIS IS THE ONE YOU WANT, NOT THE ONE YOU UNPLUGGED FROM...NOT USING THIS CONNECTOR COULD BRICK YOUR LAPTOP!!!!! This is the main reason I am writing this wall of text, is so no one else makes this mistake and ends up with a laptop that won't turn on. I am not saying it will 100% brick it but based on another's experience it could cause your laptop not to boot if you use the wrong video port. You will notice that the ports are labeled. The port you were originally plugged into should have been the port labeled LVDS and the port that the new cable is going to be plugged into is the EDP port. You will also notice that the cable has a space on either side for a screw to fit through that corresponds to a spot on either side of the EDP port. I did not use screws in either of these two holes but you will probably find that once you plug that cable in it feels secure and isn't going to go anywhere, I don't even think it can once the palm rest and keyboard are back on top of it. Connect the remaining power connector and then if everything looks ok you can start reassembly! Make sure all your cabling is tucked back away where it should have been and that you reconnect your webcam and that it lines up alright. At this point if you have you IR Emitter then you will see that there is a spot for it sitting right above the webcam with one screw hole to hold it in. If you have the emitter then go ahead and install it using a screw that fits ( see above for the one I used ) and connect the power cable to it. Once all your new hardware is installed go ahead and place the palm rest back in place and make sure the clips snap back down and hold it in place. There are a few spots that are held down by screws so don't expect it to look the same as it would with all the screws back in place. Once the palm rest is back in place and snapped down turn the laptop back over and reconnect the keyboard and track pad ribbon cables, which can be a little tricky especially for the keyboard so take your time and make sure you get it right! Reconnect your optical drive making sure to replace the cables that connect it to your laptop and all the screws that hold it in place. After that is done start to re-insert all your screws that you removed CAUTION:Make sure you get them back in the right spots, make sure to check the lengths and match them to the numbers marked beside the holes lest you damage the laptop causing it to either not boot or damage the exterior surfaces. Once all your screws are back in place you can go ahead and replace the heat sinks. This may also be a good time to replace your thermal paste while you have it apart, and there are a million videos online about the proper procedure for doing this. Once you have re-pasted if you so chose then go ahead and replace the heat sinks on the CPU and GPU making sure to tighten the screws in the proper order that is indicated beside the screws. It is advised to tighten them a little bit at a time instead of just cranking one all the way down and then moving to the next. Once your heat sinks are re-installed go ahead and replace your fans and tighten them back down and plug in the power cables again. You can replace the battery at this point and fasten it back down with the screws you took out of it and plug it back in. Replace the bottom cover and turn your laptop back over
If everything is working as one would expect you can go ahead and start enjoying your system! If you didn't install the IR Emitter yet then you will have remove the bezel again when the emitter arrives and simply install that one piece and put the bezel back on but you don't need to dissemble the laptop to do so though I would advise draining the system of any power again to help prevent static shock.
If you did opt to go with full 3D capability then you will notice that your computer tried and probably failed to install a driver or two, this would be for the IR Emitter and stereoscopic drivers. In order for my system to pick them up properly I uninstalled all previous Nvidia drivers and software and re-installed them again and they were all picked up and became functional. Once this has been completed go ahead and open up the Nvidia Control Panel and you will notice that you have a new sub tree called setup StereoScopic 3D! Run the wizard and follow the prompts and viola! You should have a functional 3D screen with a muchly improved 120Hz LCD screen powering your movies and games
I hope this has helped a few of you with your upgrade and weather or not you will want to take on this upgrade on your own. I wanted to write this guide to consolidate the info in the other 120Hz upgrade thread into one place rather then have it spread across 18 pages.
It is entirely possible I missed something or that corrections need to be made....I did type this out over about 6 hours in the middle of the night haha ... in fact it is 4:42 am now
Thanks to IanC we have corrected a few things that I had forgotten
-
Great write up. Seeing as this upgrade is only $147~ from the regular 1080p screen, and it comes with 3D wireless glasses, it's a steal.
Another plus to the NVIDIA 3D 120Hz bundle is that it gets rid of Optimus and all its crippling/throttling issues. So, your GPU will operate at its full capacity every time you launch a game. This enables you to really enjoy gaming on that smooth, 120Hz screen.
-
Nice job on the tutorial. I will sticky this and close the other http://forum.notebookreview.com/alienware-17-m17x/744470-aw17-120hz-screen.html thread.
Killing Optimus functionality completely is an excellent aspect of having the 120Hz display setup. -
To potential modders looking to do this with a compatible graphics card and have all the necessary parts but the 3D IR emitter.
MogRules likes this. -
Nice, I'm thinking about doing this once I start doing major work on mine.
MogRules likes this. -
It really is a nice upgrade, I would never get another laptop without the 120hz screen , it is just that much of an improvement. Let us know if you have any questions, but most of it should be covered in the write up
MickyD1234 likes this.
-
I have decided to take the plunge on this upgrade. First step, call dell for cable.... no dice.... time ot open my wallet to ebay
Oh well, it will be worth it in the end. -
Hi,
I just got my alienware 17 with the 1080p anti glare screen. i have to say im not satisfied with the anti glare screen in comparison to the glossy screen of m18x r1.... now guys please help me with this but ive noticed that vertical lines are much more visible on the anti glare. is it just me? if i concentrate and am a bit close to the screen i can notice the vertical lines. on the m18xr1 glossy screen i have to be REAL close and still they are not that noticeable..... i dont think its a defective screen... ive just filled out a return form... do you think its a defective screen? the lines are not visible if i sit back and watch a movie..im really confused here plz help...its more noticeable if you go to control panel and put mouse cursor on any icon and you can see the lines on the highlighted blue area....oh and btw do they return if asked within 7 days without any questions? i was so excited about the laptop and had ordered 2 samsung 850 ssds which i cancelled...this is so disheartening.
thanks alot
thanks alot -
Hi there,
Sorry to hear you are disappointed with your new machine. Unfortunately this happens, they are no longer the hand-built machines of the past.
The matte screens seem to be a result of complaints about the glossy one? The matte screen is a great general purpose laptop display, but for gaming the glossy wins every time. Mostly the complaints come from students that want to be able to take their machines to class.
The 120hz models do have another compromise with battery life as you have no intel GPU for power saving. Again, if this is a gaming rig and always on power then it's not an issue.
For the return Dell usually have a 14 day policy which is longer than the statutory 7 days. No reason required and they make it very straightforward. They can in UK law charge you a 'restocking fee' for goods returned without a problem but I have not heard of anyone having to pay this.
I would just report the display problem (yes if you see it it is a problem) and return. They will send you a shipping label and you call when it is ready for collection. You get your money back in about a week following the return. This is how it has worked for me on a couple of AW laptops.
Problem for you right now is that you're looking at an 880m replacement. This card is notoriously poor with overheating and throttling problems. We are waiting on the new 9xx series cards which should be in the next month or so - hopefully!
http://forum.notebookreview.com/gam...xperiencing-problems-880m-list-them-here.html
It might be best to try to hold off or at least call for a deal. They will be having sales 'issues' at the moment I would expect.
I know you were all ready to start some awesome gaming but think of it this way, if you hold out you will be 'in' on the early adopters. Dell are all over any issues with a new model. The 780m had a few problems initially but quickly resolved
.
Does it game fine - do you seen any anomalies on the display there? -
Thanks for the reply.
Yeah your right i think the anti glare were made because of the glare in glossy screens. I dont think there is anything wrong with the display, i think its because its anti glare pixels are more visible. I have not tried gaming yet as was just so dissappointed with the display. So i just packed it and submitted the return form. So cant help on the 880 issues. I think ill wait for the r2 version of this series... -
That's where the smart money is right now. Hope it's soon, the R1 didn't attract me that much, and now they have gone to win 8 only, err have you noticed, it's a failure!
-
Yeah just noticed win 7 gone. I just got mine with win 7 but gonna return it, dont like the anti glare screen and will wait for the r2. I just hope there are no issues in returning it.
-
Unfortunately the screen part numbers have not been changing much in the last few models...so I don't know if waiting for the R2 model will help all that much it is quite possibly going to be the same screen. Your best bet is to get the 120hz screen, it is far superior to the anti glare in every way.
-
all that parts numbers are compatible with my AW17 R5???? mine cames with 900p screen, is it posible too???? best regards
-
The 900p screens don't really look that good IMO. Most people that get them report a less then pleasant viewing experience.
http://forum.notebookreview.com/ali...icial-alienware-17-owner-s-lounge-thread.html This thread will list the part numbers. Third post down, 1st line is the 900p, second is the 1080 60hz and third is the 1080 120hz.
Easiest upgrade for you is the 1080 60hz screen which requires just changing the screen out. The 120hz option requires the LCD cable as well which can be hard to find and expensive. -
Just throwing it out there but FF13 on Steam looks AMAZING with the 120hz screen...I kinda wish this game had a 3D option. Now if Square can patch it to give us 1080 and more video options I can't imagine how much better it can get.
-
Will the m17x r4 cable work with the AW 17 2014. Model # 2jd3n
-
Probably not.. They're 2 different gen so motherboard end of the cable might be a bit different.. I wouldn't take my word on it though..,MogRules likes this.
-
No they are different cables and route differently. Unfortunately you will need the new cable.
-
if I just only change from 60hz to 120hz and no 3d, does the optimus work?
-
As ejohnson has said you will lose optimus functionality. In order to get the 120Hz screen you need to use the other video display port ** If you don't you can brick your machine so don't try it**. When you use the other port optimus is disabled by the bios and there is no way to turn it back on short of an unlocked bios which CAN brick your machine or require a blind flash (Flashing without being able to see whats on the screen) as others have found out the hard way. If you use the integrated a lot for battery longevity or whatever then you are probably not an ideal user for the 120hz, but if you don't then there is really no reason to not get it as the quality is just that much better.
-
I've just finished the upgrade. The new screen is really good! Colors are more vibrant, vivid.
... But I've just a little problem, the webcam isn't recognized. I've check the webcam cable, unplug and plug again but no change. Everything else working like a charm, I just have to find the problem with the camera.
Perhaps the problem can be the cable which fit beside the edp port? The "power cable" ? Maybe it's not plugged well? I want to be sure before to unscrew all the screws under the keyboard!
PS: I've not the emitter for the moment. -
Have you checked the Fn key function (F9 on mine)? Might be an easy one
...
XGIII likes this. -
On the Alienware 17 the Fn+F9 is for "Hdmi in"
-
I would start by checking all the cables again...even though it is a pain to pull apart. If it was working before and it isn't now then my guess would be either a lose connection OR a bad cable, which obviously would suck. If you check your device maanger it isn't showing up at all anymore? It will be under imaging devices.
XGIII likes this. -
No, there is nothing under imaging devices..
By the way, thank you MickyD1234 & MogRules . As I'm not really using the webcam I will let it apart for the moment, I'll see it another day when I'll have the force to unscrew again xD . For now I want to enjoy the screen in games
-
What keystroke is it on? I thought it had moved?
Edit: Enjoy. Nice isn't it?
-
There isn't a key that I am aware of that disables the website/mic on the AW17. Well I can't see it anyways.
The 120hz screen is very nice, you won't notice until you use another worse panel. From what I've seen from model numbers, the R4 and R3 potentially use the same panel as the AW17. -
I bought a 120hz 3d panel for my AW17 a couple of months ago from laptopscreens.com.... I now have a couple of stuck pixels and they are driving me mad... I have spoken to laptopscreens and because i'm based in the Uk its a nightmare to return and get a replacement even though the panel comes with a 3yr warranty. anyone else had a similar problem buying from the US from the Uk and needed to return a panel due a fault...
Thanks
Ian -
Hi man, no hot key to disable the cam?? That sucks, I've seen some (dodgy) web sites activate a webcam when it's available! I'd be putting a sticking plaster over it, my desktop cam wears a sock!
The panels for the R3 and R4 def were different. When I got the R4 I complained it was darker (even in the BIOS screens) and got them to replace it. Same! Turns out it is the 'LightBoost' feature that the panel has to support for 3Dvision V2 was the cause. I had to laugh since I was probably not the only person to spot that dimmer display. The next bios release had the BIOS progress bar brightened up so it was not as obvious
.
The AW panel does have the same P/N as the R4 from users I have asked but even that seems strange. The AW 120hz advertises 'TrueLife' as a form of anti-reflective capability - another panel specific quality
Dell TrueLife LCD Screens - What is it?.
If they do finally come out with a 980m/120hz I'm going for it, so I'll have real hands on experience then
-
Not heard of anyone having problems but it does not surprise me. When you purchase from another country you are relying on the vendor to honour warranty. Legally they can promise the earth and supply nothing outside of their country of origin. Only Ebay protections give you some legal rights, and even then all they can do at the end of the day is ban the seller and get you a refund from their insurers (less shipping).
A reputable international reseller will want to honour warranty but even then they usually leave it up to you to arrange and pay for the return.
Good luck and please post results - good info for this thread
-
My first panel also had stuck pixels as well....at first it was only one and it wasn't that bad but then two more popped up in a day or two after installing it so I had it replaced. The new panel had a stuck pixel when I installed it but I just tapped on the screen and it went back to normal and have not had a single issue since.
They were good about the return process for me. I made a deal to just buy a new LCD so as not to have to tear down the whole computer again and install the old cable and screen for a few days so I bought a new one, installed that and then returned the first one for a full refund.IanC likes this. -
Hey guys,
So, I might very well buy an Alienware 17 with a 980M and a 120 Hz screen when they're out.
My concern is that I want a quality TN display (I play fast-paced FPS games, so I need lower response times than what IPS screens offer), and I've read a couple of AW 17 (2014) reviews which said the panel wasn't that great. I'm guessing those reviews were about the 60 Hz panel, though. My question is therefore: how good would you say the AW 17's screen is? And are default (sold with the laptop, not replacement screens) 120 Hz screens typically better panels (notably in terms of contrast & RGB/eRGB/AdobeRGB coverage) than the more frequent 60 Hz screens? Thanks! -
Some info here: http://forum.notebookreview.com/alienware-17-m17x/754925-screen-better-aw17-120hz-aw18-pls.html
I also heard from on-line FPS gamers the latency is lower, although I have no idea if that makes any sense? Maybe if the game is cranking out 60+FPS?
Side by side there was no contest, I sent the 60hz back and suffer the reflective panel...NorrinRadd likes this. -
It's not even reflective. It's nothing like the M17x R4's 120Hz screen. It is only reflective when the screen is turned off. You can't tell when it's on.
TN panels are older but we don't need another type for gaming. These systems are designed for gaming, not work or photoshop.MogRules and NorrinRadd like this. -
Well that's a big plus - finally someone says it is better! The SEC PN an AW 17/120hz owner gave me the same part number as mine - totally confused me since the new one said 'Truelife' which is what I guess gives it the non-reflective capability?
Just another plus point I will confirm when I get one, when Dell finally get the 980m out...
-
Yeah, it basically just brings out the picture in the screen, so that you don't notice any reflection.
TrueLife is also known as "anti-reflective" technology.MickyD1234 likes this. -
That is so good to hear!! I only use my machine in low light for gaming so it's something I have got used to. Now I'm a little more keen to try one - unless AW decide to drop the 120hz panel - which would not surprise me with the compromises recently introduced
-
Thanks a LOT for your answers, guys. Screen quality is very important to me, and while I initially thought I'd end up going with an MSI GT72 I eventually decided I wanted a 120 Hz screen, which made me look at the Alienware 17. After reading a couple of reviews saying that the (60 Hz) screen wasn't all that great, I got scared that this might apply to the 120 Hz screen as well. I'm therefore very happy to hear you confirm the AW 17's 120 Hz screen is a high quality screen. Do you know if it's also true of its contrast ratio? Has anyone measured it? Hopefully 120 Hz is still an option with the AW17 model that will be presented on Monday...
-
I wouldn't really say the 60hz panel is bad unless you get the 900p option in which case....it is bad. But the 1080p 60hz panel isn't terrible by any means either, it just does not stack up that well against the difference the 120hz panel makes IMO. Yes there is the possibility of some reflection if you sit in front of a window with your back to it but I use my laptop every day in wither my brightly lit living room or my brightly lit office with nothing but a wall of windows and even when it is sunny I never have any issues seeing the screen or get bothered by the reflection.
Most of us are using the same screen that would have come with the laptop if we ordered if from Alienware, same part number and all, so there is no difference in the screen I have as there would be if I had of bought it stock.
Very much agree, you can see the reflection when the system is off but once you are up and running, it is never noticeable IMO. The R4's glossy finish was much worse, but even then I never found it that bad. -
I'm not too concerned about reflections, but does the 120 Hz screen found on the AW 17 have a good contrast ratio? And do you have any information on its RGB/eRGB/AdobeRGB coverage? Is it good (better than the 60 Hz panel?)?
-
I can't find any info on the contrast ratio for the 120hz screens...only the 60hz.
-
No problem, thanks for looking
If anyone else has any info it'd be very appreciated!
-
Hi,
I have ordered a new screen, as soon as it arrived I will replace the faulty one and return that one for a refund.
I just hope the new one is fine...
Sending back from the UK is expensive, and a risk you take buying abroad. I paid over £69 in customs and vat charges.... So it's expensive...
Fingers crossed
Ian -
Someone really doesn't want me to do the 3D upgrade in my machine.
I didn't want to spend the $90 from eBay for the N392W cable, so I went and purchased the same thing from a Chinese site. Here is where I purchased it from.
For screen line only, Original vas00 dc02c004000 laptop screen line cable other's parts optional-inLaptop LCD Screen from Electronics on Aliexpress.com | Alibaba Group
This should be the right cable. Looks good in the images, and so on. Part # lines up with what I've read.
Well, I received the cable today. After about a month of waiting. There are some issues. First, the little 10 pin connector that comes out where the cable goes into the motherboard, is only 6 pins on the cable they sent me.
The Part # is the same on the cable they sent me, but my revision is "0.5", not even a production part #. Beta part #.
Now MAYBE i could still use it. It looks like only 4 of those 10 pins are in use anyway. However, after reading some horror stories about people frying their display AND motherboard by using the wrong display, I'm worried about using some pre-production cable with my system.
So be warned about ordering these cables from these Chinese websites. You may save money and wait 30 days and end up with a non functional cable
Images below are of a WRONG/BAD cable. Do NOT buy a cable if the images look like this!
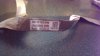
Look at my images compared to the images in the post where I purchased it from. They are different.
I hope the seller doesn't expect me to ship this back to them on my dime. They didn't ship me what they said they would. -
You got yours from the same place I got mine from....that being said mine was identical to the image on Aliexpress and everything worked just fine....I would have to take my machine apart to confirm and I really don't feel like doing that ATM. Someone can feel free to correct me on this but the part that causes the bricking is the LCD cable which has to be changed to other port on the inside of the machine...the cable that your describing sounds more like a power cable and not the actual display cable and as such shouldn't cause any major issues if it isn't the right one....but i could be completely wrong. The cable does have the right Dell part number on it but it def looks different. Mine looks identical to the pic on their website....I do remember that. It is entirely possible that they changed the cable somewhat and that is just a newer model but I have no way to confirm short of ordering a new machine and ripping it open....
-
I'm guessing the cable they sent me was a 'beta' or 'pre-production' cable. Notice how mine is version "0.5" and theirs is "1.0"? Mine is also dated 2013/04/10. Theirs is 2013/07/11.
Perhaps it would work if I used it, by jamming the 6 pin cable in where the 10 pin one would go (It looks like on the 10 pin one only 4 of the pins are used anyway) but, I don't think I want to try that!
I've emailed the seller. Unfortunately I think I'm going to be SOL because they don't have anymore for sale.
I'm telling you, someone does NOT want me to upgrade my machine to 120hz. It's just not working out for me. -
I don't blame you for not wanting to try...I wouldn't either.
-
I'm not sure someone ask it before as i didnt find this answer in the thread, but does the 120Hz R3 panel is the same in the Alienware 17 120Hz? I just read the Video Cable is not the same.
120Hz 3D Screen upgrade for Alienware 17 R1
Discussion in 'Alienware 17 and M17x' started by MogRules, Aug 3, 2014.


