
If it works like paste we are home free. Off course depending on quality paste thety refer to. My paste is great but needs repasting occationally. If i never have to repaste again a lot is gained. If it is better since we can go 6.8 instead of 6, even better.
Ill do some more tests flingin. Think another prob we have is the uneven weight of the assembly with the radiator hanging of the edge from one side with a bit distance from the cpu.
edit last probably not if 1 and 3 is the ones with to little screwforce but snagging somewhere could explain that givin opposite effect.
-
Lol it doesnt screw up formulas and numbers. Problem is the needed perfectness that our system might need tweaks to obtain.
-
ok flingin.
Applying pressure on the top of the heatsink with my finger, where the hole apx above the memory is, does little to decrease the temperature but it rapidly inreases temperature on the two cores away from the pressure, meaning reduced pressure on those screws. -
Try this flingin
When running with loose keyboard.
Use a screwdriver and apply pressure on the part of the heatsink towards you, right below the copper pipes.
If you aply it slightly to the left you will help core 0 (or core 1 if you want)
You will also affect core 2 (third core) If using a screwdriver you can get quite even temps during benching.
I have tried pads 1.5 mm between screw 1 and 3 and 2 and 4,but limited help from that.
We need to be able to apply pressure between screw 3 and 4, but that i not very easy since it is an opening in the tray there. .
Seems we have as i assumed a slight weight issue since most of the weight of this heatsink is away from center, and cooling problems are on the opposite side from the radiator.
Another thing is also that the aluminum of the heatsink could bend when applying to much pressure, causing the heatsink to move away from the middle of the die. -
I think the first thing to do is try it on a desktop CPU and see with increased pressure how well the cooling performance works. Then see if it takes a LOT of pressure or just a little tightening of the screws. I know I can flex my motherboard if I keep tightening the screws on my desktop HSF. Just wish there was a way to measure that.
-
Answer is, pressure has to be high and the thin aluminium cooling flange might not give enough even with screw mod for the R-2.
For the screws its no prob but they are hitting bottom before springs are compressed but could generate more than enough pressure if New springs are added.
The uneven weight of the assembly was also putting breaks on results.
I have overcome that now and have the coolest R-2 ever for now running 1024 with quite impressive results.

I used 105/95 and 26X clock.
Not many can go as low as 420 with the R-2, for now my Guess is noone is able to do that in the low 80's.
How did I manage?
Well I was VERY determined.
First mod, not going to be widely supported: I added cooling pads 0.5 BELOW the CPU. pressing it gently onto the pins making them come through then gently pusing it onto the CPU seat. This could destroy both the CPU and the socket if unlucky but i took the chance.
Two strips of it, one on the top and one on the bottom.
This made tings better. I did still get plenty temps on the two cores away from the "radiator".
I had to apply pressure and had nowhere to add it since i did not want to mod screws since tray flange bends slightly away from CPU already before that. Stiffening the flange could help.
Now what to do. At first i tried cooling pads going across between screws 2 and 4 hoping it would help. No go.
After that i used two coins in the gap between the cooling flange between 2 and 4 and the titanium tray.
I superglued the two coins together and superglued it to the tray when assembling, not making them flat. The glue to keep it in place not giving me copper loose in the computer. Wood or plastic could probably be better options and can be made to fit better.
The coins will be at an angle obviously since there is a gap, but they did the trick.
The tray helps me now get the force needed but will put more strain on the mobo.
As you can see i added a cooling pad where the pipes runs below the tray to slightly add pressure on that side of the CPU to.
How long it will take the added pressure before die gives, mobo gives or tray gives i have no idea of but it runs soooooo cool right now its a dream.
Nospheratu and sangemaru like this. -
Well, you got it to work - well done! Your cores have a very even temperature. How much lower are your temperatures in comparison to other peoples? It does sound like a risky mod you did, and might not be for everyone. I would imagine that if someone copied your method they wouldn't necessarily get the same results - do you think all the jigging you did with coins would just be specific to your individual unit, I have a feeling that everyone's heatsink & mounting requirements might be slightly different from one another, even if they're the same model?
-
is that with a 920xm or 940xm? what are the temps underload? highest overclock on all 4 cores with acceptable temperature?
-
Recomend this solution? No way. I had to prove it could be done. Will explain more later.
-
Using the new 920. Temps shown in photo you quoted in t-stop as max for above 100w tdp. Dont get more than 96 without overvolting the cpu. Dont wanna do that since it kills my best cpu. Could probably manage 27x clock entire test with stock voltage.
-
True the temps are very even. Means i have very even pressure.
Ive done 27X now. It makes the Power hit 103W. TDP / TDA = 105 / 100

During this i did not run HWinfo making fans do the job naturally and reducing load.
Check the low time.
84 deg max.
Did a test before teardown. 25 X and 100 - 90 TDP / TDA.

As you can see i hit 100 deg at 32% of test, choosing to abort it.
Improvement? YES very much, probably over 20 deg.
Pressure on mobo and CPU still could shorten the life of my computer, but now i can probably run BF4 at 26X without problems for hours giving me a bonus for the periode it work. If it lasts long, then im very happy. If not, it might be time to move on to M18 perhaps??
I do not recomend anyone doing this but has made a sort of a guide if someone choose to og for it.
If you do it you could destroy Your CPU and Your MoBo.
If you risk that you get a way cooler PC, for now.
The reason for the pad was to hopefully make the screws bottom the springs to force more pressure. Not the first of the Things I would have tried.
I had pads on the heatsink between the heatsink and the titanium tray, not much help.
I had to apply manuel pressure to see where it needed to be able to modify.
First and Third cores are towards you, bottom left is first.
Press the heatsink when running in loose keyboard mode With Your finger or something not to pointy, and see if temps change. I did this With loosened screws and fastened screws, no difference so i bottomed the screws out again before doing the coin trick. I did see very much improved results when pressing causing me to move foreward doing the fix. First using something soft, before moving to the coins.reborn2003, triturbo, Nospheratu and 2 others like this. -
Good Job Throme...
What i am afraid of is, my bottom corners on 920XM are already a bit chipped, so adding more preassure on those corners could cost me a lot.
I was thinking that it was fault of the screw numbers 1 and 3, which puts more preassure on the top of the DIE, where my CPU is "Chip-Free"
You and i also know that using conductive coins is not a very good idea, and because of this you are not reccomending anybody doing this, and it was used just to show us that this can be done.
I am thinking about moving to Alienware 18 (R2) in the future, hoping to get a good deal on outlet
Maybe also hoping that my R2 will die soon, and dell will be unable to fix it, so i can beg them for the newest model, and quit thinking about RGB LED madness, which i have been enjoying for the past....4 Years
The worse thing is i treat my R2 like a true Queen of the Queens, it is cleaned regulary, nobody touches the LCD cause they know they will loose a finger/hand ( LCD looks like brand new just after taking the protctive plastic blister ) It sits on a cooling pad all the time. Also i don't play much now because i have too much work, because of 2 jobs at the same time ( Full+Part-time), so it is highly UN-Likely that something is gonna fail....
Maybe i should just sell it...:cry:sangemaru likes this. -
If its dead flat and you try pressing with your finger it shold stay flat. It is difficult to press it hard enough to chip corners if it starts fastened totally flat. Your prob is knowing it very flat. All cores getting a bit chill should indicate that. Good luck if choosing to try.
Coins = no good but superglue keeps it in place. If i had somethibg else hard and temperature resistant i would have done that. Now i have to wiggle my computer after i have moved it to chech if coins has loosened but quite sure the stay. For now i leave it in going for gpu checks next. -
Info about GPU used Heat spring.
I have tried BF4 for about 1 hour now.
GPU's are quite even.
The one with the best of the best paste has 1 deg colder than the one using Heatspring.
TIM is in GPU2.
GPU 1 = 63 deg
GPU 2 = 64 deg
This the first time i have loaded the card after replacement.
Normally the heatspring would get better, the paste should loose out.
Going to run like this for a while longer.
The GPU 1 has had the paste for a while and could have been degaded a bit already but 64 deg is not very bad and makes one not have to open to repaste causing all kinds of possible problems with covers and lids and possible ESD or shorts or any memade error.
BF 4 has also run my CPU hard as normal.
Running on 26X (never done before for me)
105 / 100 TDP / TDA

Here are my temps.reborn2003 likes this. -
Looks good! HTWingNut tried Heat-spring on his GPU (I read earlier in the thread), and got higher temperatures than paste too, a larger difference than yours though.
-
looks like temps are solid. have you tried overvolting the cpu and increasing the base clocks through the bios?
-
From what i read its the increased voltage that potentially kill the CPU.
OC in bios it not something i need to do since I use T-stop if i dont use OV.
I see that i am at a breakinpoint. 27 is slightly high giving me an occational bluescreen.
How much gained from this i do not know but i can run games at 1-2 X faster and at higher effect than before, making games even more stable.
I might later try an OV in BIOS just to check. I will then post it here. -
Probably since i have inserted my GPU screws to rock bottom on both GPU's giving me high pressure.
Had to do it carefully not to break my die though.reborn2003 likes this. -
Well i just couldnt resist trying OC in BIOS to.
At 105/100
And 26X in T-stop
I added 75mV and 5% in BIOS.
Result? I had to abort the test at 30% when temps hit 100deg on first core. This time there was a slight temp difference on the cores, where they decreased closer to the "radiator".
Still WAY better than original that needed the breaks at lower TDP/TDA and 25X only in T-stop
But from what i see, BF4 is almost as hard on CPU as T-stop 1024 test meaning this is no-go for normal use if one plan on using programs needing 100% of the CPU over time. -
Finally received my HeatSpring TIM
Thanks flingin, for all the effort involved and covering the postage, it really is appreciated :thumbsup:
Trome71, those results are nothing short of amazing! Awesome work man
I installed it late last night and my results aren't reliable although I do see a LOT of potential. I tweaked and played around with the heatsink screws for about an hour continuously running TSbench 1024M and the best result I achieved was 89C on all cores except Core 2 which maxed out at 92C. This was with 24x across all cores and 90/82 TDP/TDC.
This morning I booted up again and ran the 1024M test again and my results are different. Cores 3 and 4 have lower temps and Cores 1 and 2 jumped to 97C. Ambient temps were more or less the same as last night so I'm not sure if after shutting down the hot laptop and during the night thermal expansion/contraction affected it.
I still haven't tried two layers as yet so I'll try to get that done today. I did exert extra pressure on the heatsink between the screws closest to me as Trome71 mentioned but it did not help much. Just goes to show chances of our heatsinks being similar aren't very likely and we have to tweak it on a case by case basis.
That said, Heatspring is giving me more or less similar temps to my Shin Etsu X23D. Well, last night it did. If I manage to get the heatsink in the sweet spot again I won't have to tear apart the machine again in a long long long time... hopefully. I can't see how the cooling performance of a solid metal pad that does not change phase will deteriorate over time, but then again, I'm no metallurgist.reborn2003 and Robbo99999 like this. -
Higher CPU temps for me as well
Like 10ºC higher and uneven heating just like most of you. I'm waiting for some copper shims to check how the GPU would perform with two layers of Heat-Spring and a copper shim in between. So far not very happy.
-
Actually I dont mind low 90C's temps when running 90 TDP on the CPU. Trome71's temps would be ideal but I dont want to exert unnecessary pressure on the mobo. The HeatSpring is performing more or less the same as the Shin Etsu X23D and that is a good paste.
Another thing worth noting is that I've noticed that the temps drop evenly between the cores when the test completes... its uncanny. It would make you think it was the same sensor reading all cores.
My idle temps is mid 40C's so its exactly the same as my previous paste. -
Might be worth a try, but a copper shim & two layers of heatspring, then I'd be surprised for that to be effective. Chances are you'll have air gaps between all the joins, as well as more material to transfer heat through equals slower heat transfer. Might be worth a try, but I wouldn't bet on it.
-
I think the increased heat flow at higher temperatures would highlight any differences in heat transfer efficiency between the different areas of the die & heatsink, so I'm not surprised you see a greater difference between cores at high CPU loads, in contrast to the difference between cores seen when at idle. It's the same on my CPU, and I don't use heat spring, I think it's just a natural effect.Nospheratu likes this.
-
Only way to make this better would be for copper plate to be same as size as the heatspring making that side slightly bigger than the DIE. Dont think it will be perfect thoug.
The way to apply would then be to burn in the connection in the oven with the heatsink and the copper shim. Use a vice to lock them together. They should then connect solid if it works as intended against copper. -
BTW
Ill do a new 27 with 105/100 later today.
Seems it could be better now. -
That does sound like a good way of doing it if you're going to do it at all, but it's still not an ideal situation due to the increased thicknesses of the material through which to transfer the heat, and also there are bound to be imperfections at all the joins between the different layers regardless of the method of putting them together. Also, is it safe to put the heatsink in the oven? The heatsink is an enclosed pipe with liquid inside (works on the principle of vapourisation & wicking to lower the temperatures), would heating up those pipes increase the interior pressure too much & result in expansion & possible failure of the heat pipes? I don't know, just postulating.
-
True dat.
But your oven could easily be set to 80 deg or 90 if needed.
Bigger surface than the die gives better contact with heatsink and the copper shim should spread the heat, thicker is better, but i agree, more connections are lower effectiveness.
I am happy i dont have to. -
Now ive done a new test.
This after i had high temperatures on OV in BIOS.
110 / 100 27X

Could be ambient temperatures lower, but in same livingroom so not much difference, now i get slightly lower in CPU temp.
To make it more even with others results i have now done a run with 27X 110 / 100 with slightly elevated backend of the PC. Two plastic studs apx 3 cm each.
Using no cooler since the coolers make slight differences.
83 deg max at the end.
It was not able to swallow enough air when running like that directly on the desktop without elevation making me abort at apx 30%. -
And what stops you from setting FID at 30 ?
SLV7 was able to do that even with normal thermal paste.....
HMM ?
Sent from my SM-N9005 using Tapatalk -
I have been experimenting with above 4K as you probably remember with my old 940 and thermal paste.
That 940 does not work 100% perfect after me playing around a lot with it.
30X
Finished:

During to show clocks:

Ended as you can se below 90 deg so temp was no issue for that.
Other benching was not possible.
I would still not be able to run a full T-stop 1024 since i stop before that with lower settings.
MY main goal now is that if i dont ruin my 920 i can run BF 4 quite hard since it seems it loads the CPU apx as hard as the 1024 test.
After ive run this for i while i might give it a go with my old 940.
But right now i have quite great cooling, and there is no telling how it would be if i dismantle it again. Especially if the heatspring has not stuck on the heatsink and i will not know that before pulling it apart.sangemaru likes this. -
Right now it's two layers of MX-4 and a copper shim. I hope that at least for the GPU would be OK.
-
Ah, I see, you've got some kind a custom setup already going on then. Well, that's very similar to what you were proposing with heatspring then, so if heatspring is better than paste then you may be in for an improvement then. (Although it does seem tricky to get heatspring to work effectively from reading this thread, but your initial idea doesn't sound so crazy now that you point out you already have a paste version of that setup running with the copper shim). Neither option with the shim sounds ideal, but you've obviously managed to get the paste version working though.
-
I'm running four pieces of HS stacked now and temps haven't improved. It's more or less on par with a single layer. I cant seem to get decent temps for 90 TDP which is what I'm aiming for.
I played TR, FC3, NFS Rivals and Hitman Absolution and CPU temps max out at +-82C. But temps for COD Ghosts and Crysis 3 max out at mid to high 90's. TSbench remains more or the same with one layer with temps hitting low 90's on the 1024M run.
I've been adjusting the heatsink for well over a week and one thing I've noticed is that I have to switch the laptop off and let the CPU/Heatsink cool down before attempting further adjustment. Simply adjusting the screws and thinking you hit the sweet spot doesnt work for me. Upon reboot the load temps are slightly different. I thought I had it nailed down and closed the laptop up but now I see temps are going off the rails again.
I'm a bit scared to do the retention mod and crack my die... but it may be the only way forward at this point. -
and it hasnt helped you pushing your finger hard on the heatsink while running without the keyboard?
I did this during the T-stop test to verify where i had to increase pressure to get going.
Only screws were far from good enough no matter how i did it. And that i did too during T-stop tests to verify directly if it helped.reborn2003 likes this. -
Yeah, I tried your method of increasing pressure between the screws closest to the touchpad and everywhere else really. I pushed down with the handle of a screwdriver and used varying levels of force. All it did was make to the the temps increase instantly to 100C or high 90's.
With individually adjusting the screws I managed to get temps more or less even across all cores with the maximum difference being 3C at most. So my heatsink level after adjustment is pretty decent. I think the HeatSpring just needs a bit more pressure so its time for the retention mod. -
Ahh ok.
Seems that its flat like you say, but not enough force.
I also did the mod below the CPU with the heat pad to elevate the CPU increasing the screw-force. -
Ive tried a bit more on Voltage increase on the CPU.
Going up 75mV gets me to temp throtling when doing the 1024 at below 20% finished now.
This pretty much means that for any CPU heavy application over time its quite useless increasing the voltage for me at least. (BF4 for instance)
But increasing the % in BIOS to 3% gave me a new "highscore" in 1024 with 26X core. (110/105)
I got 398,787 sec ending at 81 deg ( running on top of my cooling tray. )
Going to 27X core speed without overvoltage is boarderline bluescreen stopping before 15% all the time.
So if you can run low 400sec no temp throtling for entire test with paste the most gain from the heat spring would be not having to repaste every now and then not a usable increase in speed.
But for me i was not able to do this entire test with this high setting for TDP/TDA as im running now.Nospheratu likes this. -
Has anybody here tried the retention mod for the CPU?
I tried doing it yesterday but I think I went full retard and cant for the life of me figure out how the screw can reach the backplate after removing the screws and re-attaching the c-clip.
This is the screw with the c-clip attached. The spring cant compress at this point since the c-clip basically locks the spring in place.
![[IMG]](images/storyImages/Screw_C_clip.jpg)
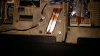
This is the heatsink with the screw installed. The screw cannot go any further as the c-clip prevents it.
![[IMG]](images/storyImages/Heatsink_Screw.jpg)
The problem I'm experiencing with this is that that tiny bit of the screw thats protuding from the heatsink isnt long enough to make contact with the backplate to screw down. I even tried using some force to the point that the opposite side of the heatsink lifted up but the screw cant grip to the backplate...
What am I doing wrong? -
Are you now trying to put it back to stock then, or staying with the c-clip retention mod? I thought the c-clip retention mod just involved removing the c-clip entirely & not reinstalling the c-clip. Removing the c-clip might give you the extra length on that screw to reach into the backplate? (Don't know much about the c-clip retention mod).
-
dont think its the C-clip that prevents i for beeing overtorqued.
Its the threads bottoming out.
You need to put shims on the top of the C-clip below the spring or add a spring to increase springforce since its the springs pressing the heatsink down, not directly the screwflingin likes this. -
I have been running it stock and I'm trying to do the c-clip retention mod for the first time. Have a look at it here.
There's definately something up with the way I'm doing it or my screws aren't the normal ones. I was also thinking of just removing the c-clips and installing it that way since this seems almost impossible. That should bring the heatsink about 0.5mm lower, maybe less.flingin likes this. -
Well. If you put the clip above the heat-sink it will never be spring loaded and you are in big danger of cracking your die if screws grip.
But as you mention it will not since it doesn't go far enough in.
Perhaps removing the clip helps but I'm not so sure if it is the screw bottoming and not the spring being flattened that stops the heat-sink from pushing harder. It stops very hard for me at least and feels as if the spring is still movable so my guess is that the screw hits the screw-flange where the screw goes from threads to bolt.
To help increase the pressure removing the clip would perhaps help a bit, but if force is not enough you can try to shim the spring to increase the spring-force since removing the clip probably does not increase the springforce, it stays apx the same.
I do not recommend removing the function of the springs since they make it easier to flatten the heat-sink to the CPU without cracking your die.
The description he makes in there suggest that the screws can grip when moving the clip above, and he also has removed the spring. This is a dangerous mod. I'd rather try to keep the springs removing the clip as I mention above then add the shims above spring.It could be more difficult to mount btw and be sure not to loose your springs and it will give you more springforce.
Going at it with springs means that to crack the edge of the die you have to raise the opposite side needing "a lot of force". Going without springs means that if you have it at a very slight angle before screwing the opposite side its already hanging on the edge of the die and it cracks with very low screwforce.Nospheratu and flingin like this. -
It looks that everybody is pushing the idea forward, good.
Please be carefull Nospheratu, 920xm is an old cpu but still at $300 mark for OEM.
I keep the fingers crossed
Good luck.
Sent from my SM-N9005 using Tapatalkreborn2003 and Trome71 like this. -
Found the missing piece of the CPU Retention Mod puzzle... and its not something I'm willing to do.
The corners of the heatsink have to be bent downwards, see 5150Joker's post here. I think the washers would be a safer option without disfiguring my heatsink. -
Well, I have the good news and bad news... good news is I did the washer mod and didnt crack my die. Yay.
Bad news is improvement is temps are only marginally better. I only used one washer per screw. I can get incredibly good temps on two cores (mid 70C's) with the other two hitting high 90's or 100 and causing the CPU to throttle which leads us back to square one. The compromise is evening out the temps by adjusting screws till you're tearing your hair out. That meant I lost the low temps on those two cores but reduced the high temps on the other two cores.
What I did notice is that with the washer mod the HeatSpring is compressed more with the edges flattened to the point where the pattern on them is mostly flattened out. It becomes much more shinier than previously. The centre of the HeatSpring still has the pattern more pronounced than the edges which means the consistency of the pressure of our heatsink isn't optimal (Nothing that we didn't know already).
Here is my latest result with TSbench 1024, 90TDP and 82TDC. Ambient is a humid 21C. It may look photoshopped as all cores show 90C max but I spent ages trying to get to this point. At the end of the test the temps on all cores are alternating between 89C and 90C.

That said, I think this is the best TIM I've ever used. Imho, adjusting screws with normal paste causes pump out when tightening and loosening the screws. I've never managed to get temps like these after a complete 1024 TSbench run using Shin Etsu X23D or Noctua NT-H1.
Hopefully the temps improve over time and knowing that this is a metal sheet I can take comfort in knowing I wont have to replace the TIM in the forseeable future. Thanks once again to flingin for all the logistics and time involved and to sangemaru for initiating the group buy idea.flingin likes this. -
That looks good Nospheratu, I guess the real usefulness will be whether those temps remain stable over time, both in absolute terms but also in temperature variation between cores. As you said, hopefully there will be no need to touch it ever again! But, it took one helluva lot of effort to get there, I suppose people will have to weigh up the probabilities of being able to achieve what you have and the dangers of cracking the die vs any reduction in temps you managed to achieve & how stable that is over the coming months.
-
Yeah, I'll report back after some time to let you guys know if anything has changed. Maybe I was a bit of a drama queen as a single washer (about 1mm thickness) isnt enough to crack the CPU die even with the heatsink fully screwed down. The normal retention mod is definitely a dangerous path to take and one can easily crack their chip even with being careful.
On most games I'm averaging about +- 82C but Crysis 3 is another ballgame. It's even worse than the wPrime 1024 test! It's not exactly the result I was hoping to achieve but its better than what I've had before so I'm not complaining. I have the urge to try for better temps but I dont want to risk the even temps across all cores I have now. It's a real headache fighting with this heatsink by adjusting screws and very time consuming. -
what clock speed are you running at? any over-volt?
-
Everything at stock except 90TDP and 82TDC. So that's 24/24/24/24 multi's, default voltage and no FSB oc.
HeatSprings Sign Up Here
Discussion in 'Hardware Components and Aftermarket Upgrades' started by flingin, Dec 11, 2013.


