Is there a part# and place to order the modified vapor chamber that's on the P870TM-R (compatible with RTX 2080 card) and fits the P870DM2/3? There are quite a few of the MXM cards on eBay but they come with coolers for P7xxx series.
-
-
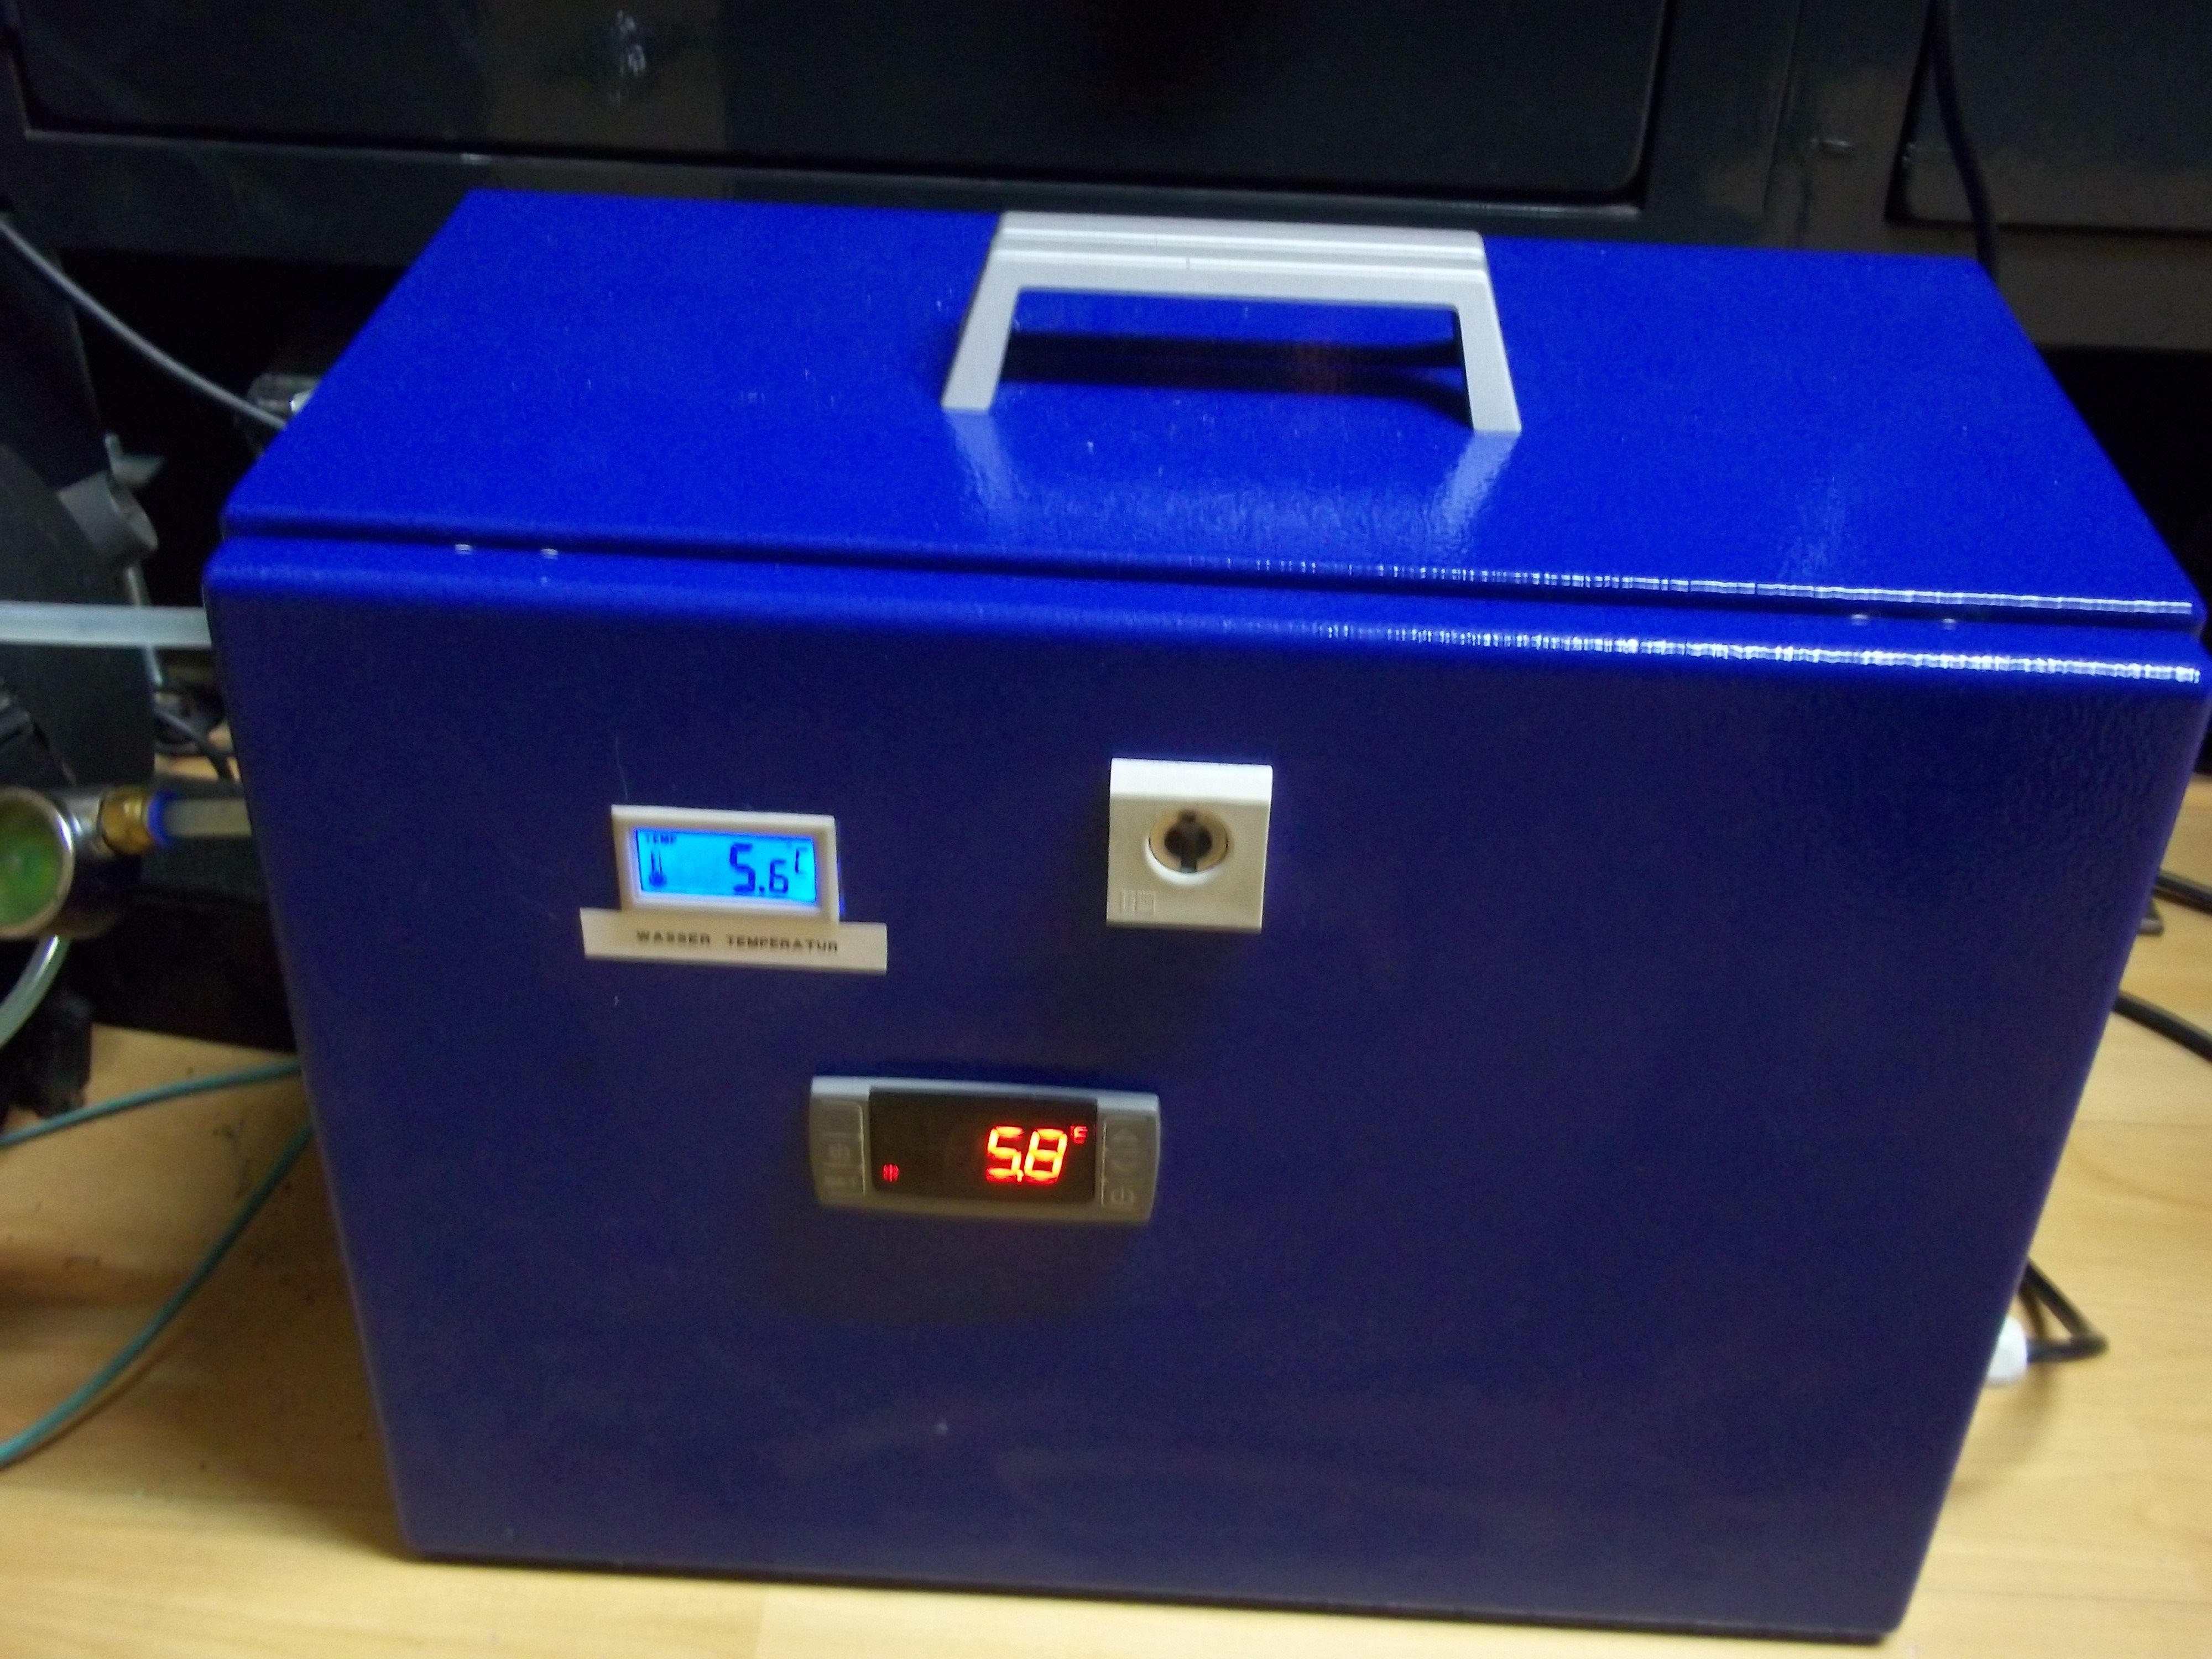
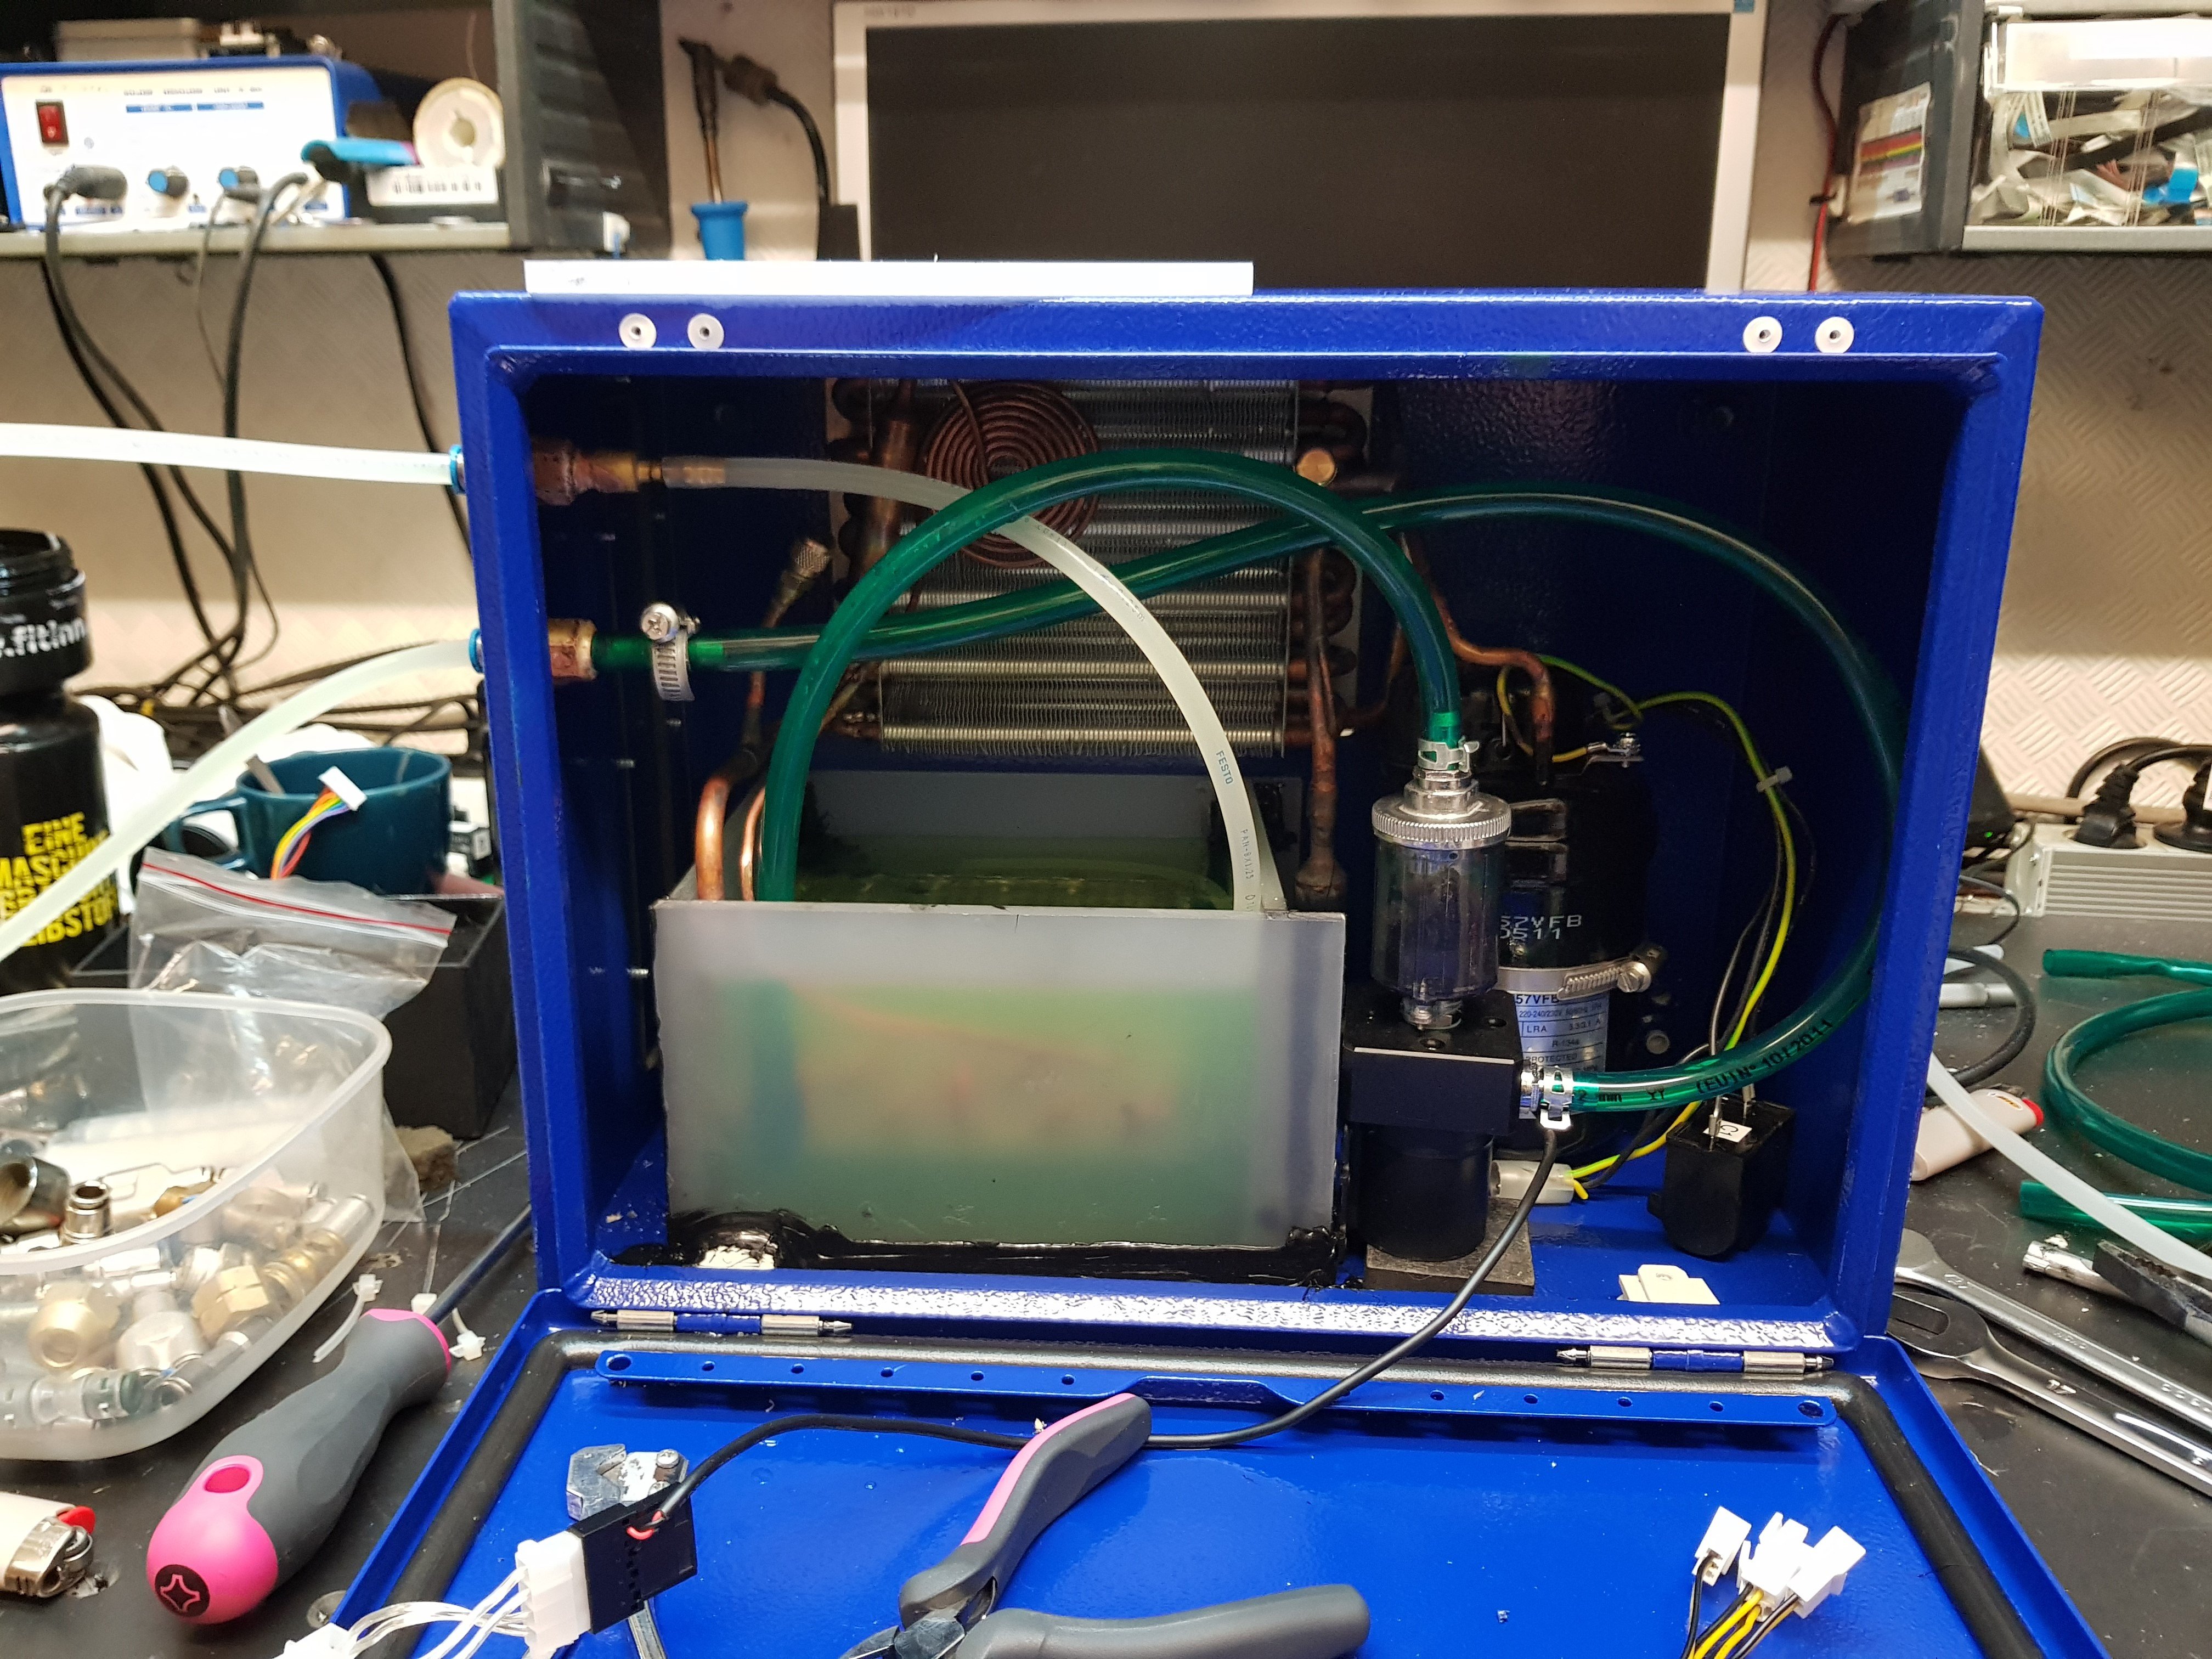
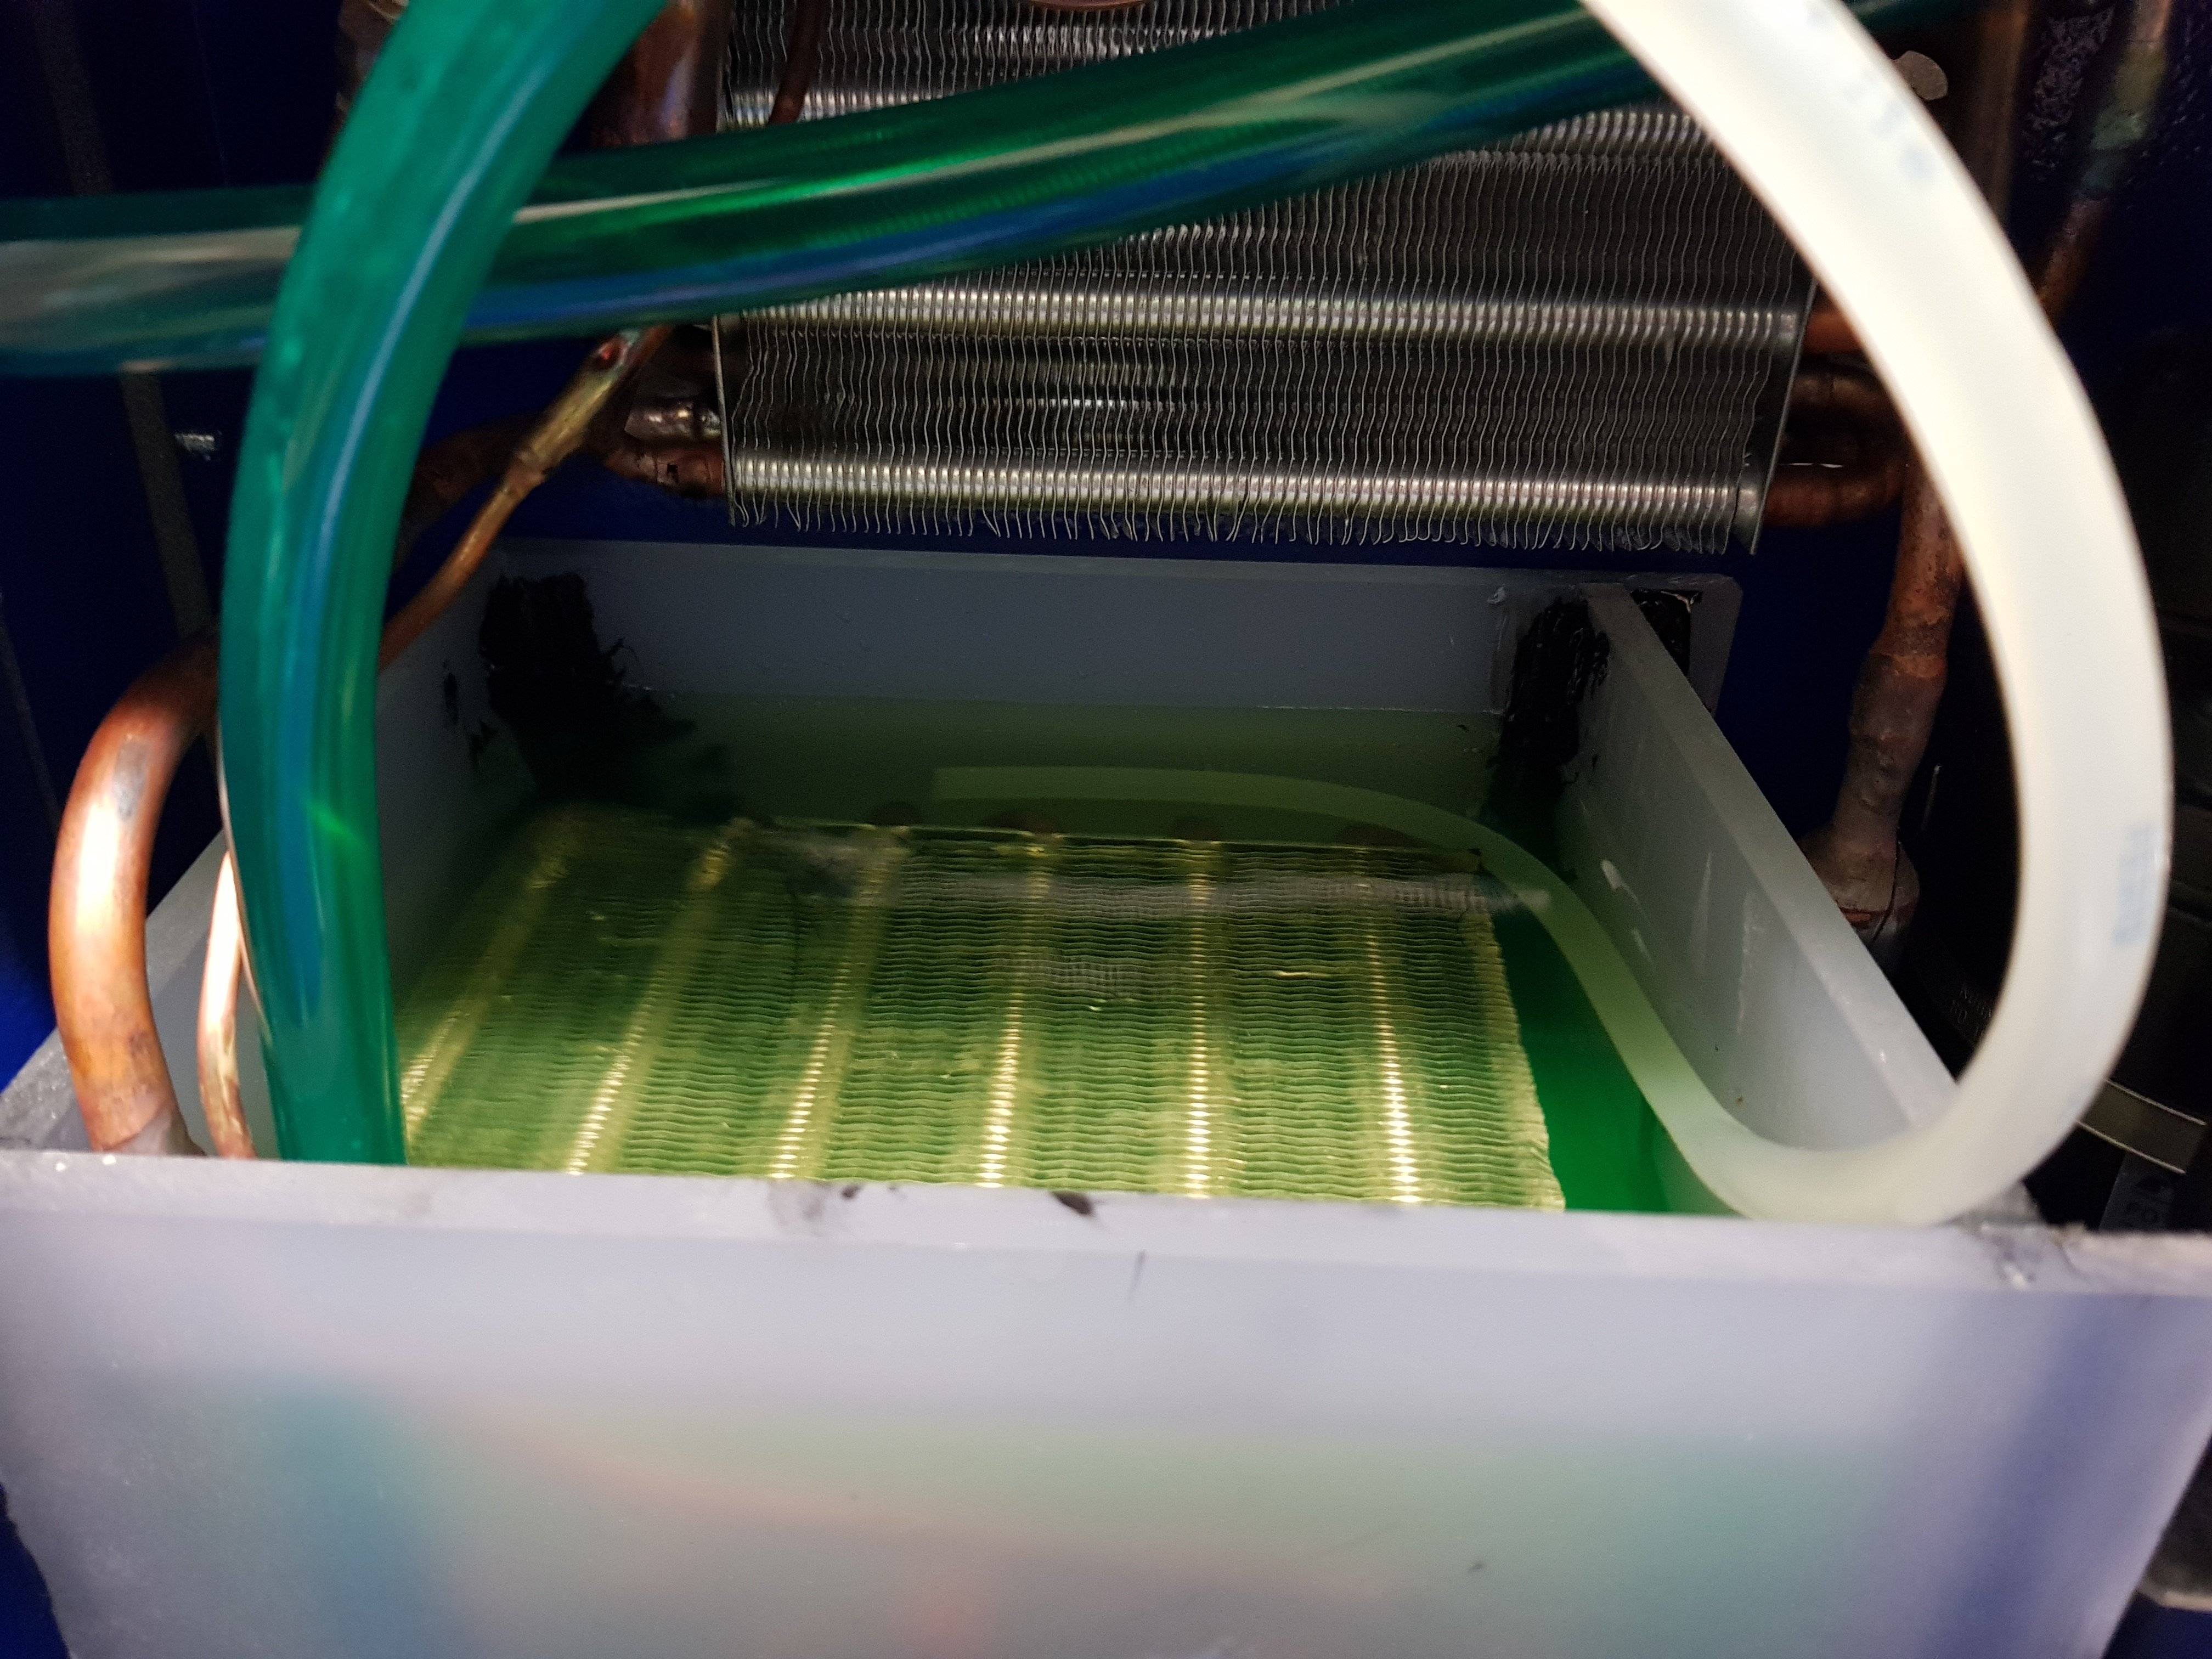
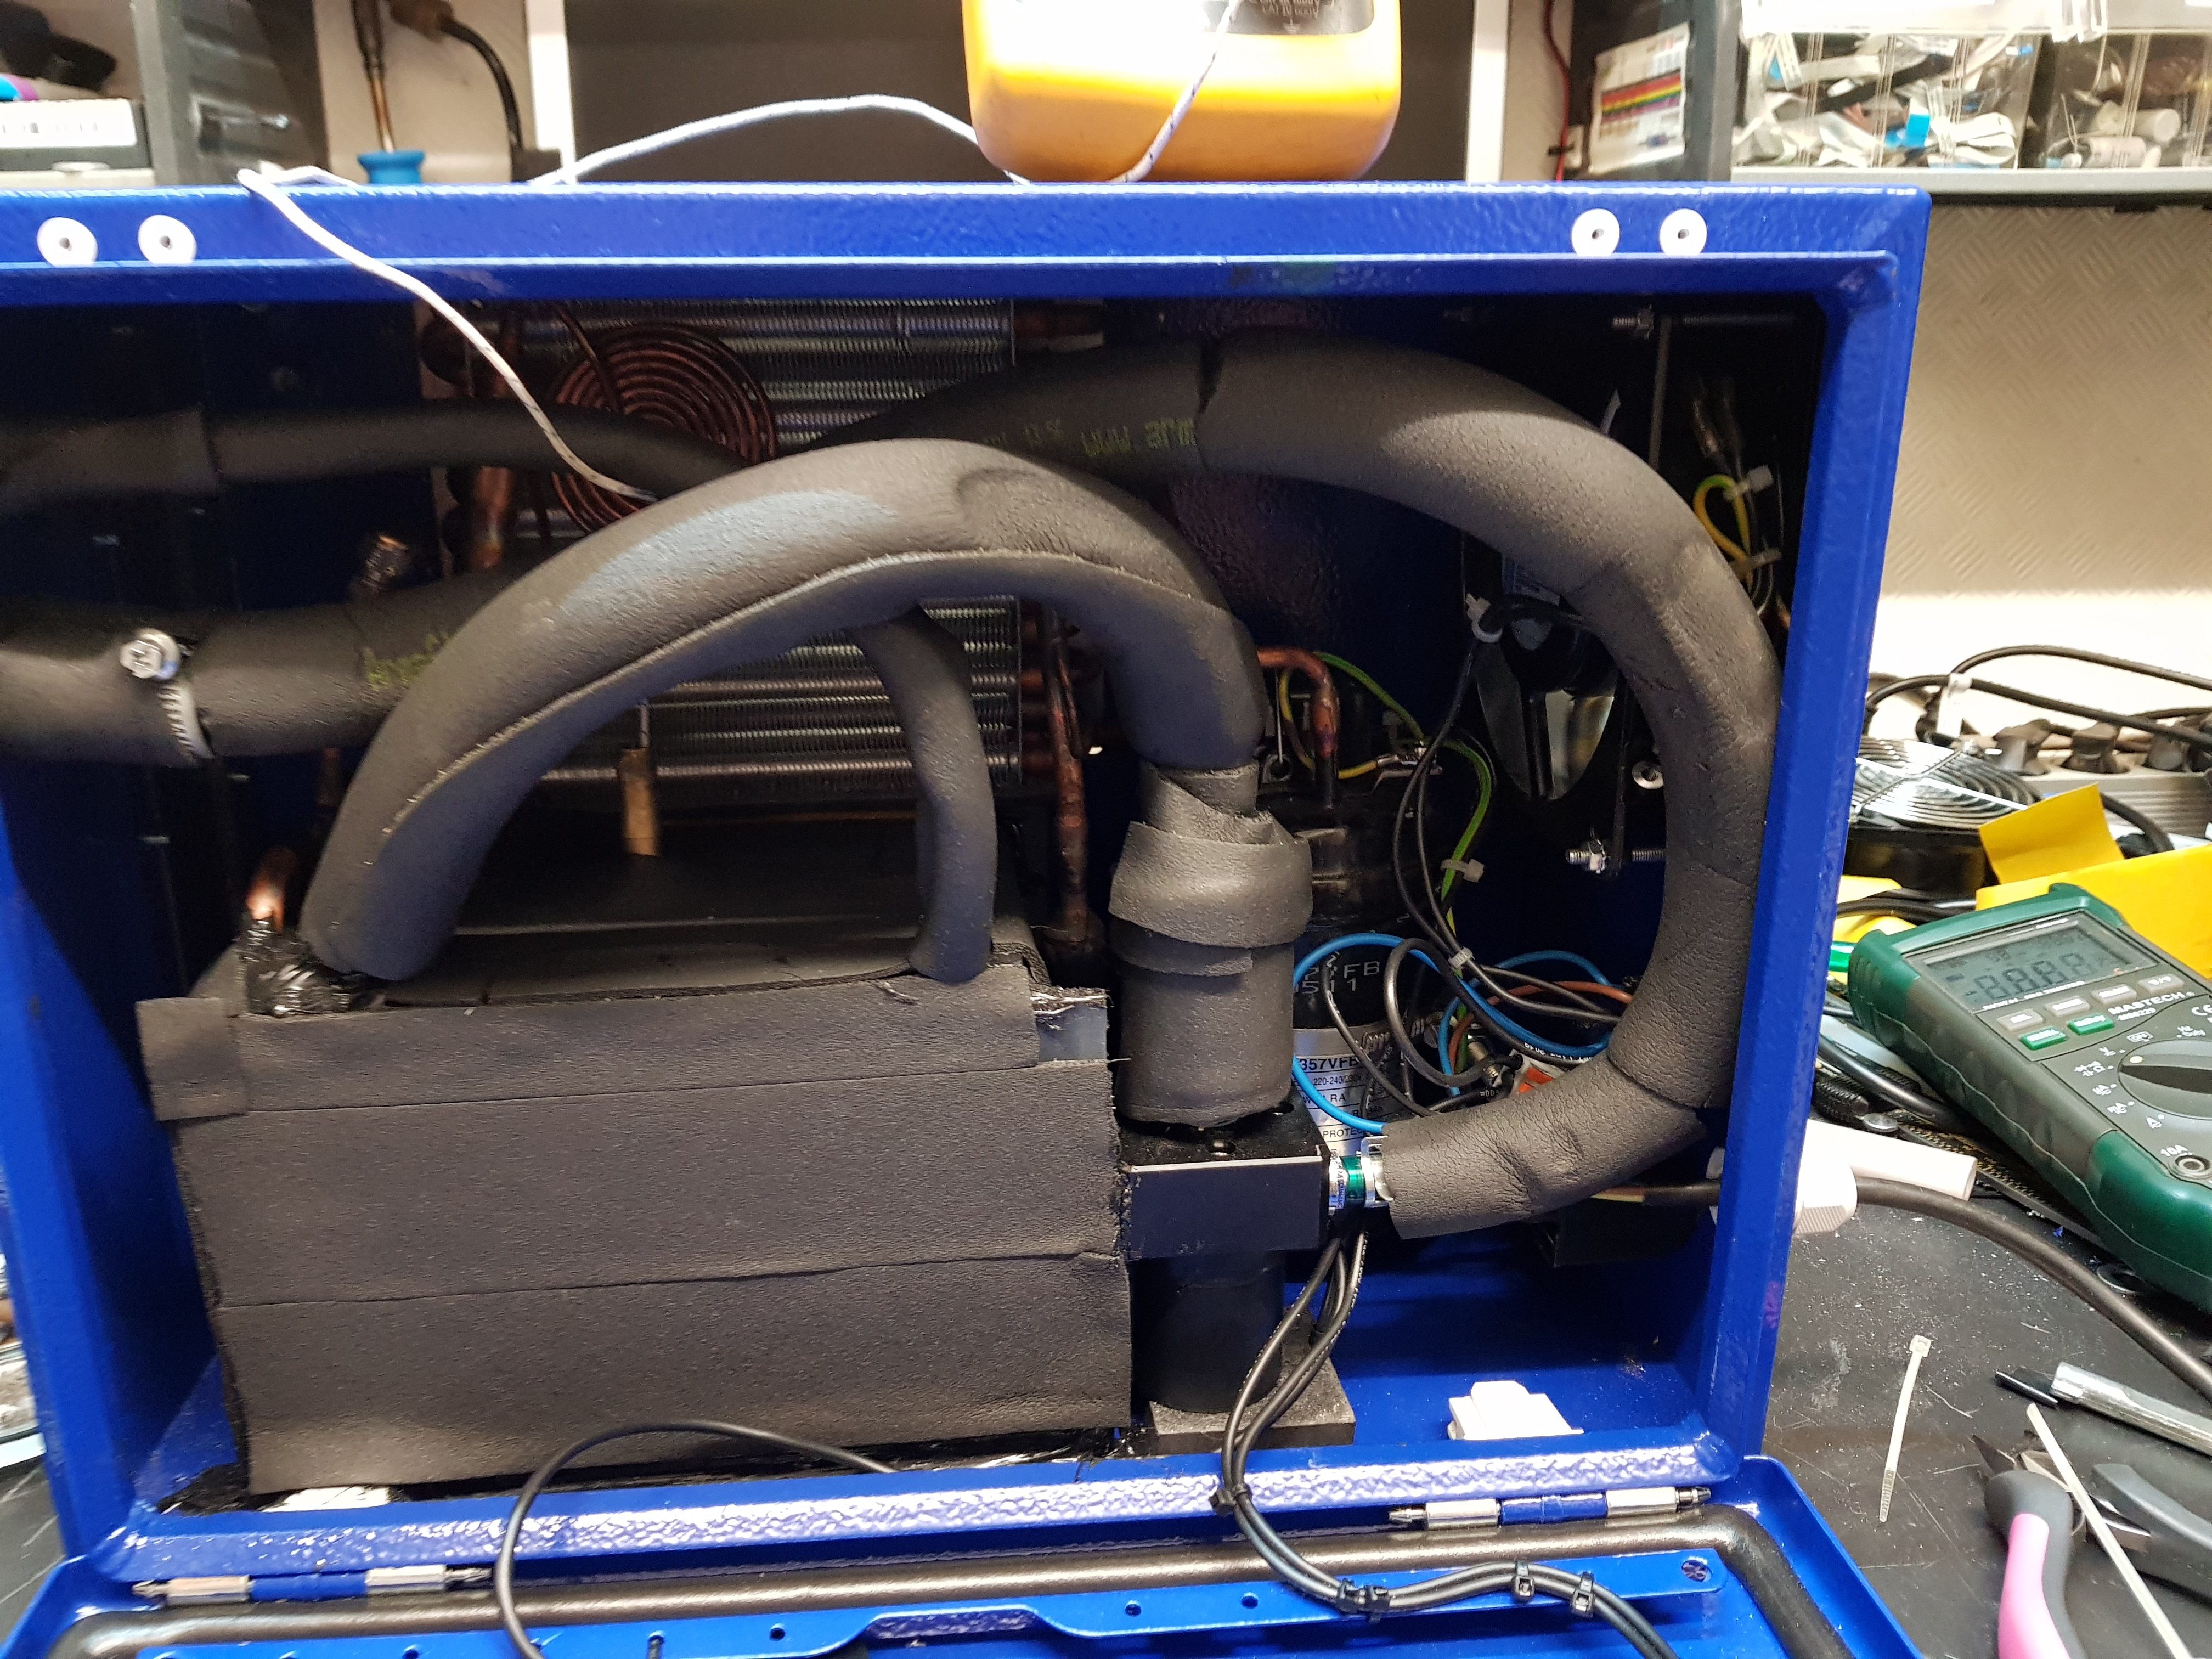
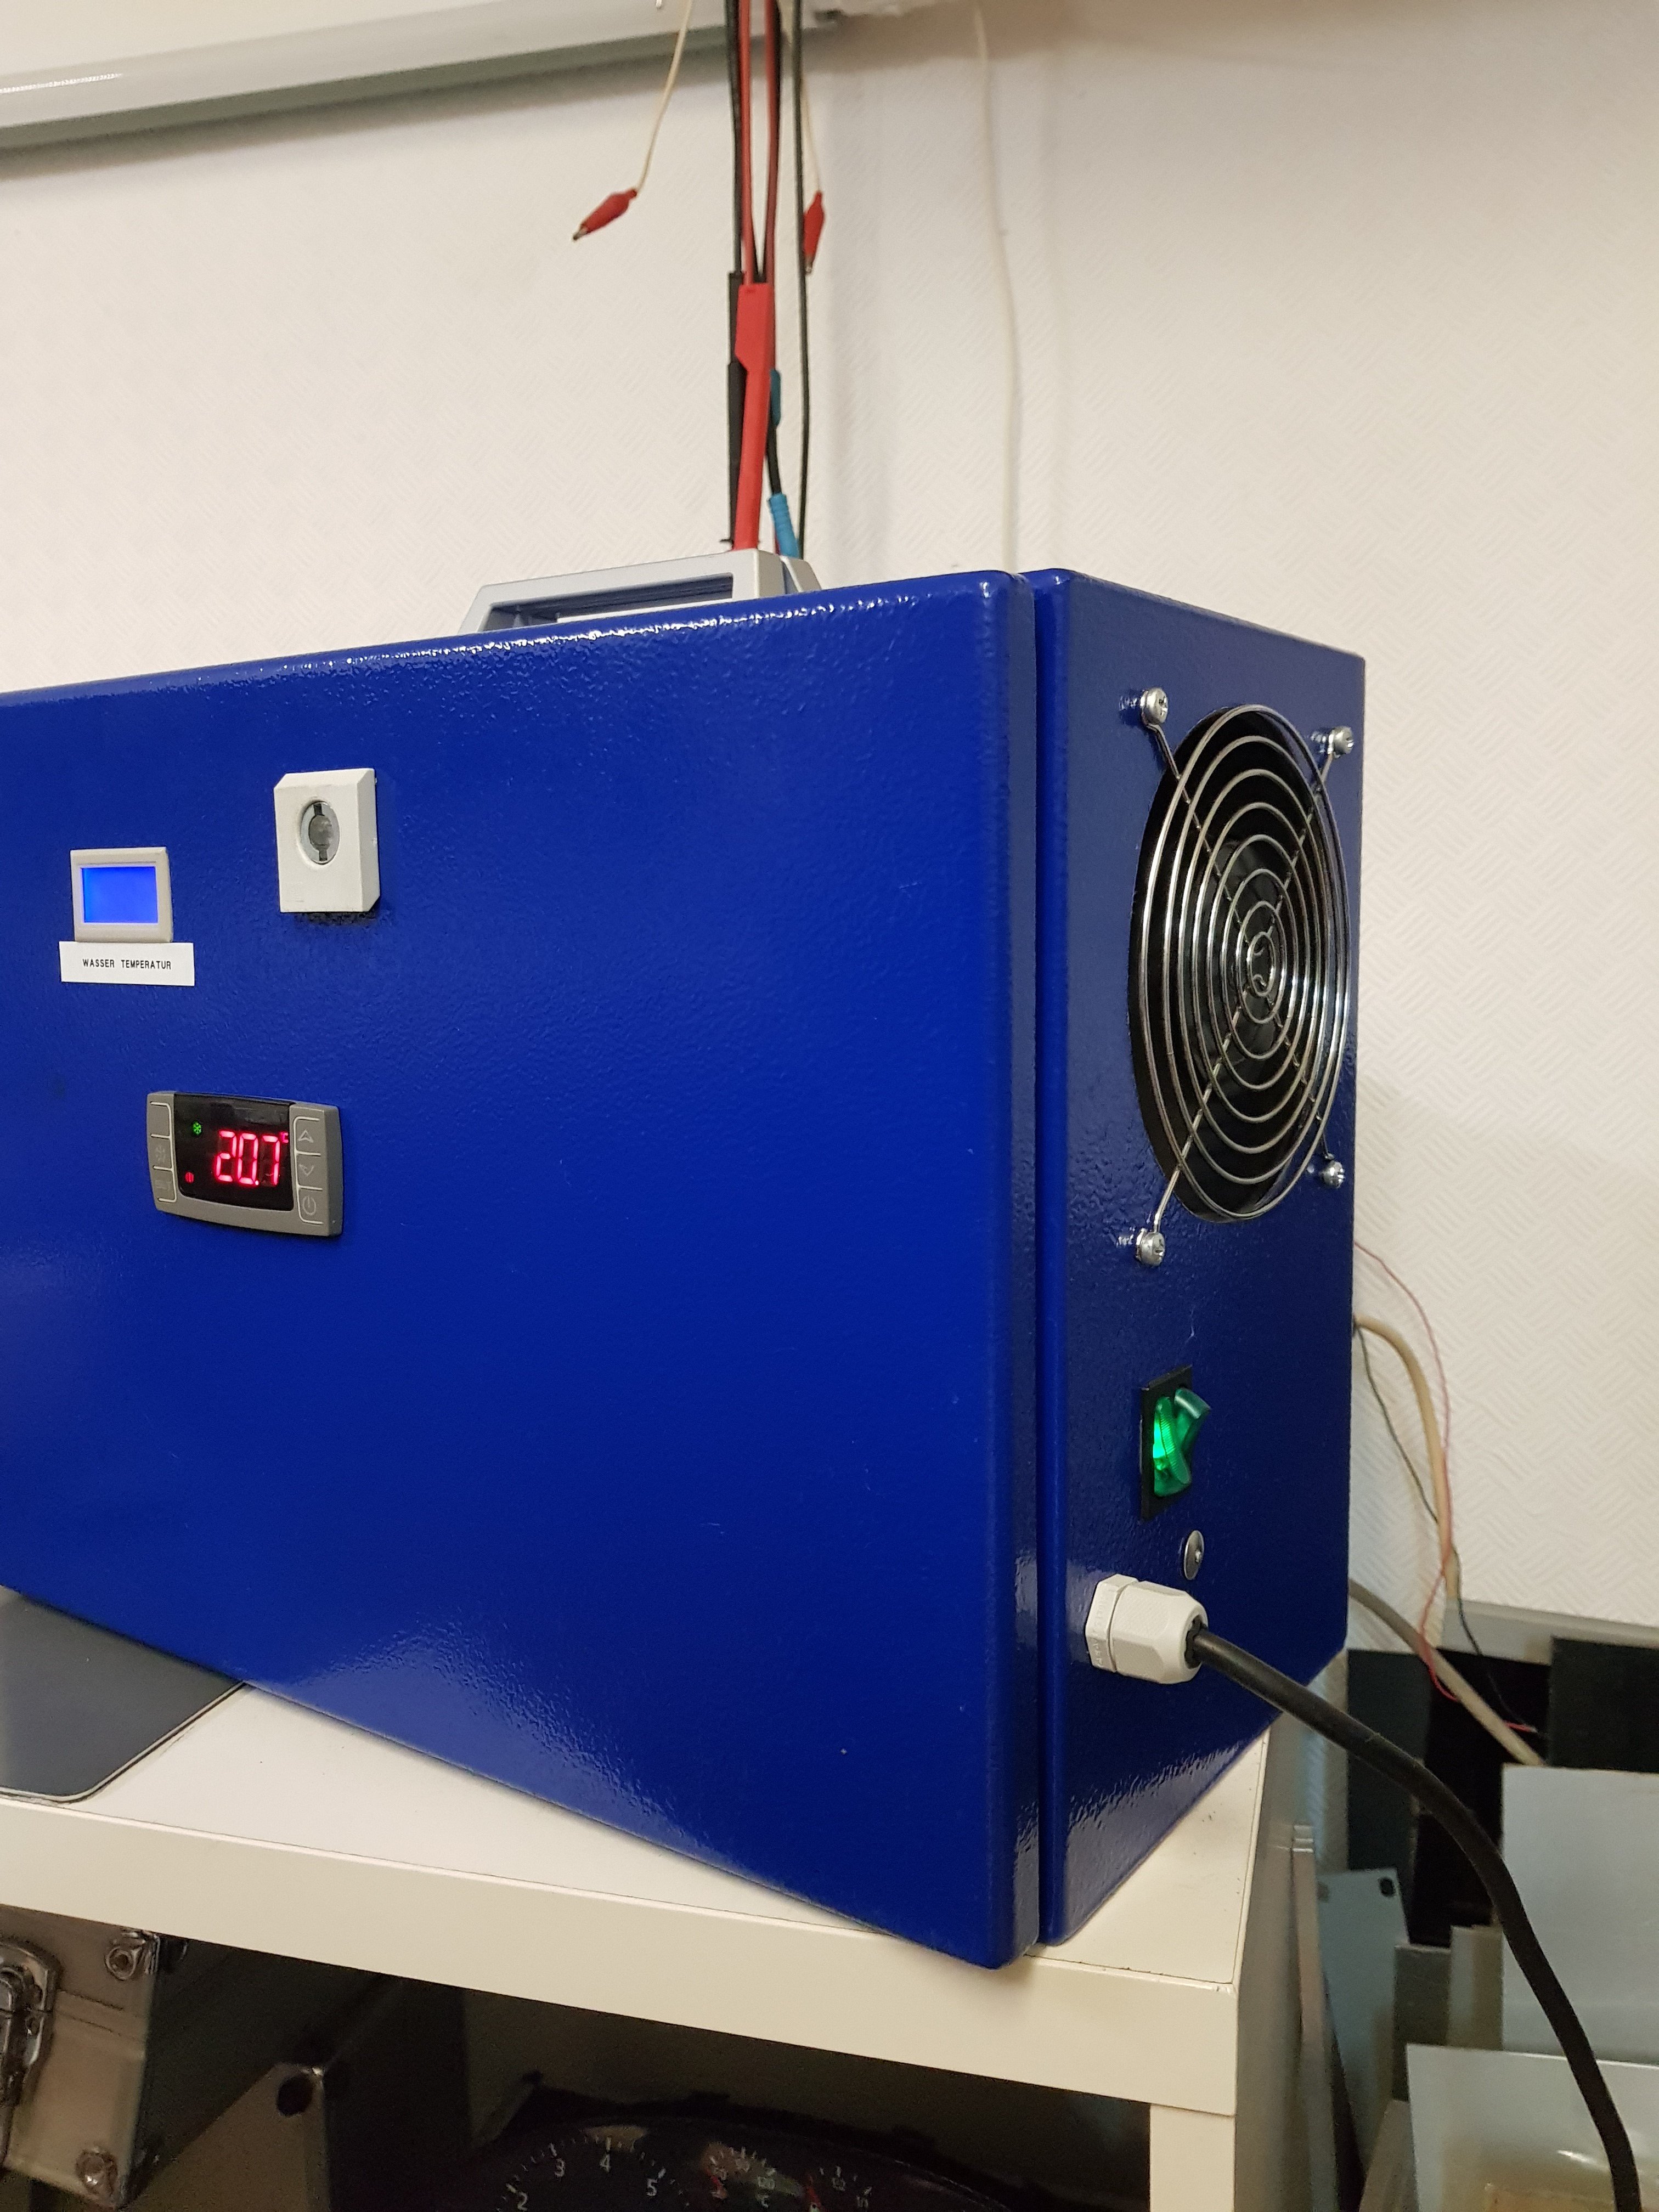
Is a self made chiller with manual or automatic funktion.
hi the article number of the vapor cooling is 6-31-P87FN-1B1 or 6-31-P8703N-401 Suitable for p870KM or TM. and RTX2070/2080
Attached Files:
Last edited by a moderator: Jun 10, 2020jc_denton likes this. -
-
Ordering a new P870 from HID w/ 2080 comes with a modified VC. Other than that it's DIY, from what I recall there are posts about what needs modding in order RTX to fit.Spartan@HIDevolution likes this.
-
But i have a special water colling for sale ? Contact me via email...
Interested ? is for P870KM and TM for single or sli GTX1070/1080 and RTX 2070/2080
Red Mark is for the RTX 2070/2080Attached Files:
Last edited: Jun 10, 2020moral hazard likes this. -
-
How noisy is the chiller?
-
it is quieter than the 3 fans")
-
Fair enough, though is it raspy?
-
is ok
-
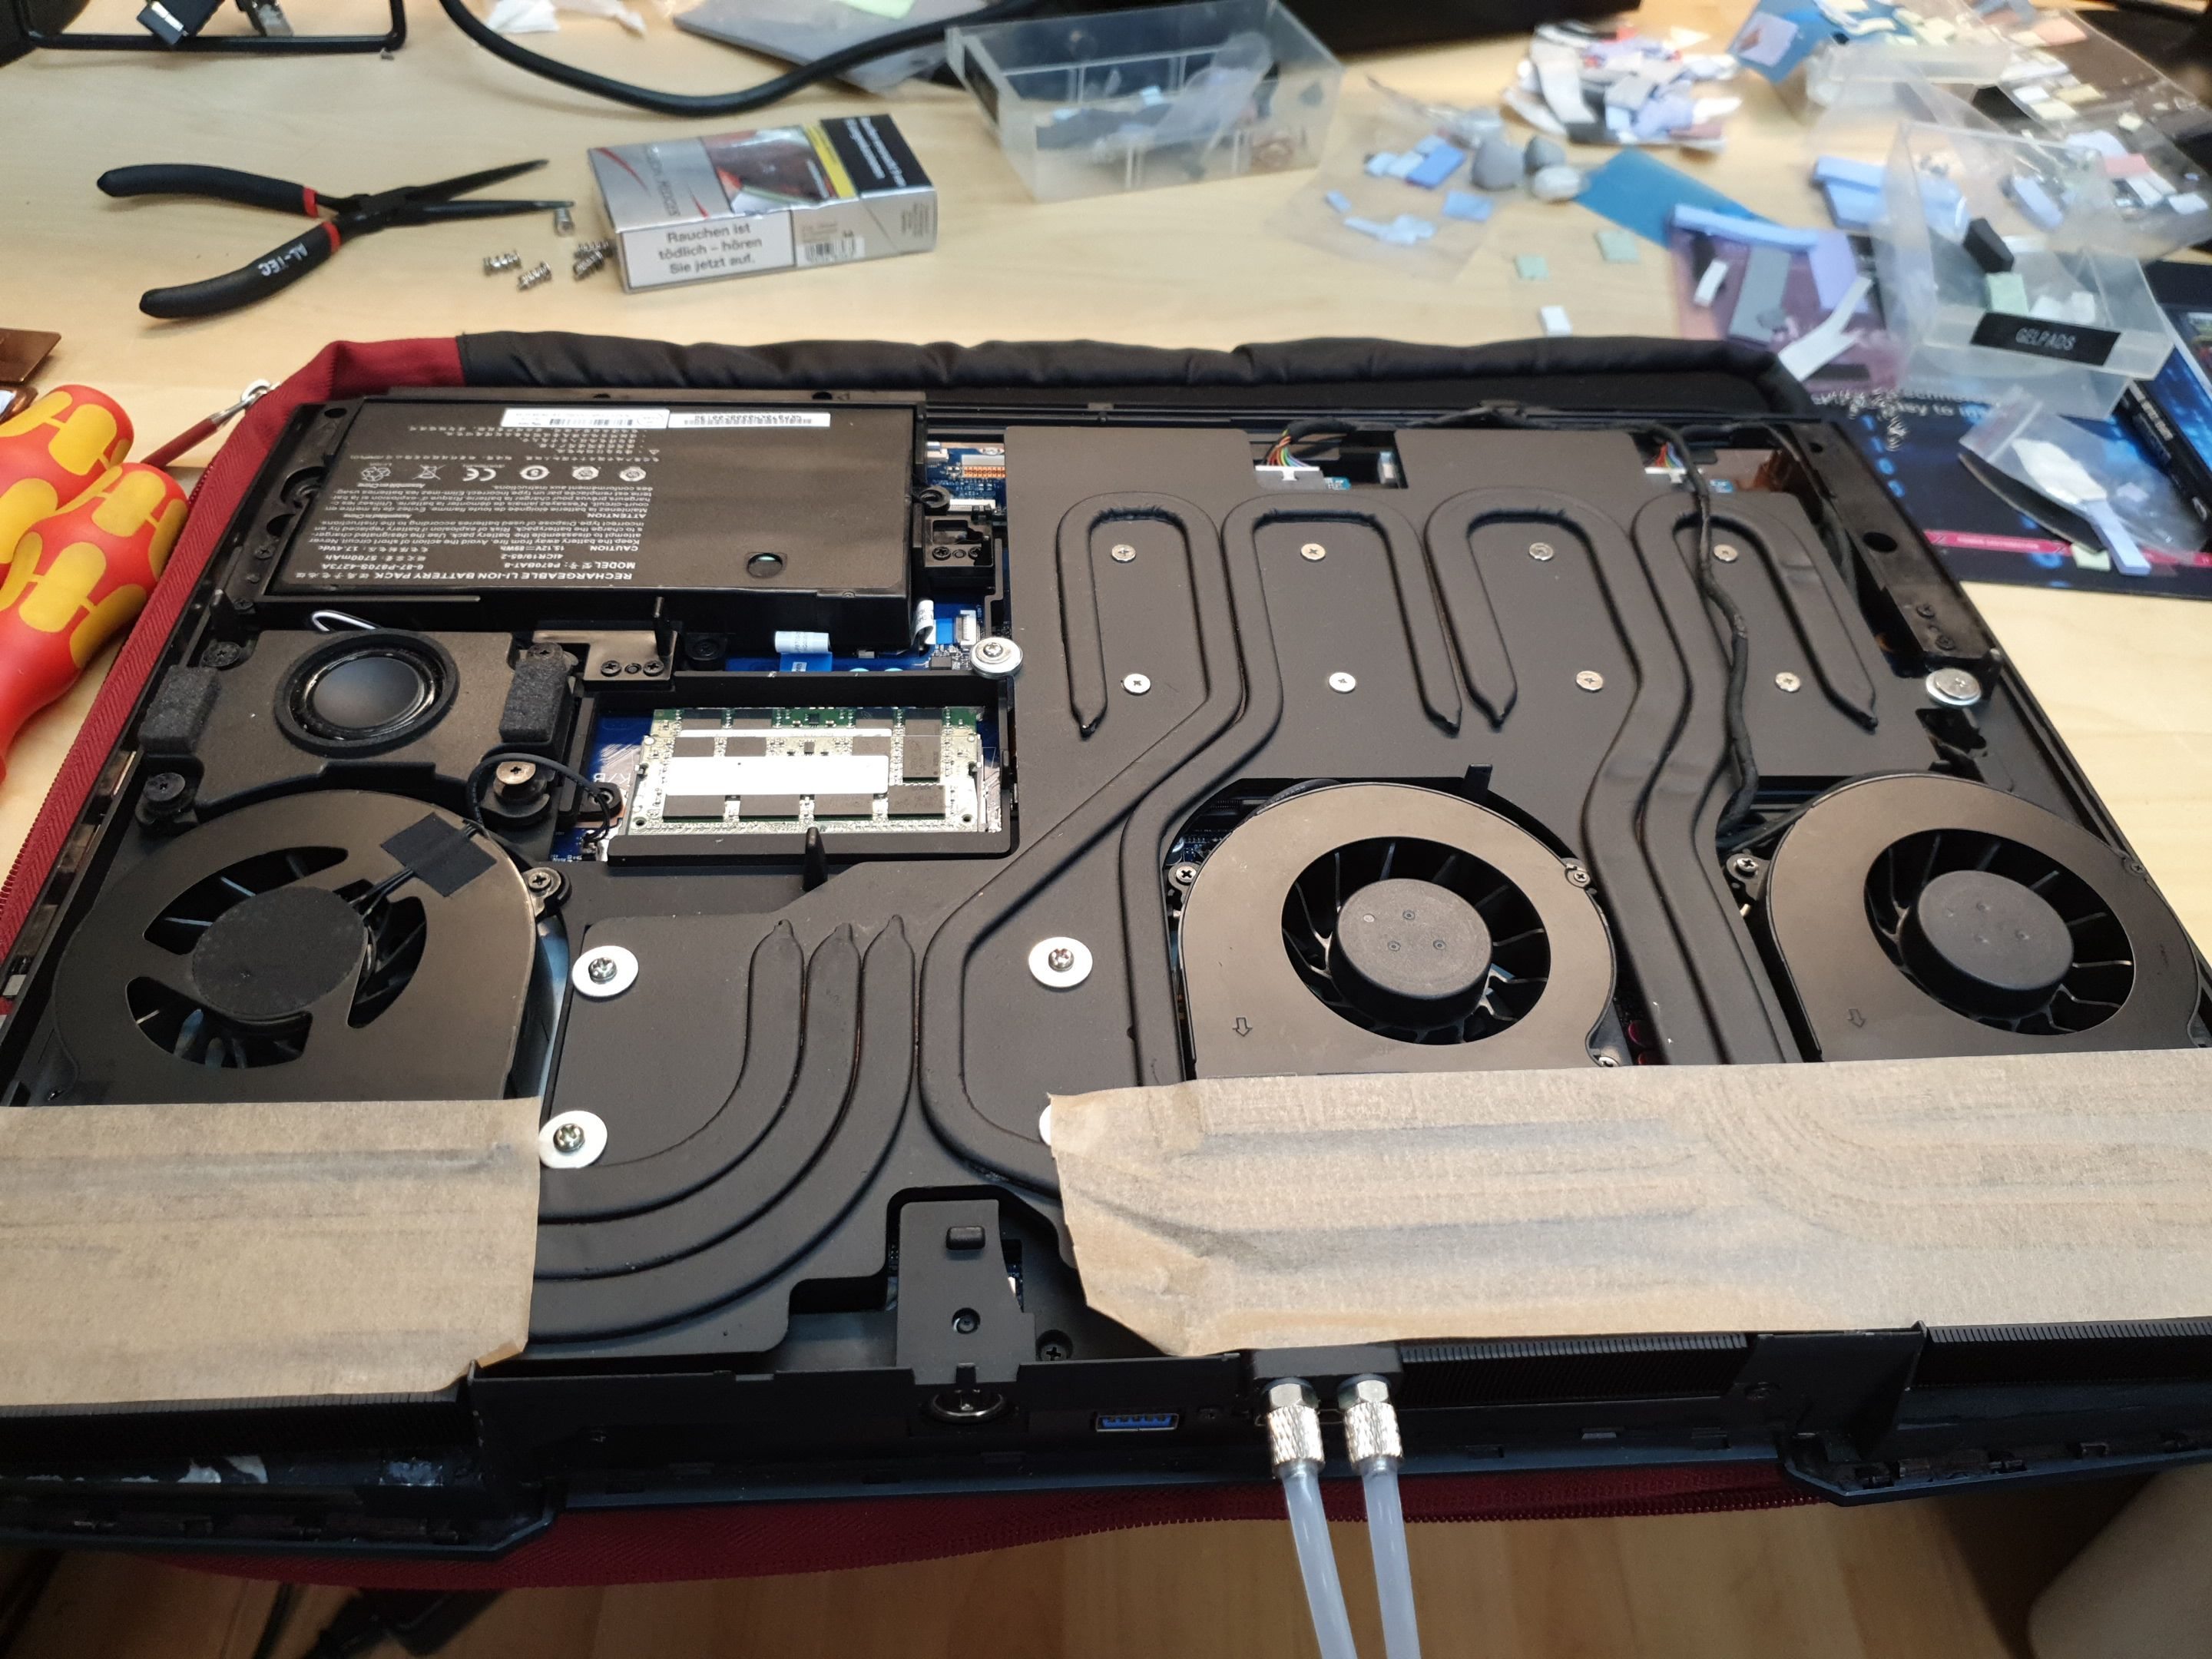
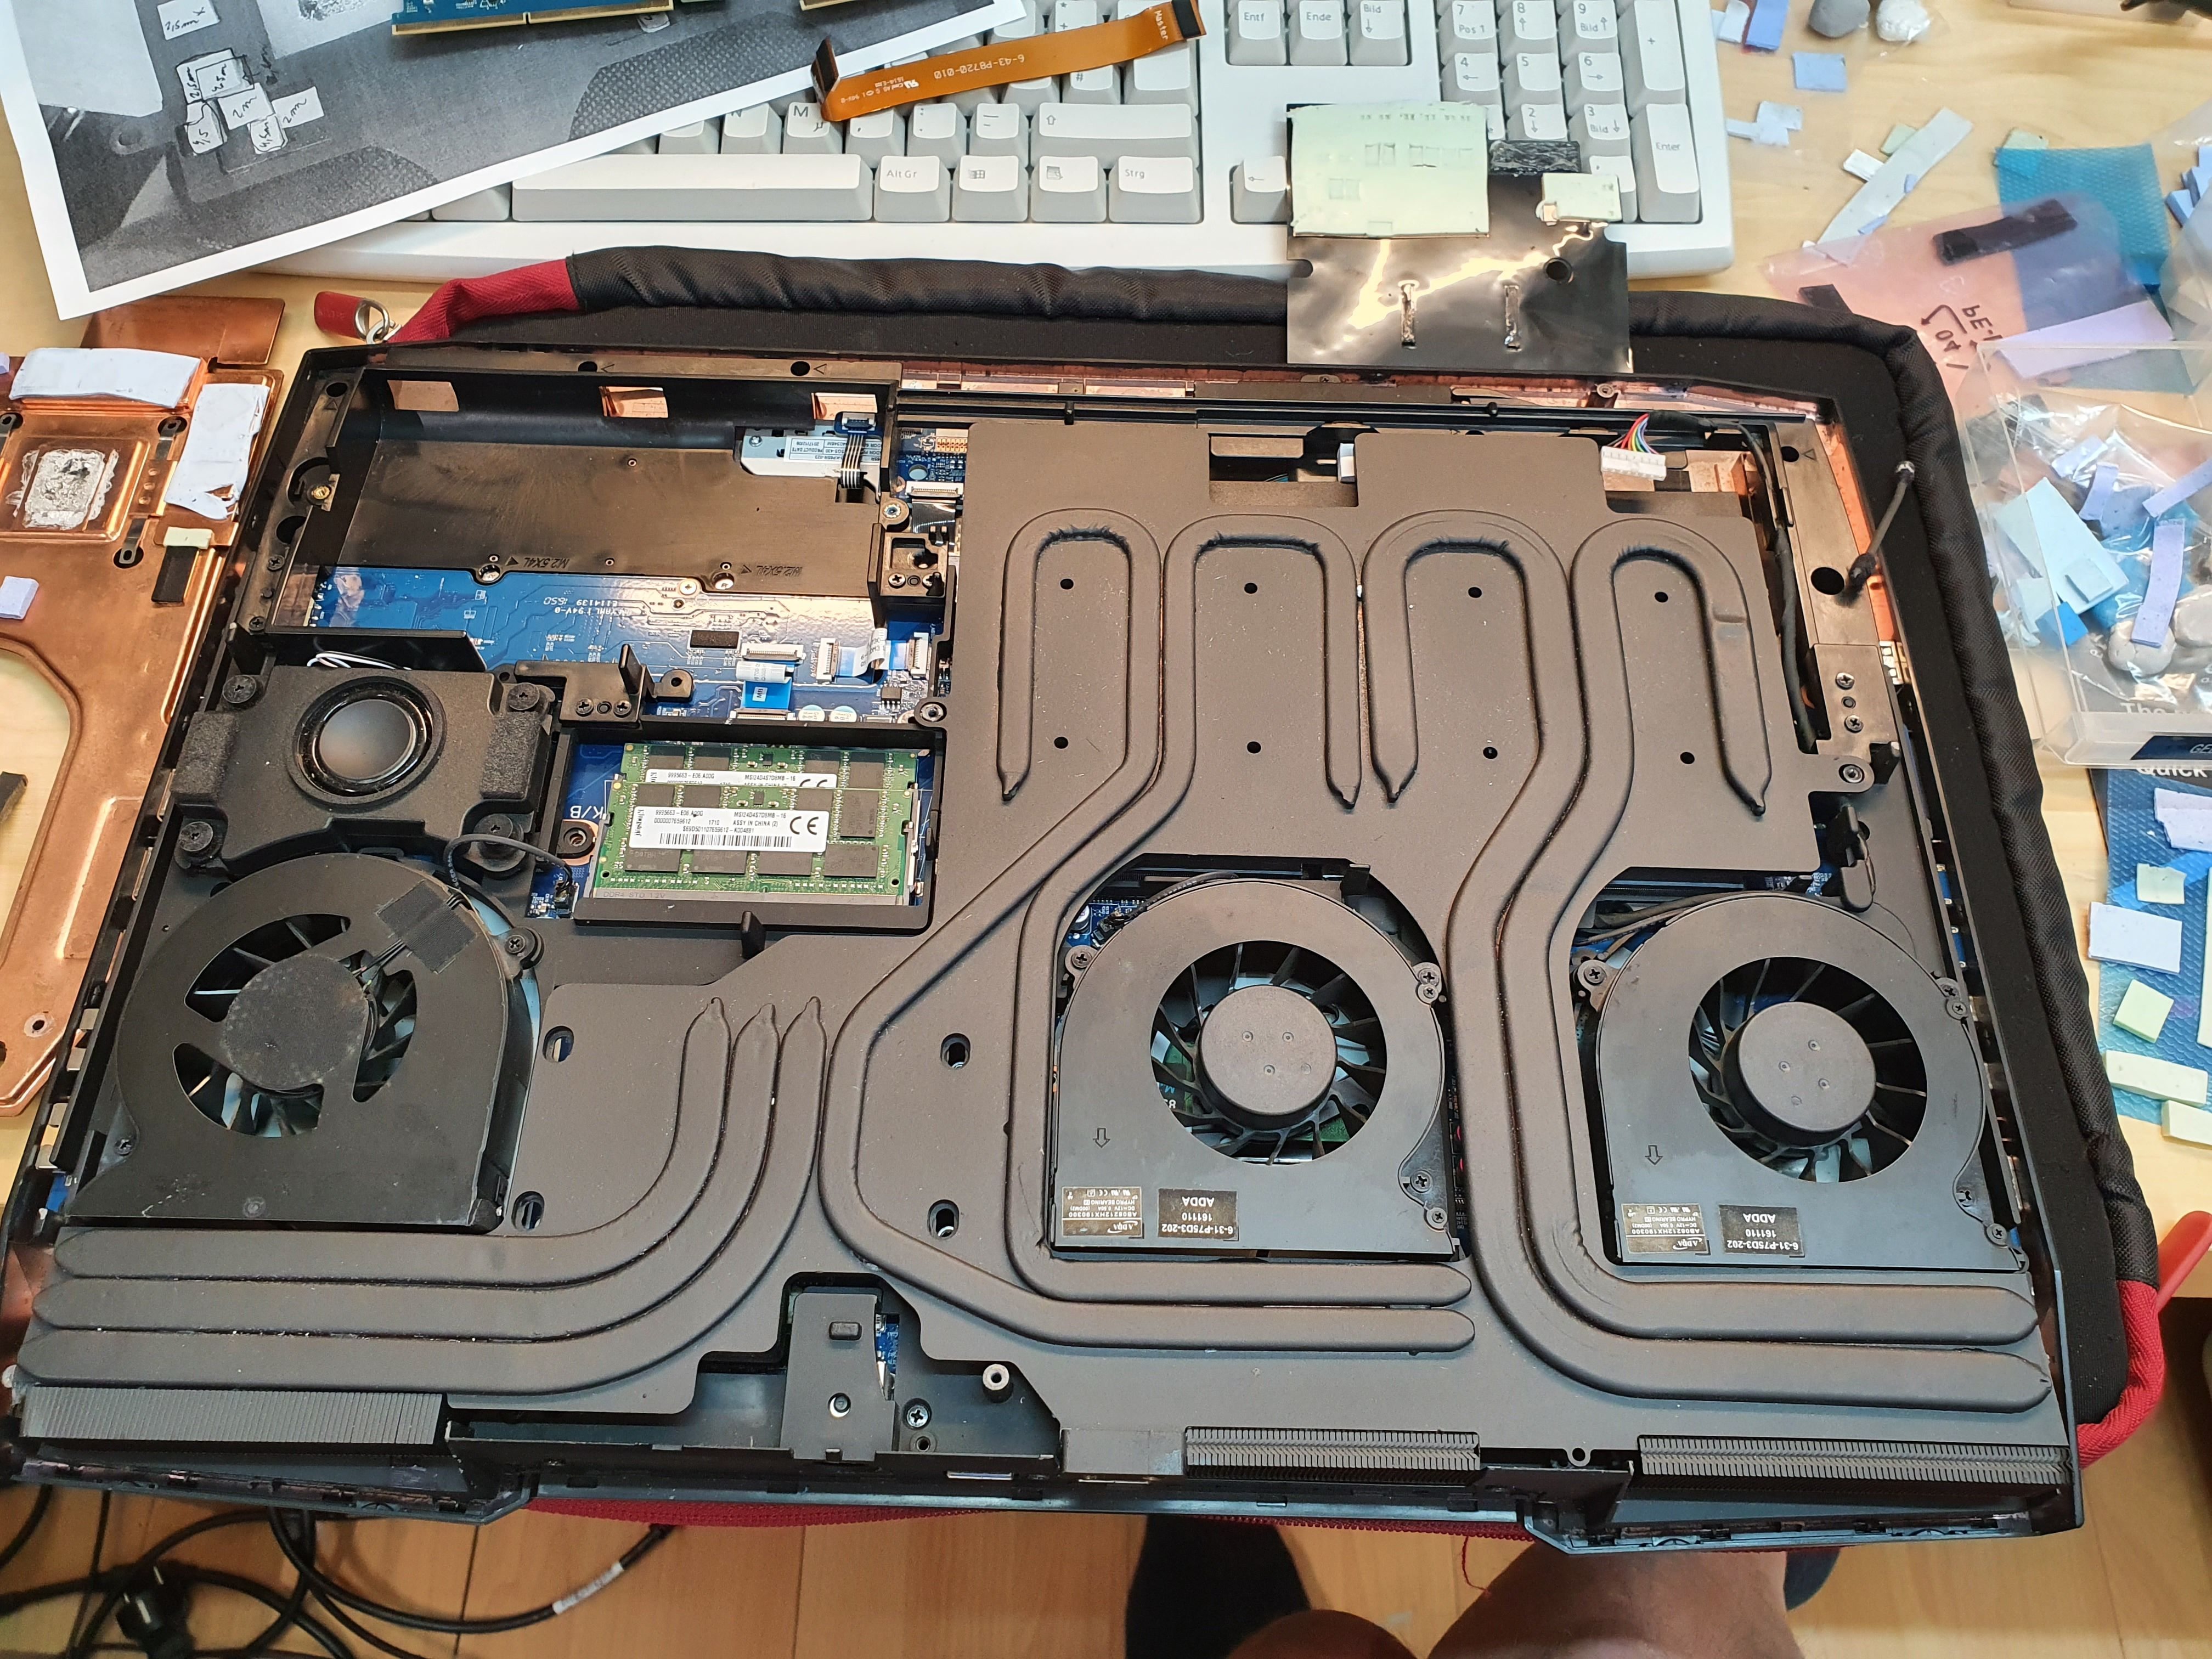
The P870 fans seem to be 13 blade from what I can see, while P775 are 17, both are 12v tho. Might swap the GPU fans to test the difference in performance, a few more blades should be better, right? ^^
-
More blades past a point will give you more pressure over flow. So it depends on the fins.
Papusan likes this. -
I have already tested, makes no difference whether 13 or 17 blades 1 degree difference! :-(
jc_denton likes this. -
Interesting, 1c difference? Did you test it with fixed air bleed due to gaps on the heatsink and max fans?
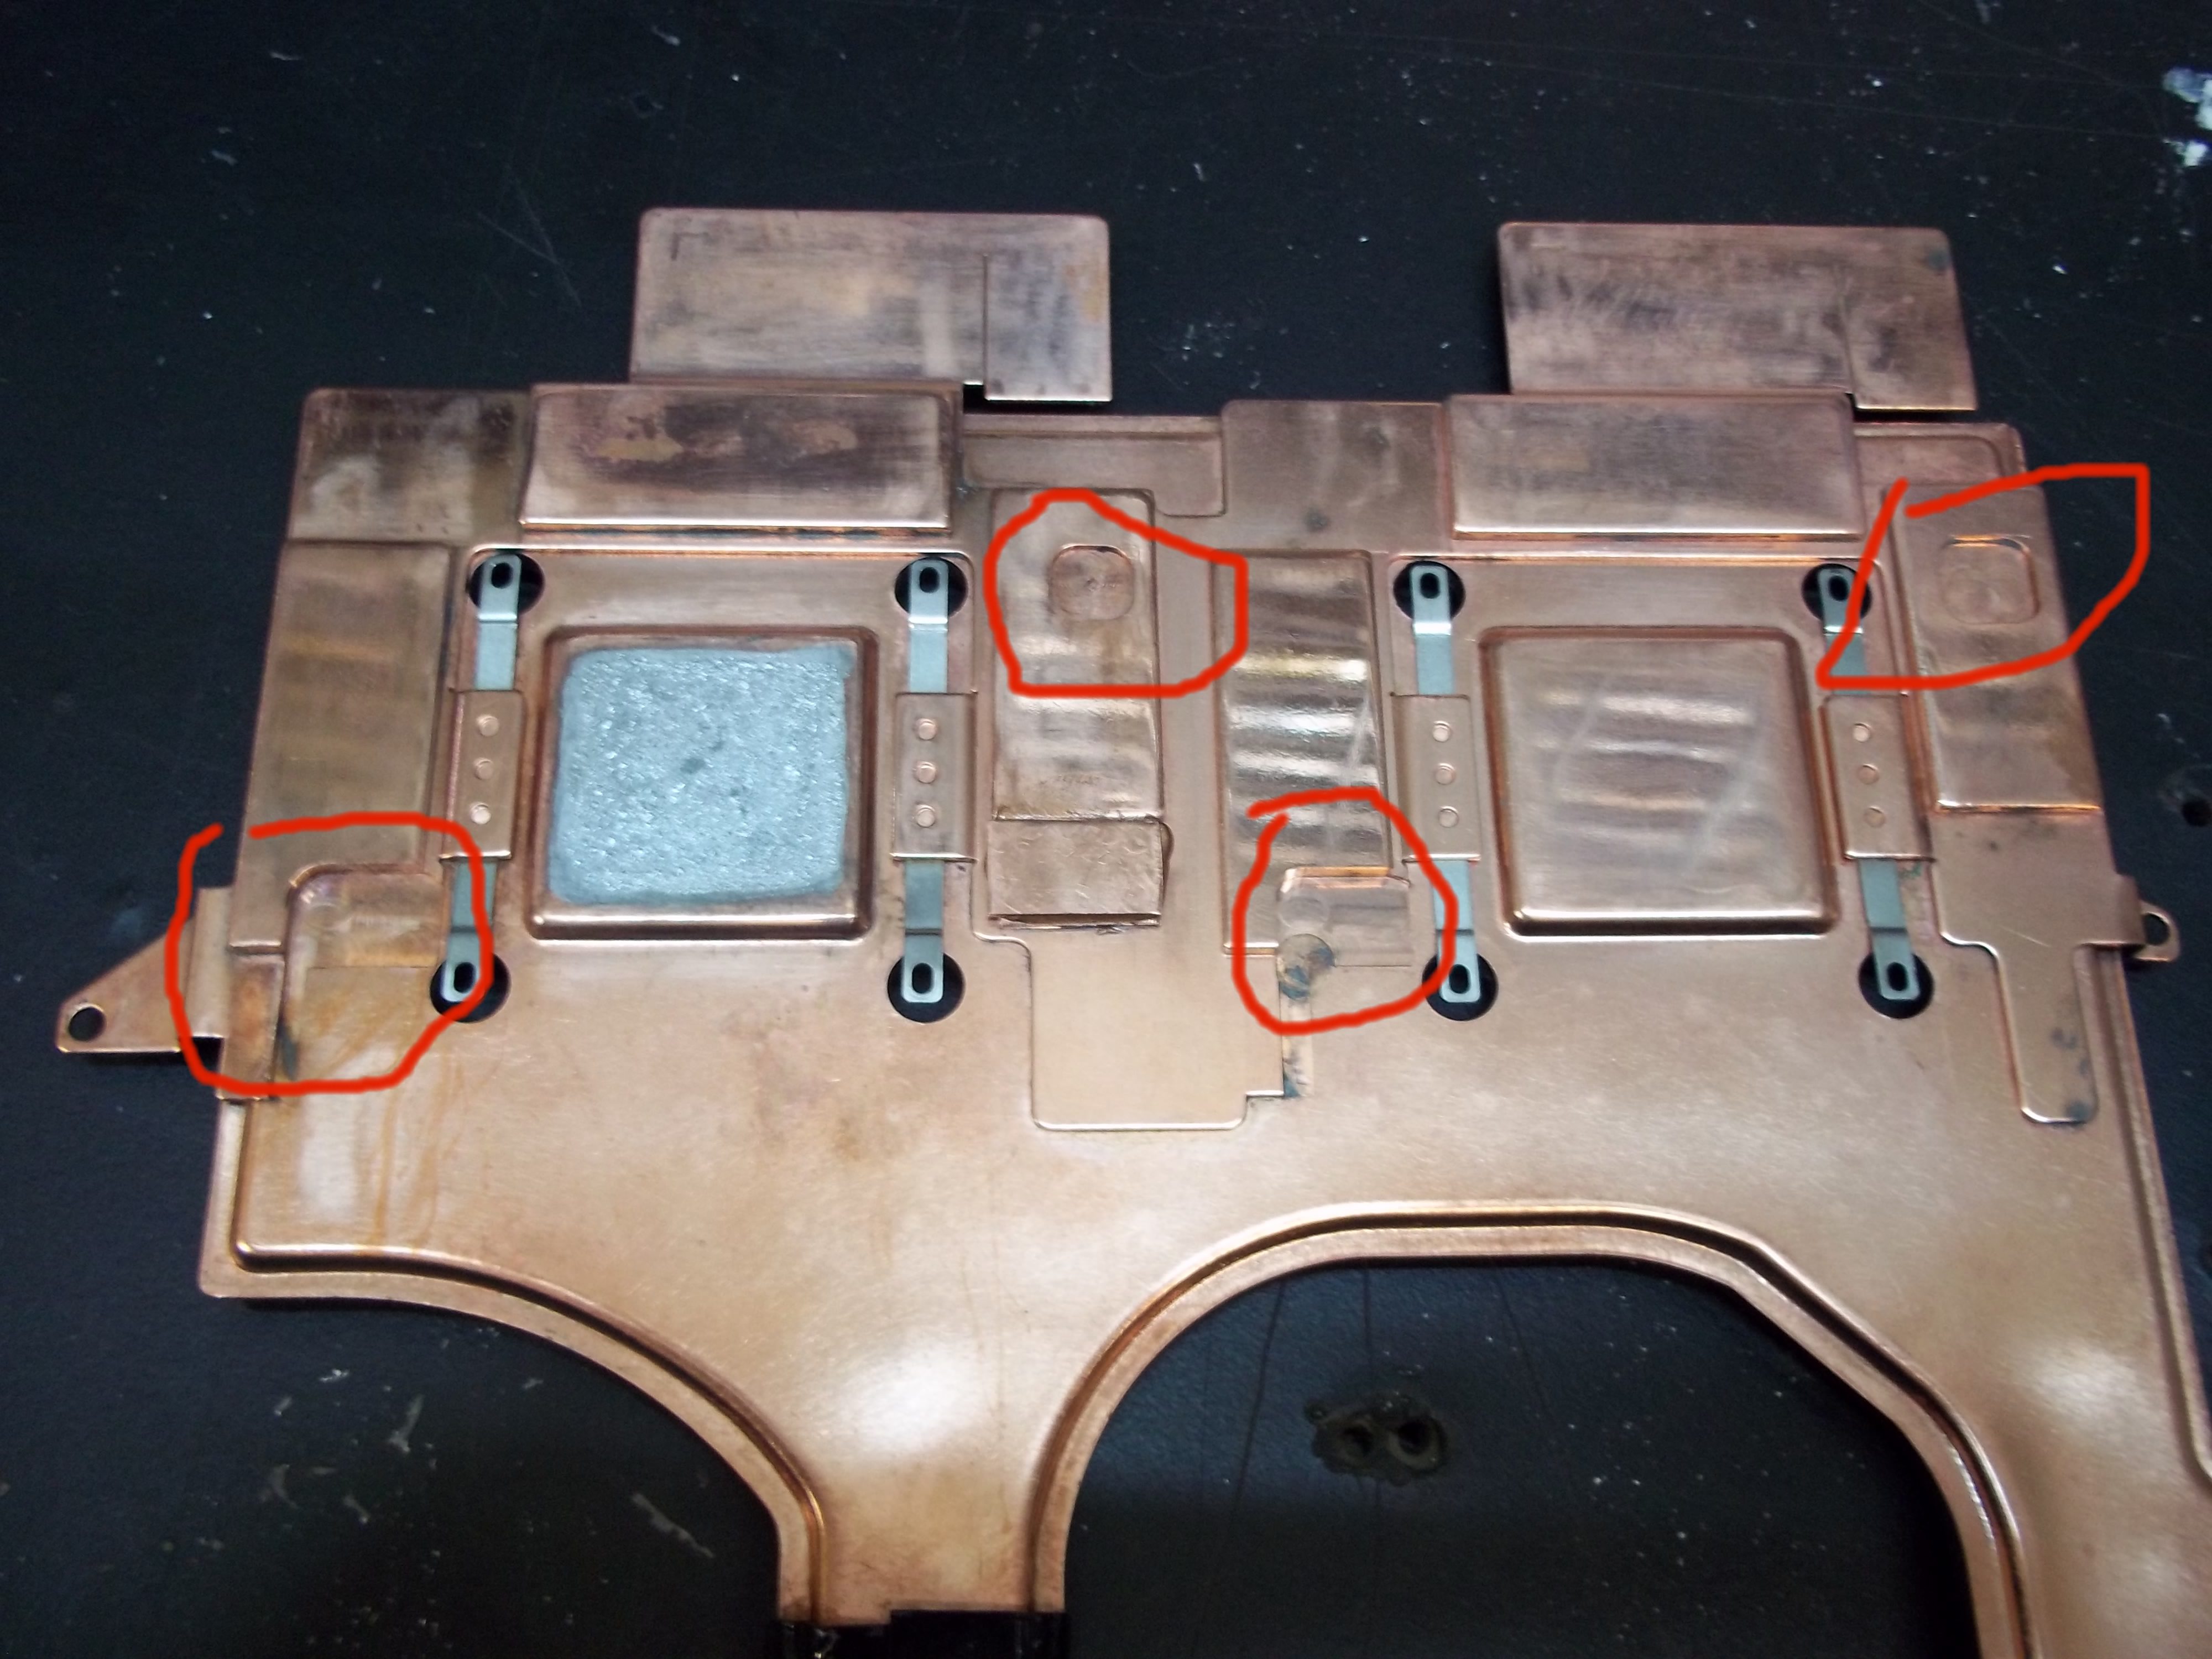
![[IMG]](images/storyImages/f82hNNx.jpg) Papusan likes this.
Papusan likes this. -
Those gaps do help the rest of the system a fair bit.
-
I've tested with and without, the underpressure keeps airflow over the nvme, ram and pch and keeps everything <50c. The gaps recirculate hot exhaust air back into the gpu fans.
There's a reason why KM1 had the gaps formfitting with the fans and managed to keep everything cool, as TM1 uses same vaporchamber but repurposed w/o extra CPU heatpipes.Papusan likes this. -
the foam has a purpose!
the air should go over there 1.
When the lid is closed, air is blown over it, it really better cools! -
Not sure how you came to that conclusion. Here's how I tested both setups:
- reset and let system idle 5min with max fans
- run GPU-Z render at locked voltage and clocks for 10min (clocks need to remain the same throughout the test for consistency)
- rerun test 3 times with and without tape
GPU thermals came out to be 3-5c lower with the tape fix.
And there is no reason for the gaps besides Clevo cutting corners.
Last edited: Jun 11, 2020Papusan likes this. -
as i see in the photo is there only a gtx rtx? installed. there is no problem with the temperatures anyway!
even with 2 cards there is no temperature problem eg. with liquid metal ....
except for the GPU core, the entire surface is not completely on itjc_denton likes this. -
Cutting metal like that costs more, it would not have saved them any money.
jc_denton likes this. -
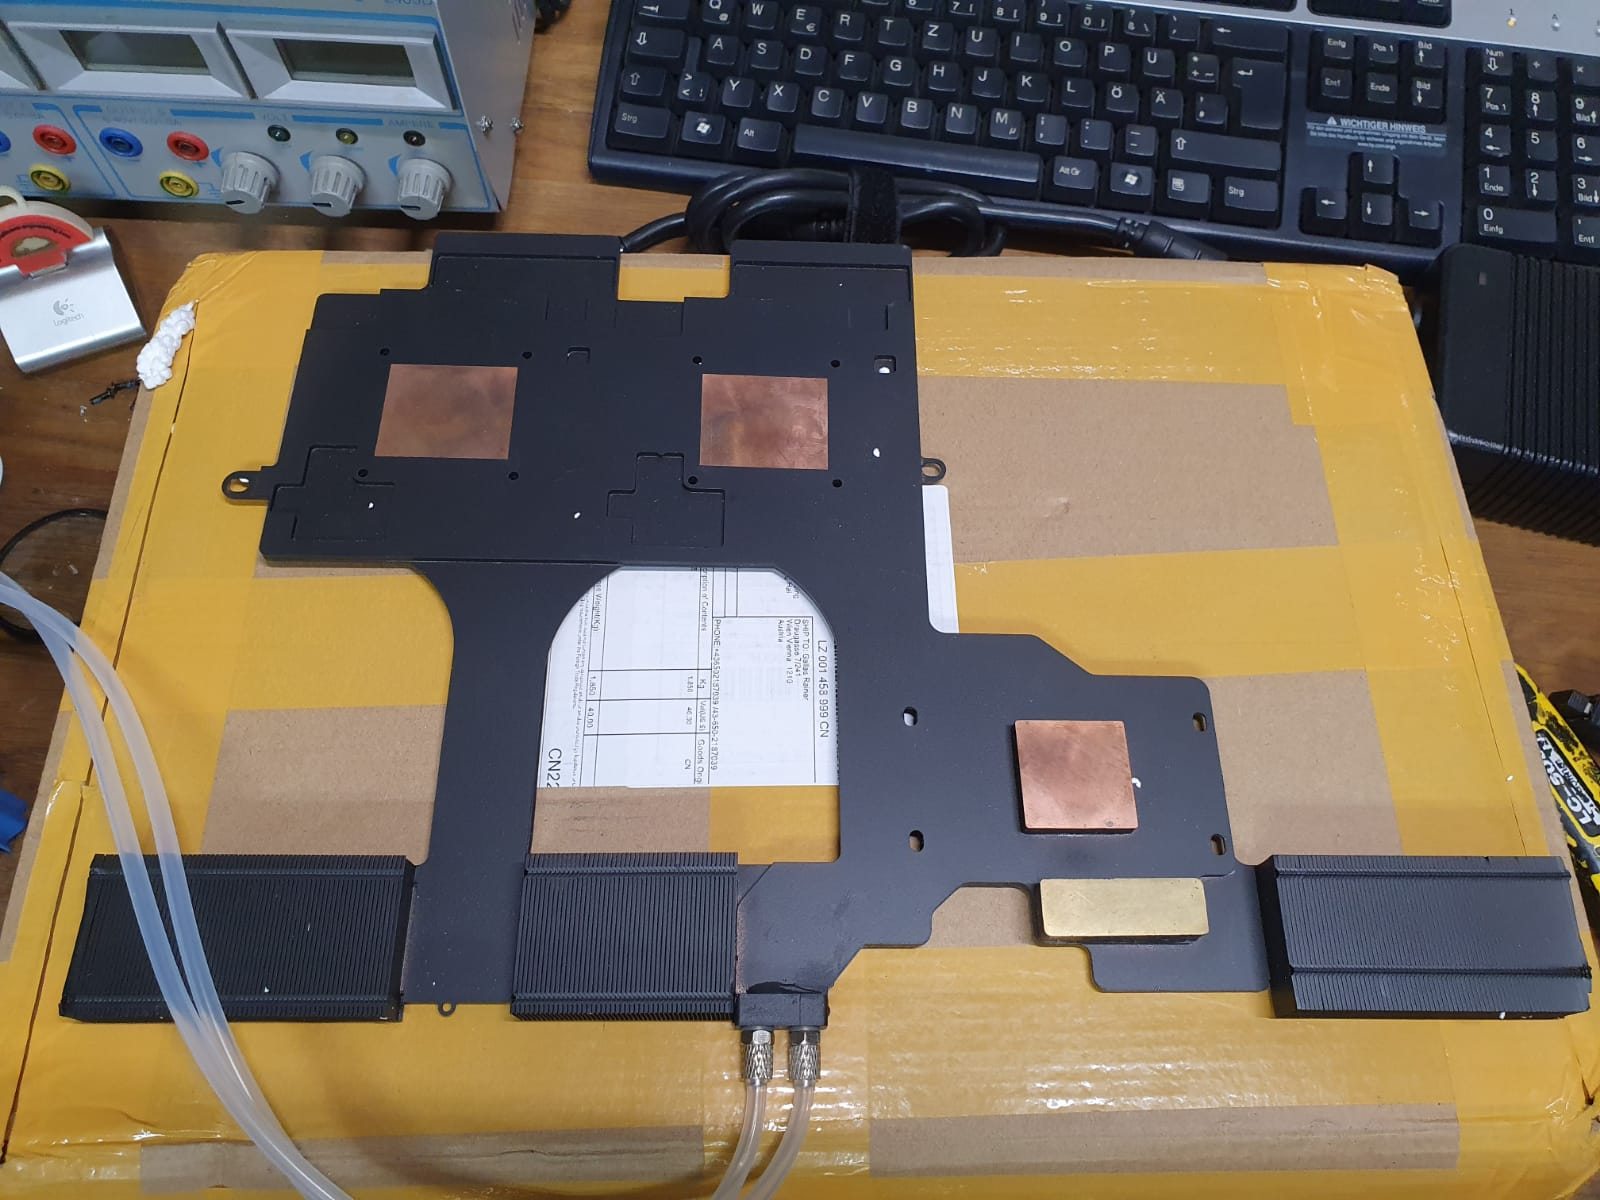
It's a single powermodded GTX1080 w/ LM and some other mods. The 400W vapor chamber works well for single card
-
Another question.
If i were to use Liquid Metal, do i need to put thermal tape on the copper heatsink side so contain the LM on the heatsink side? -
No, you should only apply a thin coat of LM on the heatsink. But if it's the first time applying it, it will diffuse into copper over time and will need to be reapplied. What we usually do is either bake the heatsink, then remove any leftover tin/indium and reapply. Or reapply a fresh coat when temperatures begin to spike.
However, I would recommend masking of the GPU die off with kapton tape, and add a foam barrier for extra insurance.
http://forum.notebookreview.com/thr...r-liquid-metal-safety-insurance-guide.817207/
I emphasize on taking your time masking the die off properly, as you do not want LM to creep under the masking and short any SMDs.Spartan@HIDevolution and Papusan like this. -
Gotcha.
I’ll be applying conformal coating to the PCB for the GPU and CPU. To protect it from any spill. -
You really do not need much LM, give this a look
Spartan@HIDevolution and Papusan like this. -
Less is certainly better, don't want it rolling around the motherboard.
-
-
Done installing the liquid metal on both GPU and the CPU.
Was a bit nerve wracking actually.
Question, for the standard 1 gm conductonaut, how many applications is possible?jc_denton likes this. -
Depends if you also need to treat the copper heatsink for the first time, due to gallium diffusing into the copper.Spartan@HIDevolution and Papusan like this.
-
Hmmm. That’s why the liquid metal used on the copper side was a whole lot more than the die side.
Ill open it again in a few days to check on it -
Don't use lots extra, use a smaller amount and reapply if needed.
-
A sure tell sign is temps beginning to rise and spike. And a heads up for when reapplying a new coat, be sure to clean off the old remains from the heatsink, as it's the leftover tin and indium.moral hazard, Papusan and Spartan@HIDevolution like this.
-
Just opened it again, and there was some bid beads remaining.
You use back the plunger to suck it up right? -
You can reuse whatever remained liquid. However, the copper heatsink needs to be scrubbed down from leftover indium and tin, preferably with isopropyl alcohol first. And then a light pass with a high grain sandpaper, 2000+ grit.
So that it looks clean and proper, like brother @Papusan 's setup afterwards,
https://imgur.com/a/2xHnNVnPapusan likes this. -
The beads will have some contamination at this point so I would not put it in with the rest of the tube again.
-
Hi @ALL,
does anybody could help me contact Prema or anybody of his Team. I need their Service I’m willing to pay for it.
I’m stuck for 2 Month can’t resolve my issue.
I own a P570wm and a Modded p5200 with soldered eprom Flash it’s flashed with MSI 160w Bios.
Modded driver install lead to Black Screen. I found a Work around to get the driver installed. The result is working drivers but in games imidiet crashes only low Demanding Games like Rocket league and Benchmarks don’t crash.
I think it’s the MSI Bios on the Card that is causing this issues. Otherwise a modded inf should not lead to a Blackscreen.
Prema modded a Clevo VBios for his p5200 used in p870. Please anybody help me. I need the Clevo p5200 vbios that Prema used.
thank you all. -
I'll try summoning brother @Prema , did you run modded GeForce or Quadro driver?
http://forum.notebookreview.com/thr...m-g-owners-lounge.831618/page-7#post-10983184 -
Is your system LVDS or eDP?
-
Thanks Meaker, I'm finally getting to this... I have the unit mostly apart but haven't taken the panel out yet but am looking for that ribbon cable... are there any diagrams or teardowns that anyone knows of showing panel replacement process in case I run into trouble? I searched I couldn't find a teardown for this entire machine but I'm sure someone has published one.
[EDIT 1] I found WingNut's review with basic disassembly of major upgradeable components:
http://forum.notebookreview.com/thr...ick-review-by-htwingnut.795187/#post-10321515
[EDIT 2] Looking for a more detailed teardown showing LCD panel etc.
I do have a bad spot of ghosting on my 4K panel where it maybe got osme pressure from a keyboard cover, but other than that it still looks beautiful so I hope to not hurt the panel and it is just a ribbon cable thing as you've said.
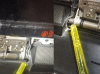
As you can see in the pic there are wires maybe getting pinched? Under the speakers? How do i access these?
[EDIT 3] Okay, I got brave and took the four retaining screws off the LCD (note this is AFTER you take off the two screws at the bottom of the LCD that are covered by tape, then remove the trim carefully using a spudger tool)... and now I can see that:
The LCD ribbon cable is only wired up on the right side. Visual inspection looks fine, there is some clear tape holding the ribbon cable in place to the display. Since the issue is the screen was going off/on when moving the lid hinge, I'm going to put the battery back in, connect a keyboard and external monitor, and power it on and see what happens when gently moving that wire that is connected to the ribbon to the display. I don't really want to disassamble more of this unit if I don't have to.Attached Files:
Last edited: Jun 28, 2020 -
-
Well crap... gently moving the display and checking the connection on the ribbon connector does not do anything, still no display. I was getting partial display with the lid ALMOST closed, which makes me think it is a pinched wire or something.
I'm not sure what to do next... how much of this beast do i have to take apartto get at where the display wire connects to the mobo? The other end of this black-wrapped video wire (the one that is going to the ribbon-connector for the display on the right-hand side? Is there a shortcut to get to that display connection on the mobo without disassembling everything?
-
Could be that display cable is pinched yes. No real shortcut though you could disassemble the hinge completely to check the cable.
-
Sure, but it wont make a noticeable difference, unless you suck up the grimy gunk residue with it, which is much thicker, instead of whatever gallium is left liquid.
-
Hey everybody.
So I've been considering upgrading this monster from a 6700K to whatever the beefiest CPU that it will accept. I've seen i7 9700 and i9 9900s being mentioned with a modded BIOS but is anything else required for the i9? I'd love to get one for the extra threads for when I'm working in Unreal Engine and other tools.
I plan on waiting to see what happens with GPUs after NVidia finally launches their new chips.
Any feedback or recommendations would be greatly appreciated.Last edited: Jul 12, 2020 -
I could have sworn i read on here that the whole mobo has to be swapped out to do i9, but i could be wrong.
-
From what I remember, it needs a firmware mod for 8th gen. While for 9th gen you need a pinmod for the CPU, before you can run it on Z170. @PapusanSpartan@HIDevolution and Papusan like this.
-
Both 8th and 9th gens need BIOS and pin mods.SithHunter, Papusan and jc_denton like this.
-
Yep, have to be careful of VRM temps if you are going to trash the bigger chips.
SithHunter likes this. -
Good looking out
Very good point. -
I did that bit during the pad adjustment
-
Hello everyone, can someone help me, I need original clevo p870dm2 / 3-g bios and original clevo vbios gtx1080mxm
-
jc_denton likes this.
-
*** Official Clevo P870DM2/P870DM3 (Sager NP9873/NP9872) Owner's Lounge! - The Phoenix 2 is here! **
Discussion in 'Sager/Clevo Reviews & Owners' Lounges' started by Spartan@HIDevolution, Aug 3, 2016.