are you in Russia ? then you can give your laptop to "Ноутбук1Сервис" Moscow. They have a channel on the YouTube ( АСЦ ). I think they can figure it out
https://notebook1.ru/
-
So that Aleksey can personally fix it and make a new youtube video.Semmy likes this.
-
No I am from Kazakhstan,
yes I am subscribed to their channel) -
Funny content, but also helpful.
-
Take good picture from both sides of the GPU, you might flashed the wrong chip, did you make a backup?
Have you dumped the chip to a bin file from the GPU itself and tried to open it with pascal bios editor? -
You are mistaken. Confused me with azatos612
")
-
Yes
I made backupAttached Files:
-
-
Hello! You have same Tornado f5 with gtx1060. Can you send your vbios?
-
Hello. I have a motherboard from ms-16L11, and a video card from MSI GT62.
Here is my v-bios. Your display must support G-sync to be compatible with this v-biosAttached Files:
Last edited: Jan 21, 2021Papusan likes this. -
-
Thank you! I’ll try to flash it tomorrow
-
Your display must support G-sync to be compatible with this v-bios
-
I tried it, but it doesn't work either (maybe Tornado f5 doesn't support this type of video cards.
-
Hard to tell. Your problem is not easy. May be you may need professional help and laptop diagnostics.
-
Before I buy gtx 1060, I gived laptop to laptop repair center, but they could not anithing, just said need to cange graphic card.
-
I was able to fit Zotac GTX 1080, now have to deal with the Error 43 problem ... Installing drivers is pain in the @ss with modifying .inf files .
My dremel just came so I will be modding the water-cooling loop this weekend
I broke a choke from the motherboard... trying to remove the heatsink I put on them few years ago but fixed it and the laptop works. Damn this beast has taken so much dmg over the years.
Interesting enough AMD FirePro 6100 (HD8950) was plug and play and works as a charm. No need to install drivers, all automatic.
Can someone send me the original MSI 1080 vBIOS? I am collecting and testing vBios-es although I think this quest is doomed and will have to try another strategy.
Update1: MSI vBios (86.04.2B.00.1B) 200W seems to work and installs drivers without inf modification, even G-Sync works. It changed the device code from 1BA0 to 1BE0. I think this one is modified.
However it artifacts even in windows under moderate load. The colors become distorted as well. It recovers after a few seconds I suppose when it drops the voltages or loads. I suppose the power stages are the problem. Tested the Prema mod BIOS ... same issues.
Update2: Small victory. Returned back the Zotac bios (86.04.3D.00.0D) and installed latest drivers 461.40...
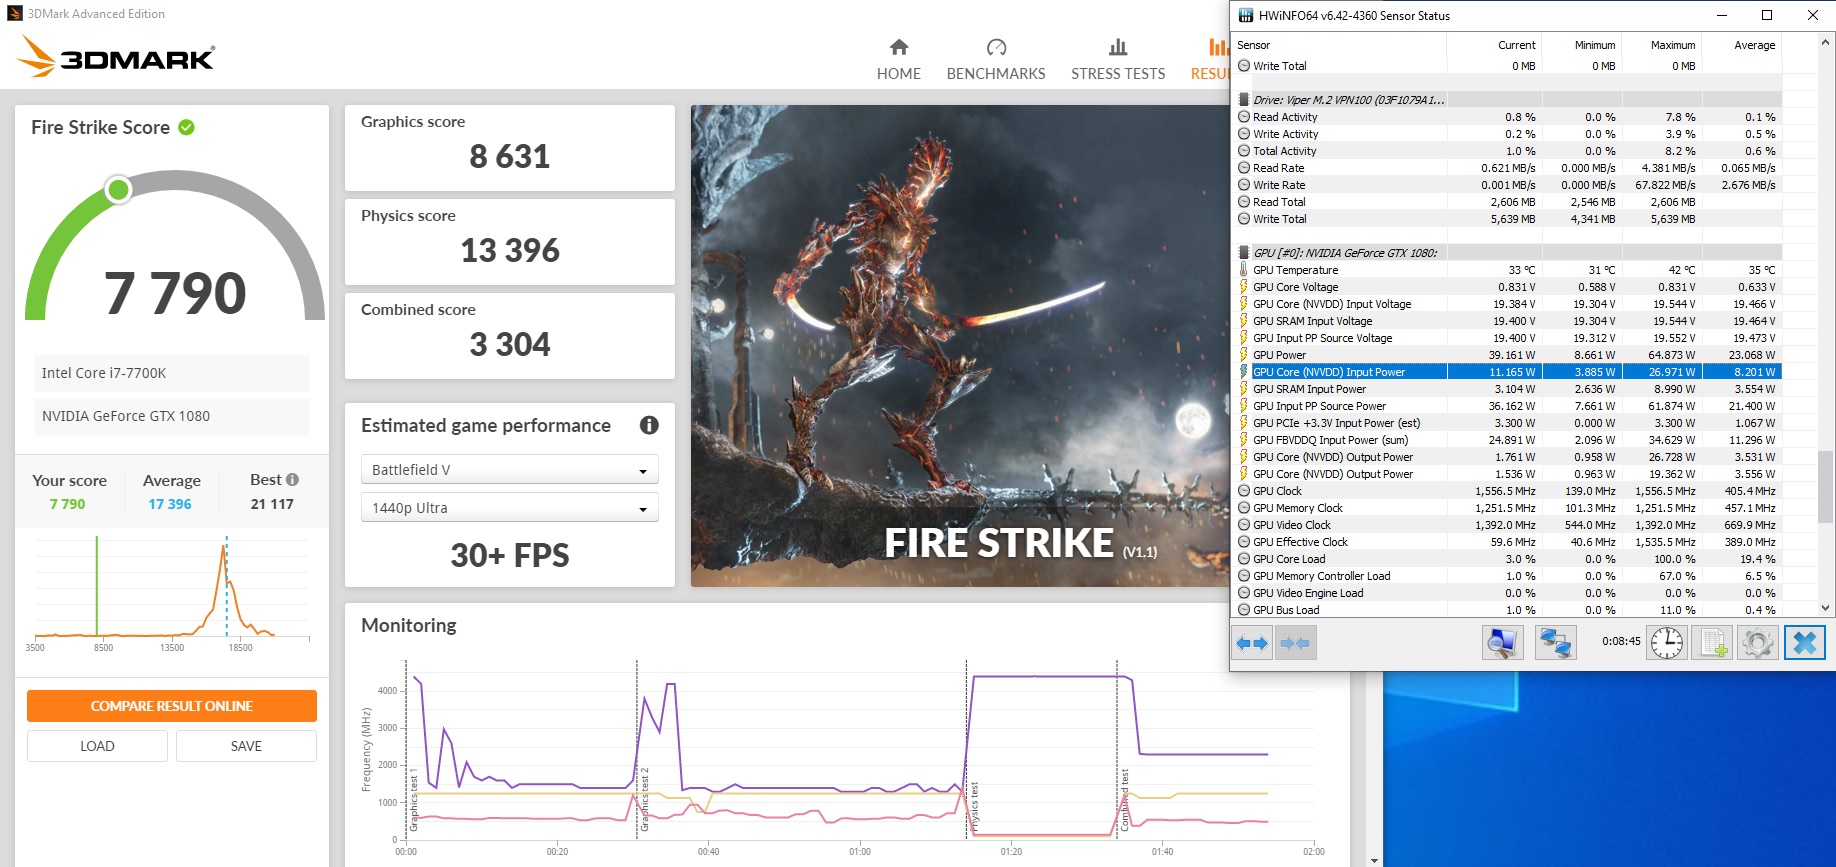
First Firestrike run ... however card draws just 60W
With the MSI bios successfully benched Aida at 160+
Update3: BIG WIN ... finally got it to run on the Zotac official bios but modded to 200/200 W.
Problem is ... it works only on external monitor.
First Firestrike Run ~21000 Graphis score
Update4: Still looking for a good working bios
MSI vBIOS that works in Alienware M18x R1 86.04.80.00.43 (1BA0)
However cannot find it to test it. Can someone help?
@Prema can you please help with a bios for the Zotac card that works trouble-free in the Tornado?
I have the Terrans Force bios by dsanke
EC: 16L1ED61.113Attached Files:
Last edited: Feb 12, 2021Semmy likes this. -
-
You may never get it to work since your GPU sends its display signa via optimus, since tornado f5 does not have one, you can only use display port.
Maybe i am wrong, i will dump my msi 1080 GTX bios once my motherboard arrives, and ill dump the EC bios as well, you can give it a go and let us know if it works. -
You are most probably correct about the optimus.
I finally installed my water-cooling and at least it is working stable so for now I will stop changing bioses over and over again but maybe I will experiment in the future. This took me so much time...
Created a new thread that I will use to sum up experience here
http://forum.notebookreview.com/threads/tornado-f5-zotac-1080-water-cooling.835340/ -
Hey there,
my F5 is running a modded version of the beta bios 3.12 with the Coffee Lake microcodes integrated and the settings being unlocked.
I have recently switched my 6700K to a 9700F (can be had for rather decent 180€ if you're lucky) and since that am encountering some funny things.
1. My battery will vanish during gaming sessions, i.e. Windows and HWInfo will no longer show a battery, as if it had been physically detached.
However, the battery will come back after a few minutes.
My previous guess had been that it is related to the 9700F's and 1080 GTX's (running a 200W vBIOS) power draw.
But the same thing happens when I flash the 150W vBIOS and my GPU is never exceeding 160W on that vBIOS (acc. to HWInfo, set to 200ms interval).
Is this typical for aging batteries (even though I have not encountered it on any other laptop) or is something else going on?
UPDATE: Turns out, it was due to a stupid idea I tried...
I had previously struggled to disconnect the battery connector from the motherboard, as it sits quite tightly on mine.
To avoid the hassle, I had only inserted the connector about 1/2 to 3/4 of the way.
Since then, I have fully plugged in the connector and the battery stays connected and identified 100% of the time now.
While I can't quite understand why this had lead to the battery to disappearing under load and reappearing after about 1 minute, in quite regular intervals, the problem has completely vanished.
2. My device has recently started ignoring my VCore settings in BIOS.
I.e. regardless of the values I set in BIOS (override / positive offset / negative offset), it will boot with offset being 0mV. (acc. to Throttlestop and HWInfo)
I have read about some bugs with AVX Offset and AC / DC Loadline not being configurable, but nothing related to the CPU's VCore.
Funnily enough, this behaviour has only started yesterday, more than 1 week after switching to my 9700F.
I was enjoying Valheim when my device started freezing - reboot - Valheim - freeze again (after a few minutes) - repeat.
(I now assume that the freezes were caused by the missing VCore settings)
What is strange to me: I was playing Warzone and Counter Strike GO only a few hours before that without any issues and am not aware of any changes I made.
Now, I can set Core and Cache voltages just fine via Throttlestop and see them accepted, but setting them in BIOS is not taking effect.
Is there any specific variable / value I should look into? (I have enabled Overclocking, XTU Interface and set AC / DC Loadline)
Or has anyone encountered similar behaviour before?
Thank you very much for any insights or ideas!
Short update:
After trying several variables at random, I still can't make my VCore Offset or VCore Override in BIOS stick - i.e. it is stored and reentering the BIOS loads up what I have set up.
But opening HWInfo or Throttlestop in Windows does not show the selected offset and when Override is set, the voltage will still jump up and down significantly (> Loadline).
I did try reflashing the BIOS as well and did the -greset part, but no dice.
For some reason, the Uncore Offset still works as expected, being effective in Windows when set in BIOS.Last edited: Feb 18, 2021 -
Regarding issue 2, i have the same issue, its a bios related issue and coffee lake cpu's since you cover two pins it does not transfer this information from the bios and just uses the microcode which includes the intel default power, there is no communication between the CPU microcode and bios microcode and what changes to ignore and read from the bios.
Also i might be wrong and its a CPU related issue which is locked, i have the same CPU and i cannot tweak it from throttlestop or bios itself no matter what i set, it will just use default microcode settings.FrozenLord likes this. -
I have an i7 8700 and I can change the frequency and offset voltage values in the throttlestopFrozenLord likes this.
-
Sounds like a reasonable theory, but I had thought that the covered pins were not used at all.
They need to be covered as they are supposed to not be wired on the mainboard, but some manufacturers might have wired them anyway, leading to high currents running over that pin in the socket and melting it.
Throttlestop is my workaround as well, as it works just fine.
However, that requires a Windows environment.
My device had previously worked fine without Throttlestop, now I am crashing in Windows after about one minute if I don't use Throttlestop.
It still seems to me as if my BIOS Offsets had previously worked. -
I thought one pin is for receiving current and the second is for information which both related to what is set in the bios, either default microcode settings set on the cpu or manual aka custom voltages etc...
But i might be wrong.
I had a 9700K and i was able to tweak it in the bios and also trottlestop, however with 9700F even if i set vcore in bios to stupid values and stupid values of slope and uv nothing changes, it just runs at default cpu settings.
Could be an issue to this particular cpu, no idea.FrozenLord likes this. -
Just to make sure: is my laptop dieing when I need to add voltage just to stabilise the 9700F?
I was previously running the 9700F at a maximum of 39x cache and core multipliers of 46x 46x 45x 45x 45x 44x 44x 43x (from 1 core loaded to 8 cores loaded, which is somewhat below Intel's spec), with AC Loadline and DC Loadline set to 35.
The laptop would crash with a freeze a few seconds to minutes after entering Windows or PopOs! (a Ubuntu-based Linux).
To stabilise it, I have added 30mV for Core and Cache.
It seemed to be stable, but despite it finishing various stress tests (including TSBench, OCCT Linpack, Cinebench and Intel's Processor Testing utility) it did crash a while later again.
I have now reduced the core multipliers by one, increased the Loadline values to 45 and set the positive offset to 40mV - it seems stable now (again).
Unfortunately, I don't have any decent logs of the past weeks but I think that it used to run fine without adding voltage.
Another aspect is that my 6700k seemed to need about 1.25V (with some Loadline pushing it to 1.28V for stabilizing 4.2GHz).
With the 9700F, the voltages seem to be almost identical, with the device needing around 1.25V for stabilising the multipliers mentioned above, where Loadline is pushing it in similar regions.
E.g. in HWInfo I see a maximum VID of 1.2V for 42x Core and 38x Uncore during the 8 thread Linpack in OCCT with the 2019 instruction set.
My question is therefore: is there a way to test the mainboard, including VRMs and PCH, for stability?
Or is there a BIOS setting that reduces the PCH load?
(My PCH has got a small copper cooler and maxes out around 83°C, acc. to HWInfo, after several hours of a fully loaded device)
Thank you for your insights and thoughts.Last edited: Feb 17, 2021 -
As a short heads-up: I have just tried getting rid of the Realtek Memory Card Reader by disabling it in BIOS.
More specifically, I used HWInfo to check which PCI Express Root Port it is connected to (it is #8) and then went into the BIOS -> Advanced -> PCH-IO -> PCI Express (something...) -> PCI Express Root Port #8 and set it to disabled.
...and from then on, I was stuck with a black screen and no POST.
My device forgave me after removing the BIOS battery and the laptop battery, but I still find it strange that simply disabling a PCI Express Root Port connected to the PCH (i.e. it definitely is not my GPU) leads to no-POST situation. -
Do you still need msi 1080 bios?
-
You seem to be confusing me with someone else.
I am happily running the Clevo vBIOS on my 1080
-
Hey, probably
Is there any benefit using clevo bios? -
It depends on your situation.
I am using Afterburner to run my 1080 at 1.86 GHz @ 900mV.
When doing this my GPU is power throttling in some situations, as the normal MSI vBIOS limits me somewhat aggressively to 150W.
(Keep in mind that I have slightly modded my device, adding holes to the bottom cover and adding a copper sheet on top of the heatsink to increase pressure)
Those 150W will be somewhat cool in my case, and as I am aiming near maximum performance, I decided to go beyond 150W.
The problem is that nVidia's vBIOS is signed, which is why I can't change TDP directly.
The perfect solution in my case would be about 165W sustained and short boosts to 180W.
My remedy is to flash a different vBIOS that offers the higher power consumption from stock, meaning that it is signed and can be easily flashed from within Windows (or DOS), as I don't have a SPI flasher.
When you search in this thread, you can find a post with three vBIOS for the 1080GTX (which from the top of my head are as follows):
- Stock MSI (150W sustained, little boost beyond that)
- Clevo (seemingly sustained 180W, with some boost beyond that)
- Prema's version for EVOC (200W sustained, boosts beyond 215W)
While the MSI one is too low for me, Prema's version is too powerful for my cooling solution, which is why I switched over to the Clevo one.
It still is not ideal and will cause thermal throttling in some situations, but it offers the headroom I am looking for while staying below 200W, which hopefully saves the VRMs from an untimely death. -
I checked my MSI vbios and its modded to 200w, i run it at 850mv or 800mv at 1.848GHz it throttles sometimes to 1.733 Ghz at 89c, usually this happens when i game at 4K.
If below, say 1440p or 1080p, it stays "cool" at max boost. -
I ran my GPU at 1.86GHz and 875mV for some time and wondered, why I got crashes in Warzone and Ghost Recon Breakpoint.
The crashes happened randomly, sometimes after 10 minutes of gaming, sometimes after more than 1 hour - and sometimes not at all.
Initially, I attributed them to buggy games, but when Cyberpunk 2077 came out, the crashes happened more frequently.
For reasons I can't fully grasp, it seems that inefficiently coded games tax the GPU in quite a reliable way to produce crashes.
Cyberpunk 2077 allowed to test in short intervals as it would reliably crash within 45 minutes of starting it.
After adding voltage to reach 900mV, all those games have become stable.
I.e. my undervolt was too aggressive but did not show up in most games or even the 3DMark Stress Test, Unigine Superposition, ...
Just as a FYI, in case you are experiencing games that sometimes crash at random.Yevgeny Stalinsky likes this. -
Thanks for the info.
-
guys someone know if there is some display upgrade like 120hz 4k\2k for it? even not an aftermarket..some update for rtx 5000 ? someone tried it?
Last edited: Feb 26, 2021 -
After doing some additional testing, it turns out that my statement was not precise enough.
I have set up 1.86GHz and 900mV in Afterburner, but for reasons unknown, the GPU will start into any kind of application with one frequency notch lower (I.e. setting 1.86GHz in Afterburner means a maximum of 1.848GHz in applications).
And funnily enough, it clocks one notch lower after about one minute, reaching 1.835GHz and staying there.
So, being the nerdy fiddler that I see myself as, I decided to try undervolting further only to find out that the GPU crashes within 15 minutes in Superposition, even when using 1.848GHz (resulting in 1.835GHz used) at 875mV and 881mV.
The next voltage notch is 893mV which I have not yet tested extensively, but I am not too optimistic.
Consequently, I have got the suspicion that my GPU is actually only stable at 1.835GHz @ 900mV in real world applications...
Long story short:
- set one frequency notch higher than actually planned (in Afterburner)
- monitor the frequency during load after some time to see which frequency the GPU stabilised at -
And as another small tidbit I have just realized (the usual caveats and disclaimers apply, i.e. you do this at your own risk and although it works without problems on my device, there is a chance that it behaves differently on yours):
ASPM seems to be off for the PCI-E devices on this laptop by default.
I have previously struggled to cool down my PCH, where it would routinely reach uncomfortable temperatures.
As a remedy, I did add a copper heatsink (my pictures and description are in this thread) but the PCH would still heat up to ~85°C under taxing loads (e.g. gaming).
I would have loved to get its temperature down, but did not find any meaningful way - that is until I stumbled across ASPM.
My PCH is now registering a maximum of 68°C after stress testing (1x FireStrike Ultimate Stress Test, 1x FireStrike Extreme Stress Test, 4 hours of OCCT Memory Stress Test), 3 hours of Valheim and a few hours of idling.
All that has changed between the hot PCH and the cooler PCH was enabling ASPM in BIOS for 4 PCI-E devices:
- NVME SSD #1 (Sabrent Rocket 1TB) on Root Port #9
- NVME SSD #2 (Intel 660p 2TB) on Root Port #17
- Intel WiFi (Intel AX210) on Root Port #7
- Killer LAN on Root Port #6
I did use HWInfo to know which PCI-E Root Ports they are connected to and it looks like this:
I would assume that this is the same for each and every Tornado F5, but feel free to check on your end - it's a commonly available freeware after all
To enable ASPM in BIOS, you need to have access to the hidden settings.
There, go via Advanced -> PCH-IO Configuration -> PCI Express Configuration -> PCI Express Root Port #xy -> ASPM
And set ASPM to Auto.
Repeat for each of the 4 devices
As a visual guide, I have tried to summarize the steps in those pictures:

Afterwards, you can check with HWInfo again, as each device you have enabled ASPM for should show the status like this (i.e. something other than disabled):
For devices that don't have ASPM enabled (this example is my card reader), it looks like this:
Hopefully this is of some help to you as well
Last edited: Mar 4, 2021 -
so we will not receive any gpu upgrade soon? what you think guys?
-
As a short update to this: my device is still not showing any adverse effects.
So, because of my curiosty, I decided to enable ASPM for the other Root Ports as well.
While this seems fine and stable as well, there is little additional temperature reduction (if at all) from doing that, which makes sense since those Ports do not contain any devices according to HWInfo.
UPDATE: as of 28th of May 2021, those settings are still working fine and did not result in any instability
Just as a warning though: I did previously also test the "DMI Link ASPM Control" which is one level above the Root Ports and this led to instability on my system during longer sessions (i.e. it boots and posts fine, but did BSOD on me in longer gaming sessions).
Consequently, I advise against changing the "DMI Link ASPM Control".Last edited: May 28, 2021 -
I have a "new to me" MS-16L1 board I just received from a vendor that powers up but does not post or give warning beeps with or without RAM/components. I'm assuming that the BIOs is not installed on the board. Does anyone have the flashing software and firmware package and or the manual for this board? It's for the Cyberpower Fangbook build of the MSI MS161L. I have asked MSI for the software/firmware but I have not received a response. The previous MS16L1 board had a short and there was a failure in repairing the capacitor which resulted in a fried mosfet that I do not have the proper tools to replace. Thanks
-
I decided to look a little bit deeper into this and have run some tests comparing the Clevo VBIOS to the MSI stock VBIOS.
My methodology is unfortunately not the best, as I am not able to control the temperature.
However, I did try to somewhat compensate for that by running the benchmark 5 times and taking the best of those runs.
Additionally, I let the device sit for about 6 minutes between each run, monitoring the temperatures with HWinfo running in the background and observing baseline temperatures after about 1 minute after each run.
So temperatures are assumed to have somehwat normalized inbetween.
And for completeness sake, this is my voltage curve:

My benchmark of choice were 3DMark's TimeSpy and FireStrike Extreme, as they provide a standardized test and some integrated monitoring capability.
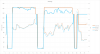
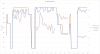
I did extract the Monitoring.csv from both testruns and have plotted FPS as well as core clocks.
TimeSpy
Switching from the Clevo VBIOS to MSI's resulted in the total score dropping by about 3.2% (7221 vs 6988).
Funnily enough, the third run was the best one for TimeSpy on either VBIOS.
FireStrike Extreme
Switching from the Clevo VBIOS to MSI's resulted in the total score dropping by about 2.9% (9690 vs 9413).
Here it was the first run both times that provided the highest score.
The results (especially the plots) are somewhat expected, i.e. the Clevo VBIOS allows the GPU stay at higher frequencies whereas the MSI VBIOS limits it.
My reason for downgrading the VBIOS is that my device tends to reach temperatures that I am not comfortable with (after upgrading to the 9700F and summer slowly rolling in).
I hope that the lower power ceiling of the MSI VBIOS solves the heat problem for me
-
Hey there,
I have once again given in to the urge to fiddle with my laptop some more...
This time, I did give lapping the CPU's IHS a shot.
Preparation-wise, I did like those articles:
https://www.ocinside.de/workshop_en/intel_ihs/
https://www.techpowerup.com/forums/threads/lapping-sanding-ihs-and-waterblock.258162/
The Tl;dr: the clamping force of the socket does lead to some deformation that seems problematic for Thermal Grizzly's Carbonaut.
My F5 is running an Intel 9700F (i.e. locked, no iGPU, soldered) with the typical copper shim between two Carbonaut pads.
When running the CPU stock, it was ok - but would throttle horribly after 8 seconds due to the power limit of 65W.
Unfortunately, this power limit can not be overriden, so I had to work around it via IMON Offset (-30).
After some experimenting, I have found the following setup to work best for my use cases (alongside AC/DC Loadline of 2 and IMON Offset of -30):
While this setting did run stable, it would thermal throttle noticeably in games that use AVX.
Similarly, running any stress test with SSE would show high temperatures (low to mid 90s, i.e. almost throttling) and adding AVX would lead to throttling.
For whatever reason, the power limit (which I am still hitting with IMON Offset) as well as the current limit did allow for significantly more power in AVX scenarios.
Having read the two articles, I knew that the socket might deform the IHS and was told to not expect too much thermal improvement.
To prevent sanding the IHS and having it deformed after, I bought a defective motherboard and sawed it in pieces.
Hence, I am able to sand down my IHS while it is inside the socket.
The result somewhat speaks for itself:
The socket does deform the IHS significantly enough - you can see the exposed copper on the left and right side, while the middle (X) is still nickel.
Additionally, the area directly next to the socket clamp does still have the original (matte) nickel surface, and seems to have barely been sanded.
Last but not least, I have decided to get rid of the original heatsink screws with their springs and have exchanged them with normal stainless steel screws along some copper pieces:
This way, I can freely adjust the pressure / distance and was able to get rid of the copper shim (which was needed before, as the IHS was not tall enough to make good contact without it).
In the end, my stuttering mid-game is gone and so is the thermal throttling under normal use cases
Unfortunately, I did not do a test run right before doing the changes.
Doing some tests now points to an improvement of a few degress of C, but nothing drastic.
Hence: is sanding the IHS worth it? Probably not, unless every °C counts.Last edited: Jul 12, 2021Papusan likes this. -
I been working on a project to insert the motherboard of this laptop to basically use in ATX case as a Desktop and it is working great so far.
9700k with RTX 3080 TI PCIE 3.0 16x, yes its being used in the MXM slot with adapter.
Slapped a CPU cooler on it which is an old old Zalman CNPS11X with a silent Noctua fan.
The EC on this MB will not let the motherboard run more than 10-15 seconds if there is no fans either on the CPU, GPU or both.
So i had to mod that, also to be able to start the board without the power board and using the ATX power button instead, i had to mod that in as well.
So far it runs great, 9700k all cores 4.9Ghz getting up to ~75c which is not bad.
Ill post some pictures later on. -
Here are some pictures, I am not going to disassemble all for better images as its too much hassle, but it should be clear enough what is going on.
So, why have i done this, basically the board is faulty, the M.2 slots do not work properly and SATA is not working at all, not even data, USB C does not work, led indicators do not work, seems like part of the PCIE power rail got damaged and is not worth fixing as it will costs about half of a replacement board.
However upon testing the board i managed to boot from USB 3.0 and M.2 to PCIE adapter and used a desktop GPU, and the board booted fine into Windows however would crash on Syntp.sys bluescreen.
So I just deleted the file Syntp.sys from the Windows system folder and disabled the driver in device manager.
So how do you actually power on the board with no power board/buttons.
The pin i circled in red in the following image is responsible for shorting the board so it could power on.
It is coated. so you need to scratch it a little to reveal the actual solder pad and solder a wire to it.
![[IMG]](images/storyImages/powermod.jpg)
Now the second issue is the EC wont let the board stay on for more than 15 seconds if no fans connected to it.
So the second mod would be convert the fan connector to PWM standard connector to be able to plug in a desktop fan to it.
In this case i used a female to male PWN cable, cut of the laptop fan connector and attached the wires to the PWN male side of the cable.
You can do that without soldering as seen in picture below.
This will resolve the CPU side of the fan.
![[IMG]](images/storyImages/20210701_001957.jpg)
Another issue that need to be worked around is, how am i going to attach any drives to the board.
I have purchased a USB hub, SATA female to male cables and SATA to USB adapters.
Now the hub itself will not be sufficient enough to provide power to all 4 ports so the workaround for that would be using the USB adapter just connecting the data cable (SATA female to male),
And connect power to the actual SATA HDD/SSD directly from the PSU, so the drives would be getting power from the PSU and transferring data over the USB hub not consuming any power from the actual USB port/hub.
With that workaround you can connect 4 SATA HDD/SSD drives with about the same transfer speed of native SATA 3 connector.
![[IMG]](images/storyImages/20210701_001857.jpg)
Since we took care of the CPU fan side of things, we still do not have a fan connected to the GPU side, since we do not need a fan there at all due to the fact that we're using a desktop GPU with its own fans.
We take the signal pin of the PWN connector on the board from the CPU side and solder it to the GPU side, that way the board gets a signal from the CPU fan and EC will not trigger a shutdown since it is tricked to believe there is a functional fan connected to the board.
![[IMG]](images/storyImages/20210701_001752.jpg)
![[IMG]](images/storyImages/20210701_001738.jpg)
Now we have to deal with fitting the GPU along with a Desktop CPU cooler which cannot be done without modding the mounting of the cooler since the mounting on the board is not standard.
As you can see the fan is a little tilted due to the mounting misalignment, however the surface area on the cooler that i used covers the whole die anyway so in the end doesnt really matter.
Regarding the GPU, since in most standard builds the GPU sits in the PCIE slot on the board everything is fitting nice and dandy, however not in our case.
The GPU cannot be inserted in its slot in the case as there is not enough space to fit the adapter and the GPU as it will be crammed on the motherboard and even then there is no space to mount the GPU.
So the solution i have used, as you can see in the image the GPU is sitting closer to the opening of the case than the board, i have used 3 standoffs from the case that is suppose to be used to mount a standard motherboard, screwed them together and than screwed that to the case where the GPU is going to be screwed to, that gives us enough space for the adapter to be connected to the GPU PCIE slot and to hover slightly above the actual motherboard.
This resolves the current issue, now we have a GPU in its slot but it will wobble since its not being secured by anything except one screw on the case, to resolve that i have used velcro which came with the PSU and a zip tie to the HDD metal bay area to the GPU backplate, that way the GPU is holding firm in place.
And to secure it a little more you can use a zip tie on the faceplate to the case where the actual faceplate extrudes on the bottom of the GPU suppose to go to the case, but since we lifted the card higher its no longer does that, so a zip tie will do that instead.
![[IMG]](images/storyImages/20210701_050706.jpg)
Now since most of the major issues been resolved, we have minor issues to resolve.
1. Missing sound card
2. No USB slots to connect stuff to since its on the opposite side
3. Only 3 USB slots available.
4. No Wifi
5. Provide power to the motherboard
6. Missing native SATA ports (original board SATA port not working).
7. Connecting more than 1 PWM fans for the case cooling.
8. Power the PC from the case button
The solution was:
1. Using a cheap chinese 5.1 USB sound card.
2. Connecting a USB hub and placing the hub on the outside of the back of case which gives us more USB ports.
3. Using Hubs which will give us 3x4 = 12 USB slots in total.
4. Using a USB Wifi card.
5. In this case I have used a 230w AC adapter which was zip tied to the case where the optical drives bay located with a cord extension.
Overall this solution is a little funny since the PC is now occupying 2 power inlets instead of one as usually done with standard Desktops,
One for the board and second cable for the PSU.
-
There is another solution to do that cleaner is convert power from the PSU to 19v with an adapter, edit appropriate cable for it to be able to fit in the motherboard power connector and make sure that you've done all while making sure there is no danger for shorts or exposed pins on the converter.
I have chonsen the easier approach for obvious reasons.
6. Used a PCIE 1x (Wifi slot) to 2x SATA 3 ports adapter and connected two SSD's to it which windows now boots from one of them.
7. Used a splitter adapter which has 8x fan connectors, the splitter will take the PWM information from the CPU fan and replicate to other fans connected to it, the splitter takes its power from molex connector from the PSU.
8. Since we soldered a wire to the pin that actually shorts the board for it to power on, we take that wire and insert it in the power button connector, now we need a ground wire and connect that to the power connector as well, in my case i just screwed another wire to the case to which is ground, so now the PC can be turned on/off via its case power button.
Since the motherboard has no standard ATX screwing points where we can just screw it to the case, we will have to be creative on that part, what i did was just use some holes on the top of the motherboard and tie them to the top of the case and used one screw to screw the bottom if the board (near the MXM slot) to the case.
To avoid the bottom of the motherboard touching the case and potentially shorting/damaging the board, i have used two double tape and some foam coating on various locations on the board.
TimeSpy Extreme Result:
![[IMG]](images/storyImages/menega_desktop.jpg)
Overall would i recommend this to anyone, usually no unless you have a dead GPU or other major issues on the board which will render it as paperweight in its laptop case.
If your GPU dies you are not going to find anything cheap as a replacement unless you're willing to lose major performance and alot of fiddling around trying to fit cheaper alternatives with modding.Last edited: Jul 25, 2021IllusiveMan, deathwingbg and Semmy like this. -
Hello everyone! Whoever installed Windows 11 on ms-16l1? I tried to install, but Windows check says that I do not have the tpm 2.0 module or it is disabled. I searched in tpm 2.0 bios settings but couldn't find it. Whoever knows if there is tpm 2.0, and if there is, where is it included?
-
My Tornado F5 showed no TPM when I first got it, but it became available following a bios update.
-
Hello Everyone here.
I own a Tornado F5 since 2018 and I have recently run into trouble and would like to ask if anyone here can help me. A year ago I cleaned it out from dust and forgot to plug the GPU fan back in. It still ran for half a year without the fan where I almost did not use it for gaming or anything else really. However, in January this year it suddenly didn't boot anymore. I brought it to a repair guy and he said he did something in the graphics. However, didn't specify what he did. It ran normal for 6 months but now the same problem has occurred again. I replaced the motherboard, because it also did not power on without the graphics card. I figured the motherboard might be broken. Now it powers on but the screen remains pitch black and after around 30 seconds the computer turns off. There is no way to access even the bios. So I suspect that after all the graphics card is dead too. Does anyone know if I can use the integrated graphics of my i7 7700k processor? Just taking out the graphics card does not seem to work. As also without it the same thing happens. If anyone here could tell me how to troubleshoot this, I would be very grateful.
All the Best,
Lialt -
Unfortunately this laptop does not have an output to the screen for the CPU's integrated graphics. The display only routes to the dedicated graphics card. I don't think the IGPU is even given any power.
The only thing you can do from here is install a different dGPU.Lialt likes this. -
Thank you very much for your reply! That helps me an awful lot! I just ordered a used mxm GPU and hopefully it works then. Could punch myself though for burning a perfecly good 1070...
Clamibot likes this. -
Hey guys, I have not been using my laptop a ton since I had built my desktop a few years ago and have been moving around quite a bit. Finally set up in a new apartment and got situated finally and have been looking into things to use my laptop for so it is not just sitting around collecting dust. I was debating trying to let it run and mine crypto for lols and see if I could make anything off of it, but due to the form factor and fact that it's a laptop, would you guys say that is a bad idea? Any recommendations to improve performance on that if I do try to go that route or is it just not worth it? I tried running it this morning and the temp went up to 88C and sat there and I don't feel very comfortable trying to let it run long term that high, I have a cooling pad in my storage unit I need to grab and don't have the built in fans running at max, but just curious to get your guys opinions if this is a bad idea or not.
I love this laptop, all these years later the thing is still a beast and runs anything I throw at it when I need it. I tried setting it up in my living room to use on my 4K TV but the input lag going through my TV just feels so bad after being used to high refresh rate monitors all the time that I don't think I can really settle for that so I figured I could try and maybe do something with it for when I don't need it for gaming on.
Also, I have reformatted my laptop a couple times over the past year or 2 and off the top of my head, do not know where I backed up the software/drivers that came with the machine when I ordered it, where is the best place for me to go to download this software to control things such as the keyboard LEDs and hopefully the fan speeds through software when I am not directly infront of the machine?
Also, I have to say I love how long this thread has been going and all the work you guys have done on being able to update your machines and keep them going with newer hardware, these machines are such beasts.Last edited: Nov 17, 2021 -
MS-16Lx series have a total of 16L1 16L2 16L3 16L4 16L5 these models (open 16Lx series bios hidden settings need to hold down the right SHIFT → right CTRL → left ALT → left on the F2 these four keys, Dsanke released the 9 generation of 16 threads bios is the default to open all the settings options, no need to use the key combination again to open).
The 16L3 is the labeled model for the Terrans Force S6 as well as the aka Tornado F5 and other machines. 16L4 16L5 are the official MSI models used in the GT63, 16L4 and 16L5 have different motherboard layouts.
16L4 and 16L2 (MSI GT62vr) the same motherboard layout, 16L5 with a 2080 graphics card, due to the 2080 version of the problem so the motherboard layout was redesigned.
*** MSI 16L13 (Eurocom Tornado F5)/EVOC 16L-G-1080 15.6" Owner's Lounge ***
Discussion in 'MSI Reviews & Owners' Lounges' started by Diversion, Oct 14, 2016.