Corsair I think had the plastic ones for one of their kits?
-
-
I have the plastic ones for the EKWB AIO, it takes a G 1/8 down to 10mm barb.
It seems impossible other than the couple I managed to find to source an M5 quick-disconnect type system, guessing its generally not very common.
Looking at the Asus GX800, that used what appears to be 4MM copper tubes onto a much smaller heatsink than this one and the results seemed really impressive.
Should have some benchmarks this week to start to run.Attached Files:
-
-
The results of the asus was limited by the small radiators and fans noise wise.
-
Still good results though - my parts should arrive today ! so will start doing tests anyday
https://arstechnica.com/gadgets/2017/07/asus-rog-gx800vh-review/
The result is both a dramatic reduction in temperatures and an increase in performance versus air cooling alone. Undocked, the CPU—which is overclocked to 4.4GHz by default—is easily throttled in synthetic tests, with temperatures peaking above 91 degrees Celsius. The GPUs, while staying within their own thermal limits at 76 degrees, only hit a top clock speed of 1,721MHz.
Nvidia GTX 1080 review: Faster, cheaper, quieter than Titan X Docked, the CPU hits a mere 50 degrees under synthetic load, while the GPU hits 60 degrees and clocks at a much higher 1873MHz. That's almost as high as a desktop GTX 1080, offering more than enough performance to make good use of the built-in 4K 60Hz display
-
Yes, though water cooling should be cool and quiet when designed properly
")
-
I am really hopeful mine runs almost silent but deadly !! =D
-
Not deadly to the system I hope
-
Here is a link to a super quick video I just put together tonight, there will be some big changes to this, but I'm happy with the flow even at 4mm it will soon be 6mm tube into the HS.
I was wrong this isn't a D5 pump but it does have 3.7m head pressure so more than enough, its more along the lines of the DDC variant - weaker but more than up for this job.
* I am awaiting the M5 QDC's - This will allow me to use the wider 6MM tubing instead of the current 4mm, and SHOULD allow a plug+play w/c laptop
* The pump will be proper bled to get rid of the air, since the video I have already bled all the air that was running around.
* The fans will be on the Noctua fan controller - I have disconnected them since the video and the pump runs almost silent now @ 100%.
* I will probs end up with 4 fans on a push-pull config running at 1000RPM or almost silent!
* The barbs will have cable ties on the extra security.
@Mr. Fox @Meaker@Sager @bennyg @Dialup David what're your thoughts on water flow guys (video below)? I think even at 4mm tube this flow will be adequate to allow the rads to cool at 100% efficiency, do you?
https://www.dropbox.com/s/lnd9sos09g0uogk/VID_20190730_205724.mp4?dl=0Last edited: Jul 30, 2019 -
Are there any micro-fins in the block itself? Or is it a carved channel?
-
It's a carved channel - basically a proper water block, 2 pieces of copper with channels - soldered together =Djc_denton likes this.
-
Guys - i am about to begin my first pre test on all the original vapour chamber etc.
Is Aid64 for both CPU+GPU's a good tool to be using to get to max temps on air alone? -
Check only the box “Stress FPU” in Aida64 and run Heaven graphics benchmarks simultaneously. But follow temps as a hawk. Hwinfo64 is a nice tool for that.
-
Hey, @Papusan just ran 16 minutes on just the original vapour chamber unit. What're your thoughts on my preliminary test on the new HS with the water flow (video on the previous page), appreciate everybody's opinion, do you think it will suffice, obviously i will be increasing tubing size before fitting and proper testing.
Selected Stress CPU + Stress CPU.
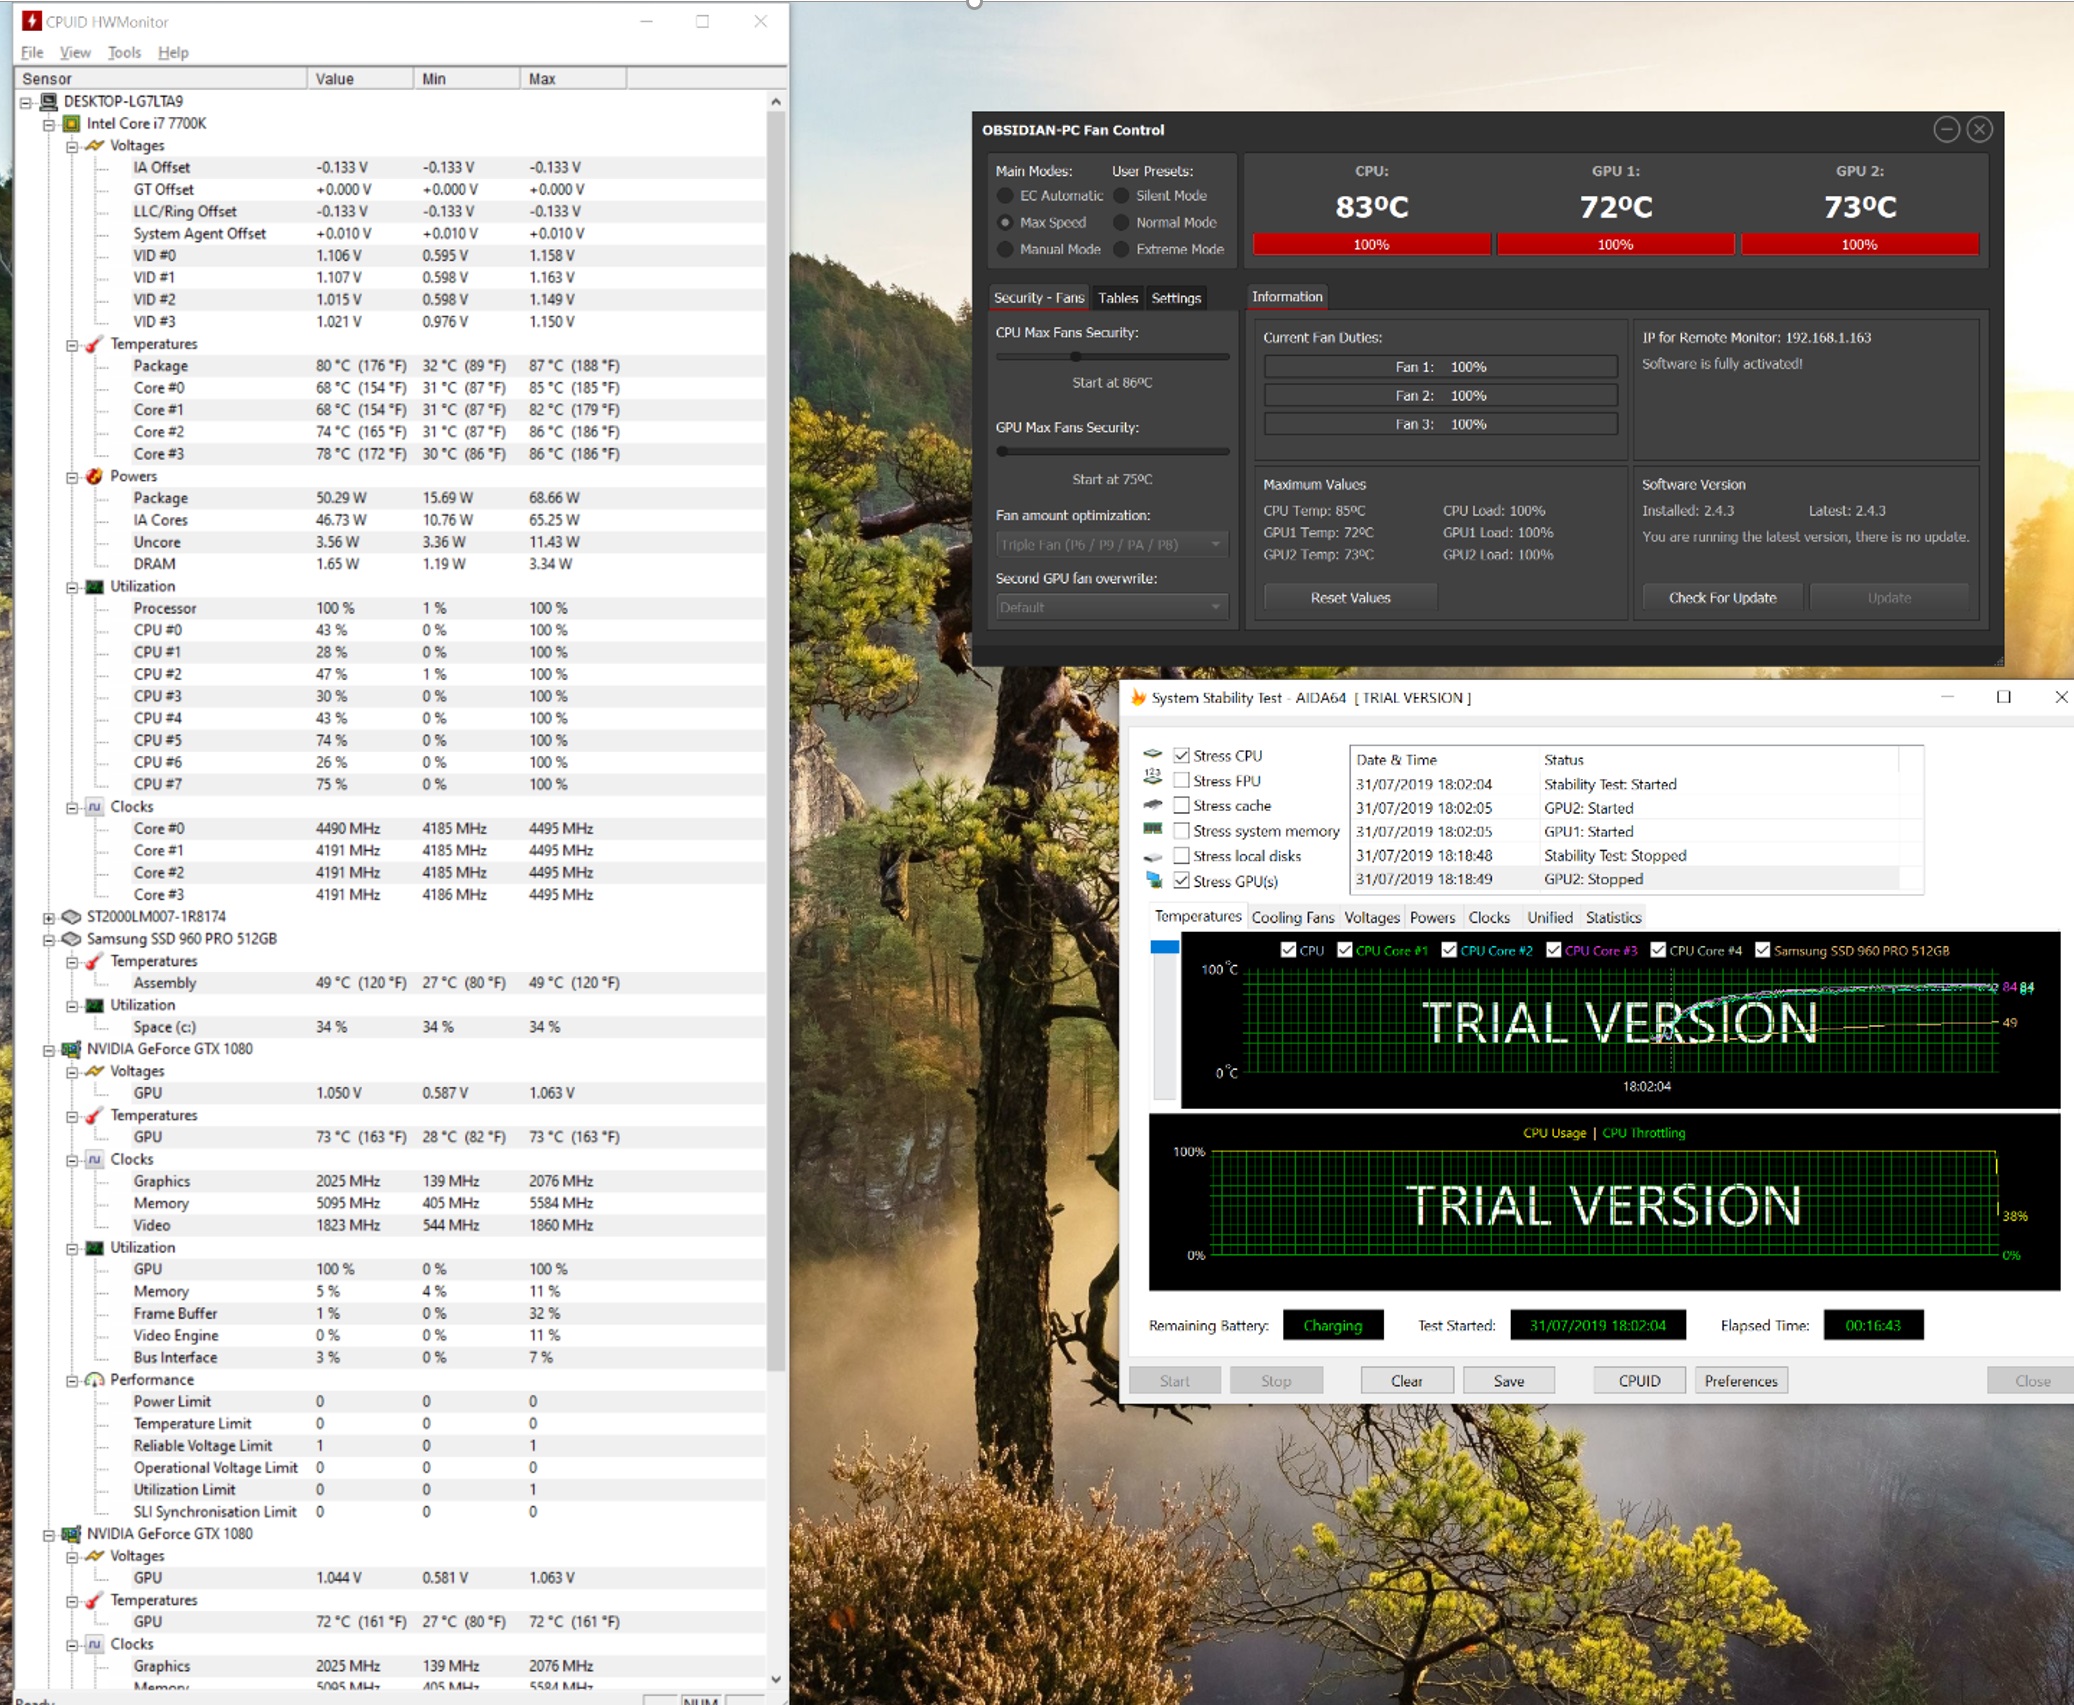
Test 1 – original heatsink - laptop fans only at 100%
Ambient room temp – 18 degrees.
7700k clocked @ 4.5Ghz and undervolted to -133.
GPUs overclocked to +175 core and 580 mem
CPU and GPU’s on liquid metal + CPU delidded +Bitspower IHS
Heatsink lapped also on CPU's and GPU.
12V fans on the KM1 @ 100% during all tests.
AID64 – 15 Minute approx test on GPU’s + CPU
Temps attached - Max CPU - 86 and GPU's maxed out at 73
Do you think it would also be good to do the identical test with my custom notepad u3 and the 3x Noctua industrial fans (200CFM total), so I can compare these 2 tests against the water-cooled ones- the custom air cooler stops the GPU's breaking 60 degrees alone? just wondering if it would be good to see a true comparison against all 3.
I cannot find 1 in depth review on this heatsink i have purchased and none with this rad setup and figure might as well do a thorough test vs OEM / Custom Notepal / WaterCooled + RadAttached Files:
Last edited: Jul 31, 2019bennyg likes this. -
-
Test all possibilities before you switch. But post screenshots of Hwinfo64 who will show all info (Cpu package power / graphics power etc). And run high performance power profiles so max clocks stay at max the whole time. Dips in clocks shouldn’t happen.
Stress FPU box only in Aida64 means more Cpu heat.
Edit. Around 65w Cpu package Power ain’t much on a 95w TDP chips.
And yeah, it’s difficult to compare. No run same tests, same clocks and same ambient temp.Last edited: Jul 31, 2019 -
Nice one buddy - will do these exact tests.
-
So I did 10 minutes on AIDA64 FPU only + Heaven same time.
Test 1 - Laptop cooling only.
Package hit 90 watts
CPU max temp - 87
GPU's - 70.
Test 2 - Laptop Cooling + Custom Notepal u3 cooler.
Hit 87 Watts
CPU Max -79
GPU's - 63 max.Attached Files:
Last edited: Jul 31, 2019 -
-
So far it looks good. A reason graphics power doesn’t show up? And you’re sure it holds max clocks the whole time? I use high performance power plan, C states disabled to have max clocks 24/7. Yours show dips below the max running clocks. I use max performance for graphics as well.
Best is start the test, then clean out Hwinfo64 so everything shows max clocks on everything. Posts screenshots in the end of test while running max. See... Hardware should see no dips in clocks. Only Pure numbers.Last edited: Jul 31, 2019 -
Noise and surface temps is where I saw the greatest gains. IR surface temp gun thingy and a basic noise meter are pretty cheap.
Flow looks OK. Your flow meter is on "fat tube" side so will look slow. Flow will be much faster through the smaller diameter tube, and the most restrictive part will be the actual waterblock anyway with all its hard right angles and smaller channels.
A couple years back I had a bit of a look at the maths behind flow rate. It didn't take long to figure how little flow is actually needed. It went something like;
100W CPU + 200W GPU = 300W = 300J / sec thermal energy
SHC of water =~ 4J/gC. Density H20 = 1g/mL.
So 75mL of water per second (4.5L/min) would lead to the water being raised by one single degree C. From 300W.
25mL/sec or only 1.5L/min => 3C rise.
Now that's off the back of silly assumptions like thermal transfer to the water is 100% efficient so this is nowhere near reality but the point is that flow is not such a big deal since water absorbs a LOT of heat. I notice about 2C difference in GPU die and loop temps between my pump on 2/5 vs full speed. Heat enters the water better but also gets removed by the rad better too.
One annoying thing about having such huge thermal capacity with all the copper and water will be that you need to run tests for a while to reach a completely stable temp. "Science Studio" did one video on YouTube with a clickbaity headline something like "Why AIO coolers are lying to you!!!111!" which was just a big whinge about temps not reaching equilibrium for 10+ mins, something that any mildly competent reviewer would docope123abc likes this. -
@Papusan will retest today, forgot to clear min/max values! everything is set to high performance already, C States I haven't touched though - assuming this will force 100% clocks.
@bennyg epic reply, thanks buddy really helped me get my head around flow, etc and some real numbers.
I'm just waiting on the quick release M5 thread before I can crack on.Papusan likes this. -
Hi guys,
Having a bit of a nightmare.
I am trying to do a quick mockup with the new heatsink prior to a new repad job and liquid metal.
Glad I didn't jump straight in with the LM, I am getting massive temperature influxes, GPU's going almost straight to 90 - tells me there is no thermal contact...
Would you mind having a look and see if you can see something I'm missing?
Yes I know the thermal pads are a mess and the paste is 100x more than needed, it's not finished - just a test right now - the thermal pads will be changed along with a new LM application once im happy.
-
Take one of the cards out and mount it to the heatsink. Using a flashlight check the contact between die and copper. This way you can see what pads are causing bad contact and which are fine.
bennyg, cope123abc and Papusan like this. -
If pads haven’t perfect thickness the heatsink won’t get good contact with the Cpu/Gpu die. And one fits all isn’t always possible.
-
damn i was just following the pad guide brother fox did a while back, wonder if it needs to be custom for this heatsink then...
Also, i wonder if the Bitspower IHS is too high profile vs stock ? could this be the case? -
A pad guide is good to have but don’t expect each and every heatsink is 100% equal with no variances. Just look at the TRIPOD mess in different AW threads.jc_denton likes this.
-
Do you think the Bitspower 6th gen i have on my 7700k could be the issue?Papusan likes this.
-
I'm fairly certain that the Bitspower IHS is indeed taller than the stock intel IHS. This could make the heatsink end up skewed when mounted, solution could be to use a 0.3mm/0.5mm copper shims on the GPU's to even out the contact. Or revert to the stock intel ihs.
Last edited: Aug 3, 2019Papusan likes this. -
I’m out walking with my phone on Canary Please find my lapping guide. Bitspower copper lid needs lapping. And the old 6700K Bitspower lid is taller (1mm) and I prefer it over the thinner Bitspower lid for 7700K. Lapping make a big difference! If not the 6700K lid is ok and can be used for both 6th and 7th gen.
See also if you find @Mr. Fox lapping guide.Last edited: Aug 3, 2019cope123abc likes this. -
Decided to order k50 Pro thermal paste for the pad replacement, so I don't have to worry about pad thickness.
And will order a stock IHS, thanks for your advice too, appreciate it. -
I think this is the lapping guide bro @Papusan mentioned.
cope123abc and Papusan like this. -
Thanks, bruh. Yes. As well maybe bro @Mr. Fox can post his experience.cope123abc likes this.
-
Thanks both.
I'm not sure what thermal loss there would be having a shim on the gpus
Now the GPU's and the CPUs share the same hestsink, the Bitspower IHS will be too proud vs the GPU's, I'm not sure on the difference in height vs the stock 7700k as I only ever got the Bitspower IHS with the laptop.
Do you think I can lap the Bitspower down to IHS profile again? -
Cheers brother, can confirm mine is 100% the 6th gen one they phased out for some reason.
So I need to lap 1mm from the HS then.
Do we know the original profile on thr Bitspower so I can keep an eye on it, it has been lapped numerous times now. -
Haven’t the proper posts in my hands now. But either you or @jc_denton will find it in the Clevo OC thread. Several posts about different lid’s thickness. But I would see if I can still lap the Bitspower 6700K lid for perfection. The best choice for 6/7th gen processors. On my phone so it’s difficult find/search threads.
Bro @Mr. Fox can help as well. Not easy with small phone on vacation
-
-
This is for the newer chips(taller die). You find everything in Clevo OC thread I think for older chips.jc_denton likes this.
-
-
Yes it looks like that Maybe there is numbers for the stock 6700K lid someplace also. But can’t remember. But add in lid/IHS in your post. Easier for searching.
Last edited: Aug 4, 2019jc_denton likes this.
-
Cheers bro that's perfect.
I have just bought a measuring gauge, I will knock the Bitspower IHS down to 3.4mm which is the same as the default 7700k according to that thread .
I'm assuming the 1mm and the thermal pads misalignment is to blame for this terrible behaviour
Thanks both of you, greatly appreciated -
Try let it be a bit thicker. Always nice have some headroom.jc_denton likes this.
-
I would suggest the same, test it a few times whilst sanding it down, checking if the temperature improves. That way you won't go too far in either direction.
Papusan likes this. -
-
Every 0.5mm of misalignment is worth about 12C.
jc_denton, cope123abc and Papusan like this. -
I would start higher. Start from 4.0 and take it from there. Bitspower 6700K lid is more difficult to find nowadays.cope123abc likes this.
-
It's hard to put a number on it, as I don't know how off the contact between the GPU's and the CPU is. From looking at the specs, the Bitpower should be ~4.3mm vs ~3.5mm stock intel ihs. I'd probably test temperatures every 0.2mm or so. The extra height is beneficial for contact pressure, so I would try and keep as much of it as possible.
cope123abc and Papusan like this. -
Blimey that's a massive figure
-
Maybe I should try and source a stock IHS, don't want to wreck the Bitspower, seem impossible to source though
-
If you find one (6700K) then yes. Be careful with that Bitspower lid.
-
I will take it to 4 and see where we go from there.
It's impossible to benchmark against as I don't know the cooling before on the water cooled unit, before this the gpu and cpu were seperate heatsinks so it wasn't an issue being different heights.
The thermal pads are sorted K5 pro will deal with those.
I will go down to 4mm on the Bitspower and check temps.
In my head this specific hestsink was engineerd with a stock IHS matching a stock GPU, I have added almost 1mm alone onto the cpu side, so potentially that's 24 degree misalignment going by thr calculations above. -
It's a project for sure, but I bet the end result temps will be worth all the hard work.
Papusan likes this. -
I hope so, starting to get frustrated with it
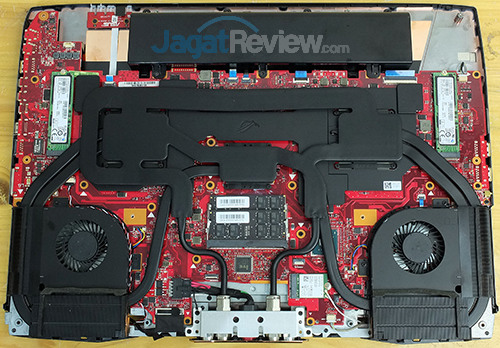
P870KM1-G - CPU Heatsink -WaterBlock?
Discussion in 'Sager and Clevo' started by cope123abc, Jun 18, 2019.